
Lawn
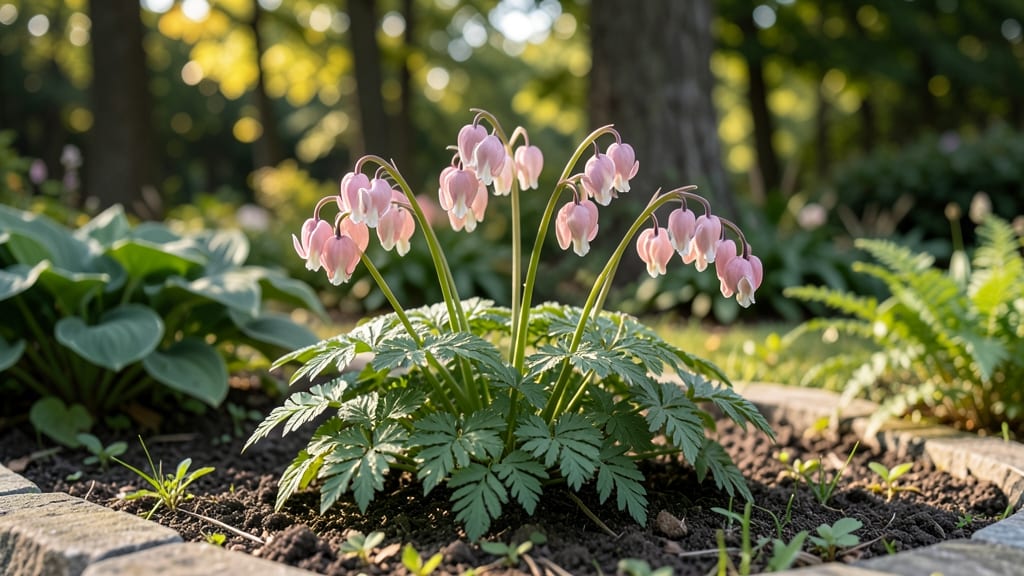
Harvesting bleeding heart seed pods before they twist into useless knots is the secret to growing new plants next spring. 🌿 I’ve spent years watching those iconic heart-shaped pods shrivel into brittle husks—until I learned the right timing and technique to save viable seeds for propagation.
The key is patience: wait until the pods turn paper-thin and tan, then gently twist them open to reveal the seeds inside. A single pod yields dozens of tiny, winged seeds that need stratification—a cold period—to break dormancy before planting.
Without this step, germination rates drop to nearly zero. Once you’ve collected and dried the seeds, store them in an envelope with silica gel or a moisture absorber. By spring, you’ll have healthy seedlings that mirror their parents’ delicate, arching foliage—without the $5 price tag of nursery starts.
This method works for both Lamprocapnos spectabilis and Dicentra varieties, and the seeds stay viable for 2-3 years if stored properly. Here’s how to do it right the first time.
📚 In This Guide
- What you need
- Instructions
- Tips and common mistakes
- Wrapping up and next steps
What you need
- ● Bleeding heart seed pods: Mature, dried pods (typically brown and papery) from Dicentra spectabilis plants.
- ● Pruning shears or sharp scissors: 1 pair (sterilized with rubbing alcohol for hygiene).
- ● Paper bags or breathable seed envelopes: 5–10 (kraft paper or unbleached cotton, labeled with plant name and date).
- ● Plastic or glass containers: 1–2 (airtight, for long-term seed storage—e.g., mason jars or resealable bags).
- ○ Desiccant packets: 1–2 (optional but recommended for humidity control in storage).
- ● Permanent marker: 1 (for labeling).
- ○ Gloves (optional): 1 pair (nitrile or latex-free for sensitivity).
- ● Seed drying rack: 1 (for even airflow if pods need extra drying time).
- ● Fine-mesh sieve: 1 (to separate seeds from chaff post-harvest).
- ● Humidity gauge: 1 (to monitor storage conditions, ideal: 30–40% humidity).
- ● Notebook or app: 1 (to track seed viability, germination dates, and plant traits).
Step-by-Step instructions for harvesting bleeding heart seed pods
Here's how to collect viable seeds without damaging the delicate stems—my foolproof method for next year's plants.
🌿 Step 1: Identify and Wait for Mature Seed Pods
Bleeding heart seed pods mature in late summer to early fall, turning from green to a papery brown when ready. Look for pods that split open naturally along one side—this signals seeds are fully developed. I wait until about 70% of pods on a stem show this splitting, as pods ripen unevenly.
Gently squeeze a mature pod between your fingers. If seeds rattle inside but the pod doesn't crumble, it's ready. Harvesting too early means immature seeds that won't germinate. Avoid pods that remain green or turn mushy—these won't produce viable seeds. I collect pods on dry mornings to prevent mold from evening dew.
✂️ Step 2: Harvest Without Twisting the Stem
The key to preserving the plant's health is cutting—not twisting. Use clean, sharp pruners to snip the stem 1-2 inches below the seed pod cluster. Twisting causes stem damage and can kill the plant, while clean cuts allow energy to focus on remaining growth.
Place harvested pods in a paper bag immediately. The breathable material lets moisture escape while keeping seeds contained. Label each bag with the variety and harvest date—bleeding heart seeds lose viability after 1-2 years, so fresh collections have the best germination rates.
🪴 Step 3: Dry and Store Seeds Properly
Spread pods on a wire rack in a dry, shaded area for 2-3 weeks until completely dry and brittle. I place the rack over a towel to catch any seeds that might fall. Avoid direct sunlight—it can overheat pods and reduce seed quality. You'll know they're ready when a pod cracks open with minimal pressure.
Once dry, gently crush each pod between your fingers over a clean sheet of paper. Healthy seeds will be plump and dark, while empty pods produce only dust. Store viable seeds in an airtight container with a desiccant packet in a cool, dark place. I keep mine in the fridge for maximum freshness—seeds remain viable for up to 2 years when stored this way.
💧 Step 4: Stratify Seeds for Best Germination
Bleeding heart seeds require cold stratification to break dormancy. Mix seeds with slightly damp sand in a sealed container, then refrigerate for 6-8 weeks. Check monthly to ensure the mix stays moist but not soggy—excess water causes rot.
After stratification, sow seeds ¼ inch deep in well-draining soil. Keep the soil consistently moist and place containers in bright, indirect light. Germination typically occurs in 4-6 weeks, though some seeds may take up to 3 months. Thin seedlings to 6 inches apart once they develop their first true leaves.
🌱 Step 5: Transplant Seedlings Carefully
Wait until seedlings show 3-4 true leaves and have developed a sturdy root system before transplanting. Harden off seedlings by placing them outdoors in partial shade for 1-2 hours daily over 10 days, gradually increasing exposure.
Choose a location with partial to full shade and rich, moist soil. Dig holes slightly larger than the root ball and space plants 12-18 inches apart. Water deeply after transplanting to help roots establish. Mulch around the base to retain moisture and suppress weeds—bleeding hearts thrive in consistently damp conditions.
Tips & tricks for perfect bleeding heart seed collection
These insider tricks will help you maximize your seed yield while keeping your plants thriving for next season.
Maturity Matters: In Step 1, when checking for mature pods, look for that distinctive papery brown color and the natural split along one side. I've learned the hard way that pods with seeds rattling inside but not crumbling are the gold standard—harvesting too early gives you seeds that won't germinate. Confession: I skipped this step for years and wondered why my germination rates were so low.
Harvest Technique: Step 2's cutting method is critical—never twist! I use clean pruners to make precise cuts 1-2 inches below the pod cluster. This might seem like overkill, but I've seen plants completely stressed by twisting. The clean cut actually helps the plant redirect energy to remaining growth, giving you healthier stems for next year's blooms.
Drying Strategy: For Step 3's drying process, I recommend using a mesh screen over a towel rather than just a rack. This creates better airflow while catching any seeds that might fall. The 2-3 weeks drying time is non-negotiable—rushing this step reduces seed viability. I test readiness by gently squeezing a pod; if it cracks easily, your seeds are ready.
Stratification Insight: During Step 4's cold stratification, I've found that using a mix of 3 parts sand to 1 part seeds gives the best moisture balance. The 6-8 weeks in the fridge mimics winter conditions perfectly. I check monthly by squeezing the mix—it should feel like a damp sponge, not dripping water. This attention to detail makes all the difference in germination rates.
Pro Tips for Bleeding Heart Seed Pods
- These insider tricks will help you maximize your seed yield while keeping your plants thriving for next season.
- Maturity Matters: In Step 1, when checking for mature pods, look for that distinctive papery brown color and the natu...
- Harvest Technique: Step 2's cutting method is critical—never twist! I use clean pruners to make precise cuts 1-2 inch...
Frequently asked questions
Got questions about bleeding heart seed pods?
You’re not alone! Whether you’re a first-time gardener or a seasoned pro, harvesting these delicate pods can feel tricky. Here are the most common questions—and straightforward answers—to help you master the process.
Why are my bleeding heart seed pods twisting or drying out before I can harvest?
Bleeding heart plants (Dicentra spectabilis) often twist their pods as a natural mechanism to release seeds when fully mature. If pods dry out too soon, it’s usually due to heat, low humidity, or overripe foliage. Harvest pods when they’re light brown and papery (not green or cracked) to avoid seed loss. If pods twist prematurely, try shading the plant or harvesting earlier.
When is the best time to harvest bleeding heart seed pods for next year’s garden?
The ideal harvest window is late summer to early fall (August–September), when pods turn tan/brown and split open slightly. Wait until after the first frost if possible—the cold helps soften the pods for easier seed extraction. Pro tip: Harvest on a dry, sunny morning to prevent mold.
Can I save seeds from store-bought bleeding heart plants?
Yes, but with a caveat: Many nursery plants are hybrids (e.g., ‘Alba’ or ‘Valentine’) and may not produce true-to-type seeds. For reliable results, grow from seeds only if the parent plant’s variety is open-pollinated. If unsure, ask the seller or opt for seed-saved heirloom varieties like ‘King of Hearts.’
What’s the easiest way to extract seeds from twisted pods without damaging them?
Twisted pods can be stubborn! Here’s a foolproof method:
- Gently twist the pod to pop open the seam (use fingers or tweezers).
- Tap the pod over a white bowl or paper to release seeds—don’t shake violently (seeds are tiny!).
- Use a fine brush or toothpick to coax out stubborn seeds from crevices.
- Store seeds in a cool, dry place (like an envelope) until spring.
What should I do if my bleeding heart plant doesn’t produce seed pods at all?
No pods? Don’t panic—it’s often due to:
- Age: Bleeding hearts are perennial but may skip seed production in their first 2–3 years.
- Lack of pollinators: These plants rely on bees and butterflies. Plant nearby nectar sources (like lavender or catmint) to attract helpers.
- Over-fertilizing: Too much nitrogen = leafy growth, no flowers. Use a balanced fertilizer (10-10-10) or compost instead.
- Deadheading too late: If you remove all spent blooms in early summer, the plant may not set pods.
Wrapping up and next steps
Mastering the art of harvesting bleeding heart seed pods ensures your garden stays vibrant for seasons to come! With the right tools and techniques, you can easily collect viable seeds—no more worrying about fragile pods or wasted effort. 🌱
Ready to put your new skills to work? Start by monitoring your plants this fall—when those pods turn brown and crisp, you’ll know it’s time to act! Share your success (or blooper moments) with fellow gardeners for extra tips and encouragement.
Happy harvesting—your future garden will thank you! 🌸