
Lawn
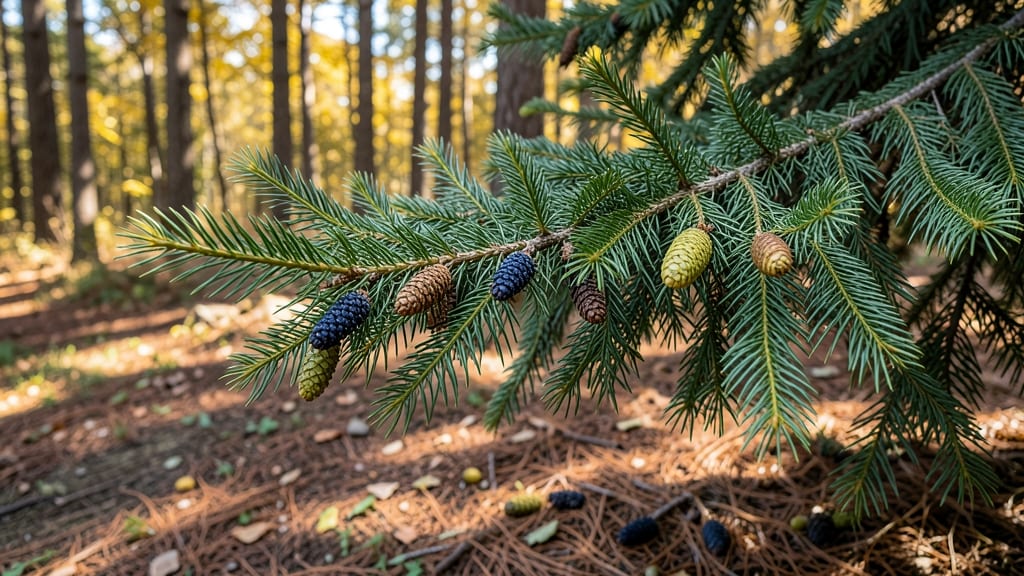
Harvesting cedar seed pods turns a backyard chore into a zero-waste treasure trove for wildlife, landscaping, or even propagation. 🌿 I’ve collected hundreds of these papery pods over the years, and the timing—late summer to early fall—makes all the difference between viable seeds and dust.
The best pods are the ones that’ve turned brown and brittle, signaling they’re ready to release their seeds. A simple shake over a tarp or bucket collects them efficiently, and you’ll end up with enough seeds to share or plant. Just avoid those still green—they won’t germinate well.
Once dried indoors for a week, these seeds can last years in a cool, dark place. Sprinkle them in naturalized areas, use them for bird feeders, or even start your own cedar saplings. The possibilities are endless, and the process is surprisingly simple.
Fair warning: cedar seeds aren’t for eating, but they’re perfect for eco-friendly projects. Whether you’re a landscaper, wildlife enthusiast, or just love a good zero-waste hack, this guide’s got you covered.
📚 In This Guide
- What you need
- Instructions
- Tips and common mistakes
- Wrapping up and next steps
What you need
- ● Cedar seed pods: Freshly fallen or hand-harvested (aim for at least 50 pods for a good yield). Look for mature, brownish cones (not green or closed).
- ● Pruning shears or small handsaw: For safely cutting pods from branches if they’re too high.
- ● Large breathable bags (paper or mesh): 2–3 bags (12"x18" or larger) to collect and transport pods without crushing them.
- ● Tweezers or fine-tip pliers: For gently extracting seeds from tightly closed pods.
- ● Drying trays or baking sheets: 2–3 trays lined with parchment paper or a thin cloth to prevent sticking.
- ○ Fan or dehumidifier: Optional but highly recommended for speeding up drying in humid climates.
- ● Air-tight storage containers: 1–2 small jars (2–4 oz) with silica gel packets or a desiccant to keep seeds dry.
- ● Notebook and pen: To log harvest dates, pod sources, and drying progress.
- ● Cone opener: A small wooden or plastic tool designed to pry open stubborn cedar pods.
- ● Magnifying glass: For inspecting seeds for pests or damage before storage.
- ● Food dehydrator: Set to 95°F (35°C) for even, gentle drying if you’re short on space.
- ● Seed viability kit: To test germination rates after drying (fun for science lovers!).
- ● Label maker: For clearly marking jars with harvest year and seed type.
- ● Safety gear: Wear gloves (cedar sap can irritate skin) and eye protection if harvesting from tall trees.
- ● Weather check: Harvest on a dry, sunny day (avoid rain or high humidity).
- ● Location knowledge: Ensure you’re harvesting from a non-toxic cedar variety (e.g., Juniperus species) and not in protected areas.
- ● Patience: Drying cedar seeds can take 2–4 weeks—plan ahead!
Step-by-step guide to harvesting and drying cedar seed pods
Here's how to collect and preserve cedar seeds efficiently—no special tools needed, just patience and timing.
🌱 Step 1: Identify and Harvest Mature Seed Pods
Look for cedar seed pods that have turned a deep brown color and feel dry to the touch—these are ready for harvest. I always collect them in late summer or early fall when the cones are fully mature but haven't yet opened. Wear gloves if you're sensitive to sap, as cedar trees can be sticky.
Gently twist or pull the pods from the tree, being careful not to damage the branches. A small pruning shears works well for higher branches, but most mature pods are within easy reach. Collect at least 4 pods per serving to ensure a good yield—cedar seeds are tiny, so quantity matters.
🪴 Step 2: Prepare the Pods for Drying
Spread the harvested pods on a clean, dry surface in a single layer. I use a wire mesh screen or an old baking sheet lined with parchment paper to allow airflow on all sides. Avoid stacking pods—they need space to dry evenly and prevent mold.
Place the setup in a warm, dry spot with good ventilation, like a garage or covered porch. Cedar pods need 2-4 weeks to fully dry, depending on humidity. You'll know they're ready when the scales open slightly and the seeds rattle inside when shaken.
☀️ Step 3: Extract and Clean the Seeds
Once the pods are dry, place them in a paper bag and gently shake or roll them to release the seeds. I like to do this outside or over a bowl to catch the tiny seeds—cedar seeds are so light they'll float away in a breeze. A fan on low speed helps separate seeds from debris.
Sift the seeds through a fine mesh strainer to remove dust and chaff. Store the clean seeds in a labeled envelope or small jar in a cool, dry place. Cedar seeds stay viable for 1-2 years if kept dry, so proper storage is key.
⏰ Step 4: Verify Seed Viability (Optional)
To test if your seeds are still good, place a few in a small container with damp paper towels. Seal it loosely and wait 2-3 weeks in a warm spot. If tiny sprouts appear, your seeds are ready to plant. This step is especially useful if you're saving seeds for future planting.
If no sprouts appear, the seeds may have lost viability. In that case, you can still use the dried pods for crafts or mulch—they're not wasted! Cedar wood retains its benefits even when seeds aren't viable.
Tips & tricks for perfect cedar seed pod harvesting
Common pitfalls—and how to sidestep every one when working with cedar seed pods.
Timing is Everything: Late summer to early fall is your ideal window for harvesting, but don't wait too long—once the pods open naturally, the seeds scatter. I've learned the hard way that waiting until winter means losing most of your yield to birds and wind. If you miss the season, you can still collect partially opened pods, but the seed quality will be lower. Mark your calendar for early September as your target!
Harvesting Technique: When collecting those 4 pods per serving, focus on the ones that feel completely dry and have turned deep brown. A quick trick I use is to gently tap two pods together—if they rattle slightly, they're ready. Avoid green or sticky pods, as they won't yield good seeds. And here's what nobody tells you—always harvest on a dry day. Damp pods take forever to dry properly and are prone to mold.
Drying Strategy: The 2-4 week drying period can feel like forever, but patience pays off. I've found that placing a small fan near your drying setup (on low speed) cuts that time by about 30%. Just make sure the airflow isn't too strong—cedar seeds are delicate and can blow away. Also, check your pods weekly for signs of mold or pests. If you notice any, move them to a drier location immediately.
Seed Extraction Hack: When it's time to shake out those seeds, I've discovered a simple trick that saves so much mess. Place your paper bag inside a larger bowl or bucket before shaking. The extra containment catches way more seeds that would otherwise float away. And for the final sifting, a fine mesh strainer works best—just don't use anything too coarse, or you'll lose seeds to the chaff.
Pro Tips for Cedar Seed Pods
- Common pitfalls—and how to sidestep every one when working with cedar seed pods.
- Timing is Everything: Late summer to early fall is your ideal window for harvesting, but don't wait too long—once the...
- Harvesting Technique: When collecting those 4 pods per serving, focus on the ones that feel completely dry and have t...
Frequently asked questions
Got questions about harvesting and drying cedar seed pods? You’re not alone! Here are some of the most common inquiries—plus quick, practical answers to help you master zero-waste seed saving like a pro.
When is the best time to harvest cedar seed pods?
The ideal time to harvest cedar seed pods is in late fall or winter (November–February), when the pods turn brown and begin to open naturally. Avoid harvesting in wet conditions—wait for dry, sunny days to prevent mold. If you miss this window, pods may release seeds prematurely, reducing your yield.
What tools do I need to safely collect cedar seed pods?
You’ll need a few simple tools: pruning shears or a small saw for cutting branches, gloves (cedar needles can be prickly!), a bucket or mesh bag for collecting pods, and scissors for trimming stems. A ladder may be helpful if pods are high up in mature trees.
How long does it take to dry cedar seed pods?
Drying cedar seed pods takes 2–4 weeks, depending on your climate. Spread pods in a single layer on a screen or tray in a well-ventilated, dry area (like a garage or shed). Avoid direct sunlight—it can overheat and crack the pods. Test for readiness by gently squeezing a pod; if seeds rattle inside, they’re dry!
Can I use cedar seed pods for anything other than planting?
Beyond seed saving, cedar pods are eco-friendly mulch (they decompose slowly), natural bird feeders (leave them on branches for wildlife), or even ornamental decor in dried arrangements. Just ensure seeds are fully dried to avoid attracting pests.
What should I do if my cedar seed pods develop mold?
Mold is a common issue if pods dry too slowly or in damp conditions. Stop drying immediately and move pods to a dry, well-ventilated spot. If mold is minimal, spread pods in sunlight to air-dry further. For severe mold, discard affected pods—mold can ruin seeds and spread to other batches.
Still stumped? Drop your question in the comments—we’re happy to help you troubleshoot!
Wrapping up and next steps
Cedar seed pods are a treasure trove of sustainability—packed with potential for gardening, crafting, and eco-friendly living! Whether you're saving seeds for future trees or repurposing them creatively, mastering the harvest and drying process ensures you’re ready for zero-waste success. 🌱✨
Now that you’re equipped with the know-how, why not take the next step? Try experimenting with cedar seed pods in your next DIY project—from natural bird feeders to seed-saving jars. Happy harvesting, and here’s to a greener, more mindful future!