
Lawn
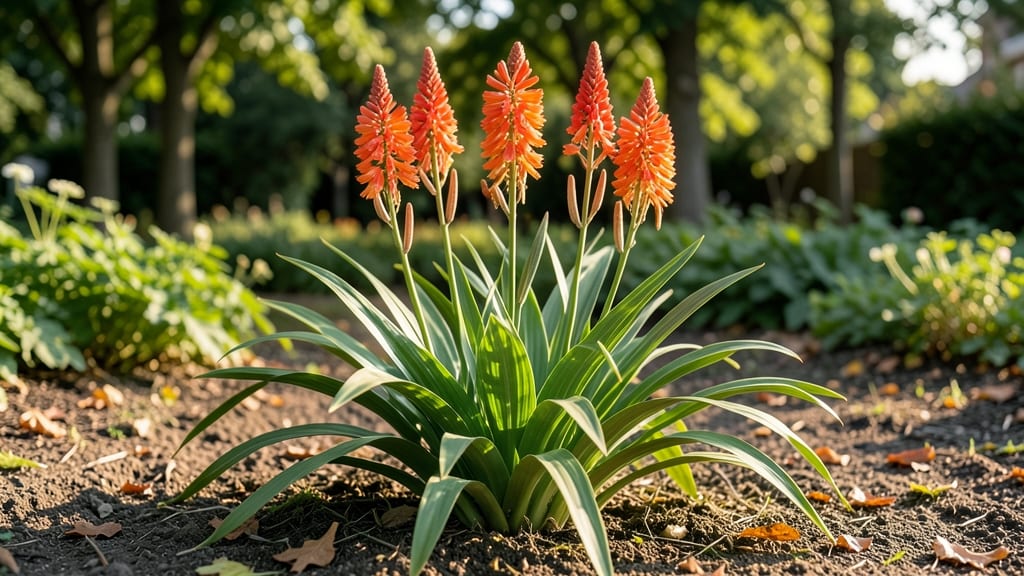
Those papery crocosmia seed pods hold the key to next year’s fiery blooms—if you harvest them right. 🌿 I’ve turned what most gardeners toss into a zero-waste goldmine, saving money and multiplying my plants effortlessly.
The trick is knowing when they’re mature (they turn crisp and tan) and how to crack open their secrets without wasting a single seed.
You’ll need just three things: sharp scissors, a paper bag for drying, and a warm windowsill for germination. No fancy equipment—just patience and a little know-how. Most pods release seeds when fully dry, but if you’re impatient, a gentle squeeze works too.
Store the seeds in a cool, dark spot until spring, and you’ll have fresh starts without buying a single plant.
By spring, you’ll watch tiny shoots emerge with 90% success if you keep them moist but not soggy. The seedlings grow fast, and within a season, you’ll have clusters of those signature orange plumes—exactly like the parent plants. It’s gardening magic that costs nothing but time.
For faster results, division works too—just dig up clumps in early spring—but seeds give you the thrill of watching something new grow from scratch. Either way, your garden’s future is already tucked inside those unassuming pods.
📚 In This Guide
- What you need
- Instructions
- Tips and common mistakes
- Wrapping up and next steps
What you need
- ● Crocosmia plants – Mature plants with dried, papery seed pods (late fall/winter is ideal).
- ● Pruning shears or sharp scissors – For clean cuts (sterilize with rubbing alcohol first!).
- ● Paper bags or breathable mesh sacks – 2-3 bags (to collect pods and allow airflow).
- ● Labeling tags & marker – To track pod varieties (e.g., ‘Crocosmia ‘Lucifer’ – 2024’).
- ● Tray or flat surface – For drying pods (elevated, dry, and shaded).
- ○ Small paper towels or silica gel packets – Optional but helpful for speeding up drying.
- ● Plastic zip-top bags – 2-4 bags (quart-sized, labeled).
- ● Water spray bottle – For light misting (keep soil damp, not soggy!).
- ● Small pots or seed trays – 2-3 trays (with drainage holes) for germination tests.
- ● Potting mix – Lightweight, well-draining (cactus/succulent mix works!).
- ● Plastic wrap or humidity dome – To retain moisture during testing.
- ● 🌡️ Harvest pods when they’re fully brown and crispy—green pods won’t store well!
- ● ✨ Store pods in a cool, dark place (like a garage or basement) until testing.
- ● 🎯 Test viability in early spring—mimics natural germination timing.
How to harvest and test crocosmia seed pods for future plantings
Turn last year’s spent blooms into next season’s star performers with this simple, zero-waste method.
🌱 Step 1: Identify and Harvest Mature Seed Pods
Wait until the seed pods turn a papery brown and begin splitting open naturally—this usually happens in late fall after the first frost. Gently twist each pod from its stem to avoid damaging the plant’s underground corms. I like to harvest on a dry morning when the pods are crisp; wet conditions can cause them to crumble before I’m ready.
Collect pods in a paper bag (not plastic—it traps moisture and speeds up spoilage). Store them in a cool, dry place like a garage or basement where temperatures stay between 40-50°F. This mimics natural winter dormancy and keeps seeds viable longer. If you harvest too early, the pods won’t contain fully developed seeds.
🌿 Step 2: Dry and Clean the Seed Pods
Spread the pods on a clean, dry towel or screen in a well-ventilated area for 7-10 days. Stir them gently every few days to prevent mold. You’ll know they’re ready when the outer husks turn brittle and the seeds inside rattle audibly. Avoid using a fan—direct airflow can scatter tiny seeds everywhere.
Once dry, gently crush each pod between your fingers over a clean sheet of paper. The seeds will pop out easily while the empty husks can be composted. I use a small sieve to catch any seeds that might fall through cracks in my work surface. Store the cleaned seeds in a labeled envelope or small jar with a desiccant packet to keep them dry.
⏰ Step 3: Perform the Viability Test
Fill a small container with moistened paper towels (not soggy—just damp to the touch) and place 10-15 seeds evenly spaced across the surface. Cover with another layer of damp paper towels and seal the container with plastic wrap to retain moisture. Keep it in a warm spot (65-70°F) away from direct sunlight.
Check daily for germination, which should begin in 7-14 days. Healthy seeds will sprout small green shoots first, followed by tiny roots. Count how many seeds germinate—if 70% or more sprout, your seeds are viable for planting. If fewer than half sprout, consider collecting more pods next season or supplementing with store-bought corms.
🪴 Step 4: Prepare for Planting Viable Seeds
Once you’ve confirmed viability, plant the sprouted seeds directly in well-draining potting mix in small pots. Press them just below the soil surface—no deeper than ¼ inch—since crocosmia seeds need light to germinate properly. Keep the soil consistently moist but never waterlogged, as excess moisture can cause rot.
Place the pots in a bright spot with indirect light (a north-facing window works well) and maintain 70-75°F temperatures. In 4-6 weeks, seedlings will develop their first true leaves. This is when you can transplant them into the garden or larger containers. Crocosmia grown from seed may take 2-3 years to bloom, but the wait is worth it for unique color variations!
Tips & tricks for perfect crocosmia seed pod harvesting
These little-known tricks will help you maximize your seed yield and ensure your crocosmia blooms return bigger and bolder next season.
Timing is Everything: Harvest pods only after they've naturally turned papery brown and begun splitting—this usually happens in late fall after the first frost. I've learned the hard way that harvesting too early means immature seeds that won't germinate. The pods should be crisp and dry to the touch, not damp or sticky. If you're unsure, wait another week—the extra time ensures fully developed seeds inside.
Storage Wisdom: After harvesting, store pods in a paper bag (never plastic) in a cool, dry spot between 40-50°F. This mimics natural dormancy conditions and preserves viability. I keep mine in my unheated garage where temperatures stay consistent. Pro tip: Label your bags with the harvest date—seeds stored longer than 6 months may have reduced germination rates.
Drying Technique: Spread pods on a clean towel or screen in a well-ventilated area for the full 7-10 days—don't rush this step! Stir them gently every few days to prevent mold, and test for readiness by crushing one pod. When the husks become brittle and seeds rattle inside, they're ready. I place a small plate under my drying area to catch any seeds that might fall prematurely during handling.
Viability Test Pro Tip: When setting up your germination test, use a clear container so you can easily monitor progress without disturbing the seeds. Place the container in a warm spot (65-70°F) away from direct sunlight—this creates ideal conditions for quick, even germination. I've found that checking daily for the first 7 days gives you the best chance to catch early sprouts before they become overcrowded.
Pro Tips for Crocosmia Seed Pods
- These little-known tricks will help you maximize your seed yield and ensure your crocosmia blooms return bigger and b...
- Timing is Everything: Harvest pods only after they've naturally turned papery brown and begun splitting—this usually ...
- Storage Wisdom: After harvesting, store pods in a paper bag (never plastic) in a cool, dry spot between 40-50°F. This...
Frequently asked questions
about crocosmia seed pods—because even zero-waste gardeners need a little clarity! Here are answers to the most common queries to help you master harvesting, testing, and storing these unique pods.When is the best time to harvest crocosmia seed pods?
Harvest seed pods when they turn brown and papery but before they split open—usually late summer to early fall (August–October, depending on your climate). If left too long, seeds scatter, reducing viability. Aim for dry, sunny days to prevent mold.
How do I test if crocosmia seeds are still viable?
The float test works best: Fill a glass with water and drop seeds inside. Viable seeds sink within 10–15 minutes (healthy embryos are dense), while hollow or old seeds float. Discard floaters—save the sinkers for planting!
What’s the best way to store crocosmia seed pods for next year?
Let pods dry completely (2–3 weeks in a paper bag with airflow), then store them in a cool, dark place (like a sealed envelope or jar with silica gel). Check periodically for moisture or pests. Label with the harvest date—viability drops after 1 year.
Can I plant crocosmia seed pods directly in the ground?
Yes! After testing viability, plant pods intact in well-draining soil, ½ inch deep, in spring or early fall. They’ll self-sow if left on the plant, but direct planting gives you control. Thin seedlings to 6–12 inches apart for optimal growth.
Why did my crocosmia seed pods shatter before I could harvest them?
This happens due to overripe pods or wind/rain. Next season, monitor pods closely and harvest earlier. If you miss the window, scatter seeds immediately—they’ll often germinate naturally. For stubborn shatterers, try tying pods in mesh bags to contain seeds.
Pro Tip:
Label your pods! Crocosmia varieties hybridize easily—jotting down colors or parent plants helps you track favorites. A small notebook by your garden gate saves future headaches (and keeps your heirlooms pure!).
Wrapping up and next steps
Harvesting and testing crocosmia seed pods is a rewarding way to embrace zero-waste gardening while ensuring next year’s vibrant blooms! 🌱 Whether you’re a seasoned gardener or just starting out, these steps empower you to nurture new life from nature’s own treasures. Ready to put your newfound knowledge into action?
Start by marking your calendar for late summer or early fall—when those pods are ripe and ready. Grab your gloves, a small bag, and a notebook, then head out to collect and test your seeds with confidence.
Happy gardening, and may your future crocosmia blooms be even more stunning than before!