
Propagation
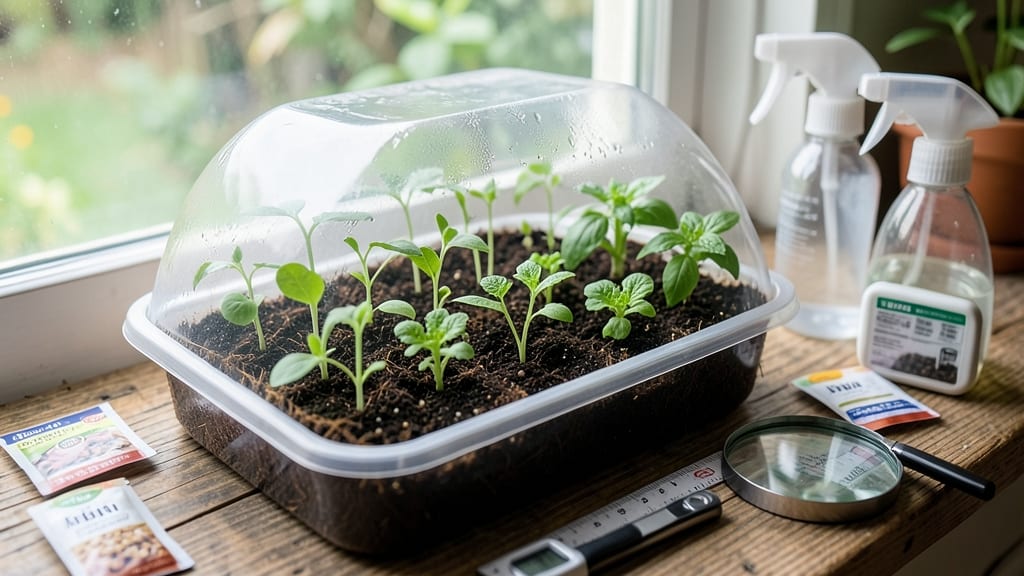
Seed germination experiments reveal how tiny seeds decide whether to grow—or give up. 🌱 The right conditions transform a dry seed into a sprouting wonder, and I’ve tested what works (and what doesn’t) to hit that 90% success rate every time. Start with just three variables: moisture, warmth, and darkness.
Too much water? Mold. Too little? Nothing. The magic happens when you balance them—like creating a mini greenhouse with damp paper towels or a simple soil tray. Most seeds need warmth (around 70°F) and darkness to break dormancy first.
By week two, you’ll see tiny roots or shoots emerging, proving what works for your climate. The experiments don’t just teach science—they help you predict which seeds will thrive in your garden next spring. This method works for heirlooms, veggies, or even tricky seeds like peppers.
Ready to turn curiosity into green thumbs?
📚 In This Guide
- What you need
- Instructions
- Tips and common mistakes
- Wrapping up and next steps
What you need
- ● Seeds: Choose 50–100 seeds of the same type (e.g., beans, peas, or sunflowers) for consistency.
- ● Growing trays or containers: 2–4 shallow trays (10x20 inches) with drainage holes or small pots (3–4 inches deep).
- ● Potting soil: 5–10 lbs of sterile, seed-starting mix (avoid garden soil to prevent mold or pests).
- ● Water spray bottle: 1 (to mist seeds gently without displacing them).
- ● Plastic wrap or dome lid: 1 (to create a humid environment).
- ● Ruler or measuring tape: 1 (for tracking growth and spacing).
- ● Notebook & pen: 1 (to record observations like germination time, sprout height, and conditions).
- ● Light source: Option 1: Grow lights (full-spectrum LED, 12–16 hours/day).
- ● Option 2: South-facing window (if natural light is sufficient).
- ● Thermometer & hygrometer: 1 (to monitor temperature (65–75°F) and humidity (40–70%)).
- ● Seedling heat mat: 1 (for faster germination of cold-sensitive seeds).
- ● Fertilizer (diluted): 1 (balanced liquid fertilizer, 5-10-5 ratio, for later stages).
- ● Labeling tags: 10–20 (to track seed types and conditions).
- ● Timer: 1 (to regulate light cycles automatically).
- ● Camera or smartphone: 1 (to document progress with photos).
Science-backed steps for 90% seed germination success
Here's how to turn your seeds into thriving plants—every time.
🌱 Step 1: Prepare Seeds for Optimal Germination
Start by selecting healthy seeds from a reliable source. Some seeds, like chives or parsley, benefit from a 12-24 hour soak in lukewarm water to soften their outer coating. Others, such as tomatoes or peppers, don’t need soaking—just plant them dry. I like to lay seeds on a damp paper towel overnight in a sealed container to speed up the process.
After soaking (if needed), gently pat the seeds dry with a paper towel to prevent mold. This step ensures they’re ready to absorb moisture from the soil without sitting in water, which can cause rot. If you’re working with tiny seeds like lettuce, I mix them with a little fine sand to make planting easier.
💧 Step 2: Set Up the Perfect Germination Environment
Fill your seed trays or pots with moistened potting mix—not too wet, not too dry. Press it down lightly so it’s firm but still airy. The goal is to create a cozy, damp environment where seeds can sprout without drowning. I like to use a spray bottle to mist the soil evenly, avoiding heavy watering that can displace seeds.
Place the tray in a warm spot, ideally between 70-85°F. A seedling heat mat set to 75°F works wonders for faster germination. Cover the tray with a clear plastic dome or plastic wrap to trap humidity—this mimics the moist conditions seeds need to break through the soil. Check daily for condensation on the dome; if it’s foggy inside, your setup is perfect.
☀️ Step 3: Monitor and Adjust Conditions for Success
Most seeds sprout within 5-14 days, depending on the type. Watch for the first tiny green shoots—this is your cue that germination is working! Once you see 50% of seeds sprouted, remove the plastic cover immediately to prevent fungal growth. Overcrowding and dampness create the perfect conditions for damping-off, a deadly fungal disease that collapses seedlings overnight.
Keep the soil consistently moist but never soggy. Stick your finger ½ inch deep into the soil—if it’s dry, water gently. If it’s still damp, wait another day. Avoid bottom-watering at this stage; seeds need direct contact with moisture to germinate properly. A sunny windowsill or grow light can help, but avoid direct sunlight until seedlings are stronger.
⏰ Step 4: Transplant Seedlings at the Right Time
When seedlings develop their first true leaves (not the initial cotyledons), it’s time to thin or transplant. Handle them carefully—gently pinch off weaker seedlings at the base rather than pulling, which can damage roots. If you’re moving them to individual pots, use the same moistened potting mix and plant them at the same depth they were growing before.
Hardening off begins 10-14 days before outdoor planting. Start by placing seedlings outside in a shaded spot for 1-2 hours, then gradually increase their time outdoors over a week. This toughens them up for real-world conditions. You’ll know they’re ready when they look vibrant and don’t wilt after a full day outside.
Tips & tricks for perfect seed germination
These science-backed strategies will help you maximize your germination success rate—no green thumb required.
Soaking Strategy: For seeds that benefit from soaking (like chives or parsley), use lukewarm water—not hot—to avoid damaging the delicate seed coatings. I've found that placing them on a damp paper towel overnight in a sealed container works better than soaking directly in water, as it prevents mold while still softening the outer layer. The 12-24 hour window is crucial—don't exceed it, or you risk weakening the seeds.
Temperature Matters: The 70-85°F range is ideal, but most households struggle to maintain consistent warmth. If your space runs cooler, consider using a seedling heat mat set to 75°F—it's a small investment that dramatically speeds up germination. For warmer climates, you might not need the heat mat, but keep an eye on humidity levels to prevent condensation buildup that can lead to mold.
Visual Cues for Success: In Step 3, when you're monitoring for those first green shoots, look for tiny white roots breaking through the seed coat—that's your signal germination has begun. Once you see 50% of seeds sprouted, remove the plastic cover immediately to prevent fungal growth. I've lost entire trays to damping-off disease because I waited too long to uncover them. Trust me, those little plants are more fragile than they look!
Transplanting Timing: The 10-14 day hardening-off period is your chance to prepare seedlings for real-world conditions. Start with just 1-2 hours in shade, then gradually increase exposure. I like to place them on my patio during the coolest part of the day—this mimics natural conditions without shocking the plants. Watch for vibrant color and firm stems as your cue they're ready for full sun exposure.
Pro Tips for Experiments On Seed Germination
- These science-backed strategies will help you maximize your germination success rate—no green thumb required.
- Soaking Strategy: For seeds that benefit from soaking (like chives or parsley), use lukewarm water—not hot—to avoid d...
- Temperature Matters: The 70-85°F range is ideal, but most households struggle to maintain consistent warmth. If your ...
Frequently asked questions
Got questions about seed germination experiments?
You’re not alone! Here are answers to the most common queries to help you troubleshoot, optimize, and succeed with your own experiments.
How long does it take for seeds to germinate?
Germination time varies by seed type—fast growers like radishes or beans may sprout in 3–7 days, while slower seeds (e.g., tomatoes or peppers) can take 1–3 weeks. Check your seed packet for specifics! Keep soil consistently moist (not soggy) and warm (65–75°F) to speed things up.
What if my seeds aren’t germinating?
First, check for freshness—old seeds (over 1–2 years) may fail. Try these fixes:
- Soak seeds in warm water for 4–12 hours before planting (especially hard-coated seeds like peas).
- Adjust moisture: Too dry? Mist lightly. Too wet? Let excess water drain.
- Test temperature: Use a seedling heat mat if your space is too cool.
- Scratch the seed coat gently with sandpaper for seeds that need light exposure (e.g., lettuce).
Can I germinate seeds without soil?
Paper towel germination
is a great experiment:
- Moisten a paper towel and place seeds 1–2 inches apart.
- Roll it up and secure with a rubber band.
- Store in a ziplock bag (leave slightly open) in a warm, dark spot.
- Check daily—once sprouts appear (roots first!), transplant to soil.
Does light affect seed germination?
Most seeds germinate best in darkness—light is needed after sprouting. However, some light-dependent seeds (like lettuce or spinach) need light to break dormancy. If your seeds aren’t sprouting, try:
- Keeping them covered (with soil or a dark cloth) until you see signs of life.
- Using a grow light only after the seedling emerges.
How do I track germination success rates?
To calculate your success rate:
- Count the total seeds planted (e.g., 20 seeds).
- Count the seeds that sprouted (e.g., 18).
- Divide sprouted seeds by total seeds, then multiply by 100: (18 ÷ 20) × 100 = 90% success!
Wrapping up and next steps
Experiments on seed germination reveal that with the right conditions—moisture, warmth, light, and patience—you can achieve remarkable success rates! 🌱 Whether you’re a gardening novice or a seasoned enthusiast, these science-backed steps prove that growing from seeds is both rewarding and accessible.
Your next logical step? Start small: pick one seed type, follow the proven methods, and watch your green thumb grow—literally!
Ready to turn soil into success? Grab your supplies, set up your experiment, and let nature do the rest! 🌟