
Lawn
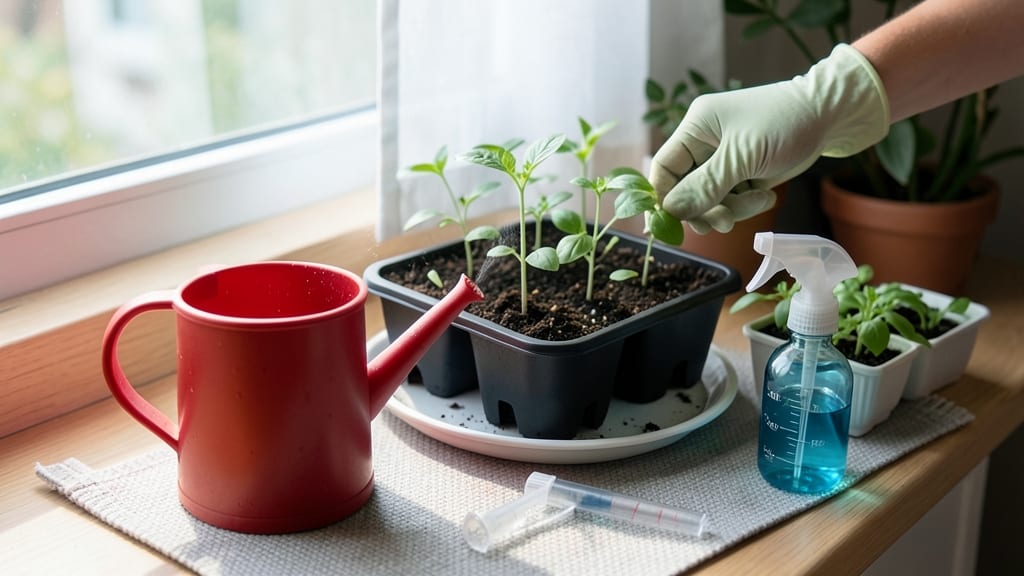
Watering seed trays isn’t about drenching soil—it’s about creating a consistently damp microclimate where seeds wake up without drowning. 🌱 I’ve lost entire seed batches to either soggy rot or parched failure, and the mist-and-cover method changed everything by keeping moisture even without overwatering.
Start with a spray bottle or fine-mist setting on your watering can—never a heavy stream. Bottom-watering works too, but only for trays with drainage holes. The goal is to moisten the top ¼ inch of soil, not turn it into a swamp.
Cover trays with plastic wrap or a humidity dome to lock in that moisture while allowing airflow.
You’ll know you’ve nailed it when the soil stays evenly damp—not wet, not dry—with no crust forming on the surface. Check daily: lift the cover to peek at the top layer.
If it’s dry, mist lightly; if it’s glistening, wait. This balance prevents damping-off and ensures seeds germinate at the same rate.
Common mistakes? Overwatering (moldy trays, seed rot) or underwatering (hardened soil, stunted sprouts). If you spot fuzzy mold, increase airflow immediately. Uneven germination? Your watering’s too inconsistent—stick to the mist-and-check routine. Master this, and your seed-starting success rate will skyrocket.
📚 In This Guide
- What you need
- Instructions
- Tips and common mistakes
- Wrapping up and next steps
What you need
- ● Seed trays – 1-5 trays (depending on your planting scale), with drainage holes (e.g., 10"x20" plastic or biodegradable trays).
- ● Potting mix – 1-2 bags (1-2 cubic feet) of seed-starting mix (lightweight, sterile, and well-draining). No garden soil!
- ● Seeds – Your chosen variety (check packet for spacing/depth guidelines).
- ● Misting bottle or spray nozzle – 1 (with a fine-mist setting to avoid displacing seeds).
- ● Clear plastic dome or humidity tent – 1 (to fit your tray size) or plastic wrap + rubber bands (DIY alternative).
- ● Tray stand or elevated surface – 1 (to allow airflow underneath and prevent rot).
- ● Water – Room-temperature, dechlorinated (let tap water sit 24 hours or use filtered/bottled).
- ● Heating mat – 1 (for cold climates; set to 65–75°F to speed germination).
- ● Grow lights – 1-2 LED bulbs (12+ hours/day if natural light is <6 hours).
- ● Thermometer/hygrometer – 1 (to monitor temp/humidity, ideal range: 70–75°F and 80–90% humidity).
- ● Label markers – 1 set (to track seed types/planting dates).
- ● Perforated tray liner – 1 (reusable, prevents mix from falling through drainage holes).
Step-by-Step guide to watering seed trays for perfect germination
Here's how I ensure every seed gets the right moisture without drowning delicate sprouts.
💧 Step 1: Prep Trays with Bottom Watering
Fill a shallow tray or saucer with about ½ inch of warm water—just enough to create a reservoir. Place your empty seed trays inside and let them soak from the bottom for 10-15 minutes. This saturates the mix evenly without disturbing seeds or creating surface crusts. You'll know it's ready when the top inch of soil feels uniformly damp but not sopping.
I always use room-temperature water because cold water can shock seeds and slow germination. If your mix is particularly dense, let it soak a few extra minutes—just don't let the trays sit in standing water longer than 20 minutes, or roots will suffocate. The goal is moisture balance, not a swamp.
🌱 Step 2: Mist Seeds with Fine Spray
Using a clean spray bottle with a fine mist nozzle, gently water the soil surface until it's evenly moist. Avoid pouring water directly onto seeds—this can dislodge them or create muddy pockets that prevent air circulation. Lightly mist until water just begins to bead on the surface, then stop. You're aiming for dampness, not a puddle.
Here's the thing—overhead watering after germination is a no-go. Once seeds sprout, you'll want to water from the bottom again to prevent fungal diseases. But right now, that fine mist ensures seeds stay hydrated without washing away.
🪴 Step 3: Cover for Humidity Control
Place a clear plastic dome or plastic wrap over the trays to trap humidity. This creates a mini greenhouse effect that keeps moisture consistent and speeds germination. I like to prop the cover slightly off the trays with toothpicks—just enough space to prevent condensation from sitting directly on seeds. Check daily for fogging; if the inside fogs up, you've got perfect humidity.
Don't skip this step. Without the cover, soil moisture evaporates unevenly, leaving some seeds parched while others drown. You'll see condensation form on the underside of the cover within 24 hours—that's your sign the environment is just right.
☀️ Step 4: Monitor and Adjust Moisture
Check trays daily and mist lightly if the soil surface begins to dry. You'll know when it's time to water again when the top ¼ inch feels dry to touch. Never let the trays sit in standing water longer than 30 minutes—root rot starts quickly in waterlogged conditions.
I keep my seed trays on a heat mat set to 70-75°F for consistent germination. The warmth helps maintain even moisture levels, so you won't need to water as frequently. Watch for the first signs of sprouts—those tiny green hooks breaking through the soil mean you've got the moisture balance perfect.
⏰ Step 5: Transition to Bottom Watering After Germination
The moment you see 50% of seeds sprouted, remove the cover immediately. Trapped humidity invites damping-off disease, which will collapse seedlings overnight. From this point on, water only from the bottom by placing trays in ¼ inch of water for 10-15 minutes, then draining excess.
You'll notice seedlings perk up and grow stronger once they're no longer suffocating in damp conditions. Keep the soil surface dry between waterings—just enough moisture at the roots is all they need now. This shift prevents the most common seedling killer and sets them up for healthy growth.
Tips & tricks for perfect seedling watering
A few subtle adjustments can transform your seed trays from hit-or-miss germination to reliable, healthy starts every time.
Soil Texture Matters: In Step 1, if your seed mix feels particularly dense or clumpy, give it an extra 2-3 minutes in the bottom watering reservoir. The goal is uniform dampness throughout—press gently with a finger to check. For lightweight mixes, the standard 10-15 minutes works perfectly. Remember, we're aiming for "damp sponge" consistency, not soggy mud.
Humidity Balance: After covering in Step 3, watch for condensation on the plastic within 24 hours—that's your confirmation the humidity level is ideal. If you notice water droplets forming on the soil surface instead, prop the cover higher with toothpicks to prevent direct condensation. This simple adjustment prevents fungal growth while maintaining the greenhouse effect.
Temperature Consistency: The 70-75°F range in Step 4 is non-negotiable for most seeds. If your home runs cooler, place trays on a seedling heat mat or near a sunny window. For warm climates, move trays to a slightly cooler spot to prevent over-drying. I've seen germination rates double when maintaining this precise temperature—it's that critical for enzymatic activity in seeds.
Transition Timing: When you reach the 50% sprouting mark in Step 5, remove that cover immediately—don't wait another day. I've lost entire seed batches to damping-off disease from leaving covers on just 12 hours too long. After removing the cover, switch to bottom watering only, keeping the soil surface completely dry to prevent fungal spores from thriving.
Pro Tips for Water Seed Trays
- A few subtle adjustments can transform your seed trays from hit-or-miss germination to reliable, healthy starts every...
- Soil Texture Matters: In Step 1, if your seed mix feels particularly dense or clumpy, give it an extra 2-3 minutes in...
- Humidity Balance: After covering in Step 3, watch for condensation on the plastic within 24 hours—that's your confirm...
Frequently asked questions
Got questions about keeping your seed trays happy and hydrated? You’re in the right place! Here are some of the most common queries—plus clear, no-fuss answers to help you avoid soggy messes or dried-out disappointment.
How often should I water seed trays?
Water seed trays lightly every 1–2 days, using the mist-and-cover method. Check the soil daily—it should stay moist but not soggy. Overwatering suffocates seeds, while underwatering dries them out. Consistency is key! Pro tip: Use a spray bottle for precision, and avoid letting water pool.
What if my seeds aren’t germinating?
First, ensure your trays are in a warm (65–75°F), bright (but indirect) spot. If seeds still won’t sprout, check moisture—soil should feel like a damp sponge. Try gentle warmth (a seedling heat mat helps) and avoid disturbing the soil. Patience! Some seeds take 7–21 days to germinate.
Can I use tap water for seed trays?
Yes, but let it sit for 24 hours first to remove chlorine, which can harm delicate seedlings. Alternatively, use rainwater or filtered water for a gentler touch. Avoid cold water—lukewarm is ideal! Bonus: If your water is hard, a quick boil and cool will help too.
What if my seed tray gets moldy?
Mold means too much moisture or poor airflow. Act fast: remove the cover and let the tray dry for 1–2 hours in a well-ventilated area. If mold persists, repot the seeds into fresh, sterile soil. Prevent it by using well-draining soil and avoiding overcrowding.
Can I reuse seed trays for new batches?
Clean trays thoroughly with soapy water and a 10% bleach solution (1 part bleach to 9 parts water) to kill bacteria. Rinse well and dry before reuse. Warning: Avoid plastic trays with cracks—bacteria love hiding there!
Wrapping up and next steps
Mastering the mist-and-cover method ensures your seed trays stay perfectly hydrated for even germination—no guesswork, just growth! 🌱 With the right tools, timing, and a little patience, you’ll give your seedlings the best start possible.
Now that you’re equipped with the know-how, it’s time to roll up your sleeves and get planting—your future garden awaits!
Ready for the next step? Once your seeds sprout, transplanting or thinning seedlings will be your focus. Stay tuned for tips on nurturing those tiny greens into strong, healthy plants!