
Lawn
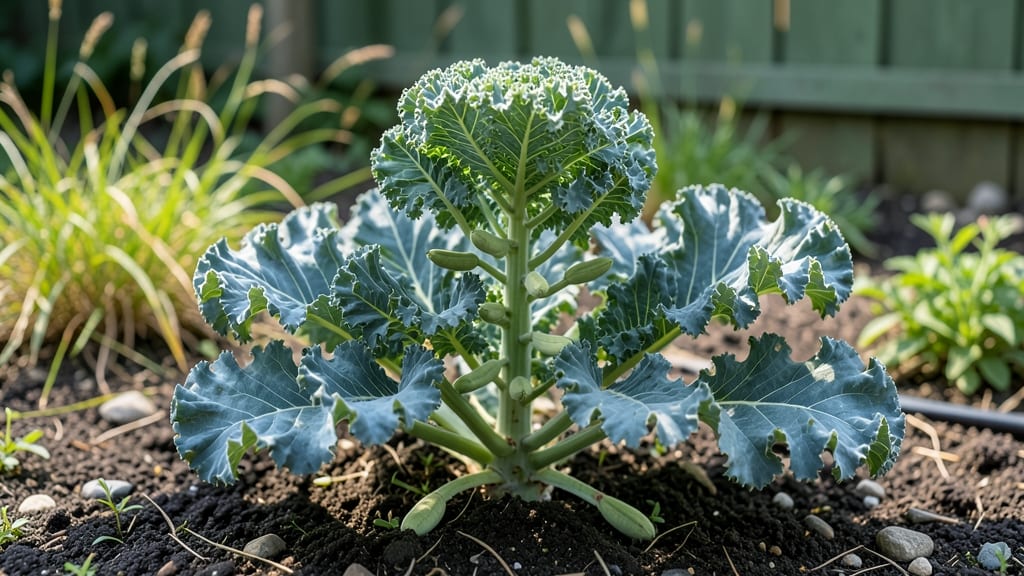
Saving kale seed pods transforms scraps into next year’s harvest—easy when you know the dry-and-split trick. 🌱 I’ve turned wilted stems into a seed bank, and the process is simpler than it sounds: let pods mature fully, then crack them open to reveal tiny black seeds ready for replanting.
The key is patience—wait until pods turn brown and papery before harvesting. Store them in a cool, dry place until fully desiccated, then gently split them with your fingers or a small hammer.
One plant yields enough seeds for a dozen new starts, cutting costs and ensuring heirloom varieties stay true. You’ll end up with a stash of seeds that last 3-5 years when stored properly, plus the satisfaction of growing kale from your own saved seeds.
The first flush of seedlings in spring will be tender and uniform, free from the variability of store-bought plants. This method works for any biennial kale variety and adapts to small spaces. Here’s how to make it foolproof—no fancy tools required.
📚 In This Guide
- What you need
- Instructions
- Tips and common mistakes
- Wrapping up and next steps
What you need
- ● Mature kale plants – Choose healthy, bolted (flowering) kale plants with fully developed seed pods (usually 6–12 weeks after flowering). Aim for 3–5 plants for a decent seed yield.
- ● Pruning shears or sharp scissors – For cleanly harvesting seed pods without damaging the plant.
- ● Paper bags or breathable mesh bags – 2–3 large bags (12x15 inches) to collect and dry pods. Avoid plastic to prevent moisture buildup.
- ● Drying tray or screen – A flat, elevated surface (like a wire rack or cardboard) to spread pods in a single layer for drying.
- ● Rubber mallet or rolling pin – For gently cracking open dried pods to release seeds.
- ● Fine-mesh sieve or strainer – To separate seeds from chaff and debris.
- ● Paper towels or parchment paper – For cleaning and storing seeds.
- ● Small airtight containers (e.g., glass jars or seed envelopes) – For long-term seed storage. Label with the date and variety!
- ● Fan or dehumidifier – Speeds up drying in humid climates.
- ● Magnifying glass – Helps inspect pods for pests or mold before processing.
- ● Seed moisture meter – Ensures seeds are fully dried (ideal moisture: <10%).
- ● Food-safe bleach solution (1 tsp bleach per gallon of water) – For sanitizing containers if storing seeds long-term.
Step-by-step instructions for extracting kale seeds
Here's the simple method I use every year to harvest seeds from mature kale plants.
🌱 Step 1: Select and Harvest Mature Seed Pods
Look for kale plants with brown, dry seed pods that easily crumble when gently squeezed. These pods are ready for seed extraction, while green or firm pods still need time to mature. I like to harvest on a dry, sunny morning when the pods are fully dehydrated—this makes the process much cleaner.
Use clean scissors or fingers to remove the pods from the plant. Place them in a paper bag (not plastic) and label with the kale variety and harvest date. The paper bag allows airflow while preventing seeds from scattering. If pods are still damp, spread them on a tray in a warm, dry spot for 2-3 days until completely dry.
🌿 Step 2: Dry the Seed Pods Thoroughly
Spread the pods on a clean, dry surface in a single layer. I use a baking sheet lined with newspaper because it’s easy to shake off debris later. Place them in a warm, well-ventilated area away from direct sunlight—too much heat can cause the pods to crack prematurely and lose seeds.
Turn the pods over every 24 hours to ensure even drying. You’ll know they’re ready when they’re completely brittle and break apart with minimal pressure. This usually takes 5-7 days, depending on humidity levels. If your home is very dry, the process may finish in just 3-4 days.
✂️ Step 3: Split the Pods to Release Seeds
Once the pods are fully dry, place them in a clean paper bag and seal it loosely. Shake the bag vigorously for 30-60 seconds—the pods will crack open, releasing seeds and chaff. I like to do this over a tray or sheet of newspaper to catch any stray seeds that escape the bag.
After shaking, open the bag and separate the seeds from the chaff. The seeds are small, dark, and dense, while the chaff is lighter and papery. Use a fine-mesh strainer or gently blow away the chaff to isolate the seeds. Store the clean seeds in a labeled, airtight container in a cool, dark place for up to 3 years.
💧 Step 4: Test Seed Viability (Optional but Recommended)
To ensure your seeds are viable, perform a simple germination test. Place 10 seeds between two damp paper towels in a sealed plastic bag. Keep them in a warm spot (65-75°F) and check daily. If 70% or more of the seeds sprout within 7-10 days, they’re ready for planting.
If fewer seeds sprout, store the remaining seeds in the fridge for another 1-2 months—sometimes seeds need a period of cold stratification to break dormancy. This step is especially useful if you’re saving seeds for next season and want to maximize your yield.
Tips & tricks for perfect kale seed extraction
Harvesting kale seeds doesn't have to be a guessing game—these simple tricks make the process foolproof every time.
Pod Selection Secret: Look for pods that crumble easily between your fingers. If they're still firm, they need more time on the plant. I've learned the hard way that harvesting too early means wasted effort—wait until they're completely dry and brown. The right pods should feel like brittle paper when you gently squeeze them.
The Time Factor: Those 24 hours of turning your pods in Step 2 make all the difference! I've found that consistent turning prevents uneven drying, which can lead to some pods cracking too soon while others stay damp. Use a timer reminder if you tend to forget—trust me, it's worth the extra 30 seconds of effort for perfect results.
Shaking Strategy: When you're ready to shake the pods in Step 3, do it over a tray or newspaper—not your kitchen floor. I've had seeds scatter everywhere when I first tried this, but now I always work over a clean surface. Also, shake in short bursts of 10-15 seconds rather than all at once—this gives you better control and prevents losing seeds to the breeze.
Storage Wisdom: After you've separated your seeds, don't just toss them in any container. Use a small glass jar with a tight-sealing lid and label it with the variety and harvest date. I store mine in the freezer for the first month to kill any potential pests, then move them to a cool, dark pantry. This extra step has saved me from moldy seeds in the past!
Pro Tips for Kale Seed Pods
- Harvesting kale seeds doesn't have to be a guessing game—these simple tricks make the process foolproof every time.
- Pod Selection Secret: Look for pods that crumble easily between your fingers. If they're still firm, they need more t...
- The Time Factor: Those 24 hours of turning your pods in Step 2 make all the difference! I've found that consistent tu...
Frequently asked questions
Got questions about harvesting kale seed pods? You’re not alone!
Here are answers to the most common queries to help you master the dry-and-split method with ease.
Why do kale seed pods need to dry before splitting?
Drying is key to easy seed extraction. Fresh pods are tough and fibrous—drying (3–5 days) makes them brittle, so they crack open effortlessly when rubbed between your fingers. Skipping this step can lead to broken pods or wasted seeds!
How long does it take for kale seed pods to fully dry?
Timing depends on your climate, but aim for 3–5 days in a dry, well-ventilated spot (like a mesh bag or paper towel). In humid weather, extend drying to 7–10 days or use a fan. Test readiness by gently squeezing a pod—if it crumbles, it’s ready!
What if my kale seed pods won’t split open?
Try these fixes:
- Increase drying time: More time = crispier pods.
- Use a rolling pin: Gently tap pods to loosen seeds.
- Check moisture: If pods feel damp, spread them out again.
Can I save seeds from store-bought kale?
Probably not! Store-bought kale is often hybridized (crossbred) for flavor/texture, so seeds may not grow true-to-type. For reliable seeds, use heirloom or open-pollinated kale from seed savers or organic farms.
How do I store kale seeds after extracting them?
Keep seeds in a cool, dry place (like a sealed jar or envelope) for up to 3 years. For longer storage, refrigerate or freeze them. Label with the date to track freshness!
Pro Tip:
If you’re short on time, speed up drying by placing pods in a paper bag with a fan or in a low oven (150°F) for 1–2 hours. Just monitor closely to avoid overheating!
Wrapping up and next steps
Extracting kale seed pods using the dry-and-split method is a rewarding way to grow your own plants—simple, cost-effective, and eco-friendly! 🌱 Whether you're a seasoned gardener or a curious beginner, this technique unlocks the potential of your kitchen scraps into future harvests.
Now that you’re equipped with the know-how, why not take the next step?
Start small: try drying a few pods this season, then expand as you gain confidence. Share your success with fellow gardeners, or even experiment with other leafy greens like collards or Swiss chard. The world of seed saving is yours to explore—happy growing! 🌿