
Lawn
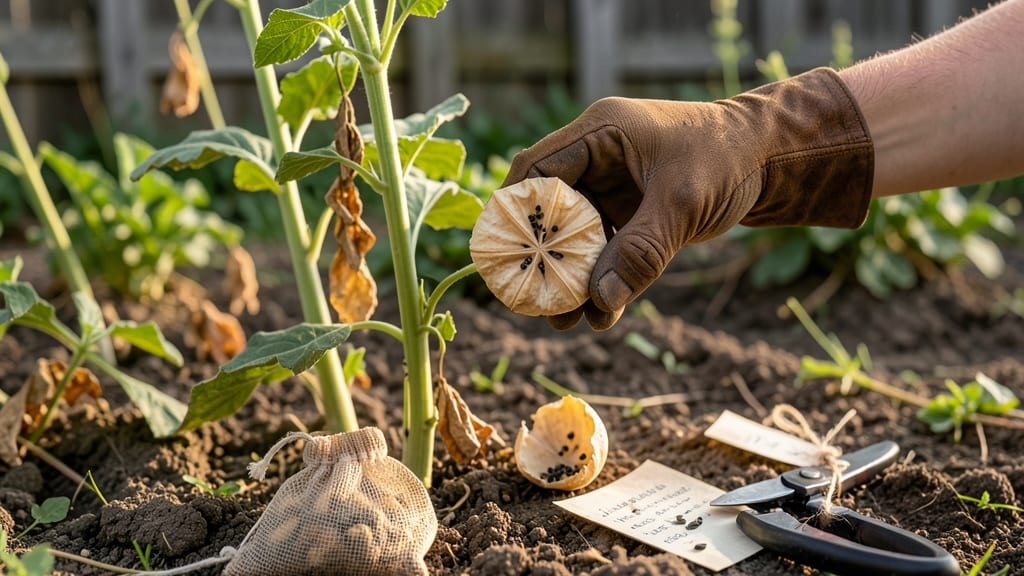
Edible seed pods from the mallow family turn your garden into a zero-waste pantry. 🌱 From okra's crisp green pods to hollyhock's delicate blooms, these plants offer both beauty and bounty—if you know how to coax them into producing.
My first attempt with okra ended in bitter disappointment until I learned the right spacing and watering tricks that trigger sweet, tender pods.
These plants thrive in warm climates but adapt surprisingly well to cooler zones with the right variety—think hollyhock's hardy stems or hibiscus's tropical punch. You'll need full sun, well-draining soil, and patience (those pods take time to develop).
The key is consistent moisture without soggy roots, and harvesting at the perfect moment before seeds form—too late, and you're left with tough, stringy textures.
What you end up with is a harvest that goes beyond the garden: okra pods stir-fried with garlic, hollyhock blossoms steeped as tea, or hibiscus flowers simmered into vibrant jams. The flavors range from mild and nutty to tart and floral, all while your plants keep producing for months.
Every pod harvested means less waste and more reasons to grow next season.
Whether you're growing in containers or full garden beds, these plants reward experimentation. Try okra for Southern heat, hibiscus for tropical climates, or hollyhock for ornamental edibles that double as cut flowers. The only mistake is not starting—so grab some seeds and let's turn your yard into a zero-waste feast.
📚 In This Guide
- What you need
- Instructions
- Tips and common mistakes
- Wrapping up and next steps
What you need
Ready to turn your yard into a zero-waste pantry? Here’s what you’ll need to harvest, prepare, and preserve edible seed pods from the mallow family—like okra, hollyhock, and marshmallow—with ease! Whether you’re foraging or growing, gather these essentials:
🌱 Required Materials
- Fresh mallow family seed pods (okra, hollyhock, or marsh mallow pods—ensure they’re pesticide-free and from a trusted source).
- Kitchen knife or pruning shears (for harvesting whole pods).
- Cutting board (preferably food-safe, like bamboo or plastic).
- Mixing bowls (2–3, for rinsing and sorting).
- Colander or fine-mesh strainer (to rinse pods thoroughly).
- Paper towels or clean kitchen towels (for drying).
- Small airtight containers or jars (for short-term storage—glass or BPA-free plastic).
- Dehydrator, oven, or food dehydrator trays (for long-term storage; optional but recommended).
🔧 Tools for Processing (Optional but Helpful)
- Mortar and pestle (for crushing seeds into flour or oil).
- Food processor or blender (for grinding dried pods into powder).
- Cheesecloth or fine sieve (for straining seed oil or flour).
- Vacuum sealer (to extend shelf life of dried pods).
- Labeling markers and stickers (to track harvest dates and varieties).
🌿 Prerequisites
- Basic plant ID skills (or a trusted field guide/app to confirm edible pods—never consume unidentified plants!).
- Sunny, well-ventilated workspace (for drying pods safely).
- Patience (drying pods can take 24–72 hours, depending on humidity).
Step-by-step guide to harvesting and using mallow family seed pods
Turn those fluffy seed pods into culinary treasures with this simple, sustainable method.
🌱 Step 1: Identify and Harvest Mature Seed Pods
Wait until pods turn completely brown and open slightly—this signals full maturity and peak flavor. I like to harvest on dry mornings when dew has evaporated, as moisture makes the pods stickier to handle. Use clean, sharp scissors or fingers to pluck the pods gently from the stem.
Look for pods that feel dry and papery to the touch. If they still have green streaks or feel damp, leave them another day or two. Collect only what you'll use within a week, as freshness matters for both taste and texture. Place harvested pods in a paper bag to dry further if needed.
💧 Step 2: Clean and Prepare the Seed Pods
Spread the pods on a clean kitchen towel or baking sheet. Gently shake each one over a bowl to release any loose debris or small seeds that might have already detached. For stubborn dirt, I use a soft brush to sweep away particles without damaging the delicate fibers.
If the pods feel particularly sticky, let them air-dry completely in a single layer for 24 hours before processing. This prevents mold growth during storage. The goal is to end up with clean, dry pods ready for the next steps—no grit or moisture left behind.
✂️ Step 3: Extract the Edible Fibers
Carefully open each pod by pinching the seam where it naturally splits. You'll see fluffy fibers inside—these are the edible parts we're after. Use a small knife or your fingers to gently pull the fibers away from the central seed cluster, being careful not to tear them.
For larger harvests, I like to place the pods in a clean jar and shake them vigorously to loosen the fibers. Then, I sift the contents through a fine mesh strainer to separate the fibers from the seeds. Save the seeds for planting or composting—nothing goes to waste in this process.
☀️ Step 4: Dry and Store the Fibers
Lay the extracted fibers on a baking sheet lined with parchment paper. Place them in a warm, dry spot away from direct sunlight for 1-2 days to dry completely. You'll know they're ready when they feel crisp to the touch and lose their slight stickiness.
Once fully dry, store the fibers in an airtight container like a glass jar. Keep them in a cool, dark place—like your pantry—to preserve their texture and flavor for up to 6 months. These dried fibers can be used whole in soups, teas, or as a thickening agent in sauces.
🪴 Step 5: Use or Preserve Your Harvest
For immediate use, add the dried fibers directly to hot liquids like broths or teas—they'll release their mild, earthy flavor as they steep. I often sprinkle them into smoothies or blend them into homemade granola for a nutty crunch.
To preserve for later, you can also infuse the fibers into oil or vinegar. Simply cover the dried fibers in a clean jar with your chosen liquid, let it sit for 2 weeks, then strain and store. This creates a flavorful base for dressings or marinades that highlights the unique taste of the mallow family.
Tips & tricks for perfect mallow family seed pod harvesting
Here's what nobody tells you about turning those fluffy pods into culinary gold—without the guesswork.
Harvesting Secret: I harvest pods in the morning when they're still slightly damp from dew, but not wet. This makes them easier to handle and prevents the fibers from sticking to your fingers. If you must harvest later in the day, place them in a paper bag for 24 hours to dry completely before processing—this step is non-negotiable for preventing mold later on.
Cleaning Hack: For stubborn dirt clinging to your pods, I've found that a soft-bristle toothbrush works better than any kitchen brush. Gently scrub each pod while holding it over a bowl to catch the debris. This method preserves the delicate fibers while removing every last bit of grit. The goal is to end up with pods that feel as clean as possible before opening them.
Fiber Extraction Tip: When extracting fibers from larger harvests, I recommend using a fine mesh strainer with holes just big enough to let the fibers through but catch the seeds. This separation is key—you want those clean fibers for culinary use while saving the seeds for planting. Pro tip: If you're short on time, you can skip the strainer and just shake the jar vigorously before carefully picking out the seeds by hand.
Storage Wisdom: After drying your fibers for that critical 1-2 days, store them in a glass jar with a tight-sealing lid. Add a small piece of dried silica gel packet (the kind that comes with electronics) to absorb any remaining moisture. This simple trick extends their shelf life to the full 6 months without any risk of spoilage. The key is complete dryness before sealing.
Pro Tips for Mallow Family Edible Seed Pods
- Here's what nobody tells you about turning those fluffy pods into culinary gold—without the guesswork.
- Harvesting Secret: I harvest pods in the morning when they're still slightly damp from dew, but not wet. This makes t...
- Cleaning Hack: For stubborn dirt clinging to your pods, I've found that a soft-bristle toothbrush works better than a...
Frequently asked questions
Got questions about harvesting and using mallow family seed pods?
You’re not alone! Here are answers to the most common queries—from timing to troubleshooting—to help you turn those pods into pantry staples with ease.
When is the best time to harvest mallow family seed pods?
Harvest seed pods when they’re fully mature but before they split open naturally. For most varieties (like okra or velvetleaf), this means waiting until the pods turn dry and brown but still remain intact. Early morning harvests prevent moisture buildup, ensuring cleaner pods. Pro tip: Test a few pods—if they release seeds with gentle pressure, they’re ready!
Are all mallow family seed pods edible? Which ones should I avoid?
Not all mallow family pods are edible! Stick to well-known varieties like okra, velvetleaf (Abutilon), or celtuce. Avoid wild or unidentified pods—they may contain toxins or irritants. When in doubt, research the plant’s common name or consult a local foraging guide. Safety note: Never consume pods from treated lawns or roadsides.
How do I store harvested seed pods for long-term use?
Store pods in a cool, dry place (like a paper bag or mesh sack) to prevent mold. For seeds, dry them further at 90°F (32°C) for 2–3 days, then seal in airtight containers. Whole pods last 1–2 weeks in the fridge; freeze them for longer storage. Tip: Label containers with the harvest date to track freshness!
What can I do with leftover seed pods after extracting seeds?
Don’t toss them! Use leftover pods in compost, fertilizer tea, or even as natural scrubbers for pots. Some chefs dry and powder them for thickening soups (like okra gumbo). For creativity, try seed pod crafts—kids love turning them into bird feeders or wind chimes!
My pods are getting chewed or damaged—how do I protect them?
Pests like slugs, beetles, or birds can target seed pods. Use row covers, neem oil sprays, or physical barriers (like copper tape). For ground-level plants, mulch heavily to deter burrowing critters. Quick fix: Handpick pests early in the day when they’re slowest.
Can I grow mallow family plants in my lawn for seed pods?
Most mallow family plants (like okra) thrive in well-drained soil with full sun—ideal for garden beds, not lawns. If you want edible pods in your yard, dedicate a small plot or use container gardening. Avoid turfgrass areas, as mallow plants compete with grass roots. Idea: Try edible ground covers like strawberries or creeping thyme instead!
Wrapping up and next steps
Discovering the edible treasures hidden in the mallow family’s seed pods turns gardening into a delicious, sustainable adventure!
From nutrient-packed okra to the delicate flavors of hollyhock, these zero-waste gems prove nature’s pantry is always open. Why stop at harvesting? Share your finds with friends or experiment with new recipes—your kitchen (and the planet) will thank you!
Next steps:
- 🌱 Start small: Grow a few mallow-family plants in your garden or balcony.
- 📖 Explore: Bookmark this guide and try one new seed pod recipe this week!
- 🤝 Connect: Join foraging or gardening communities to swap tips and harvests.