
Lawn
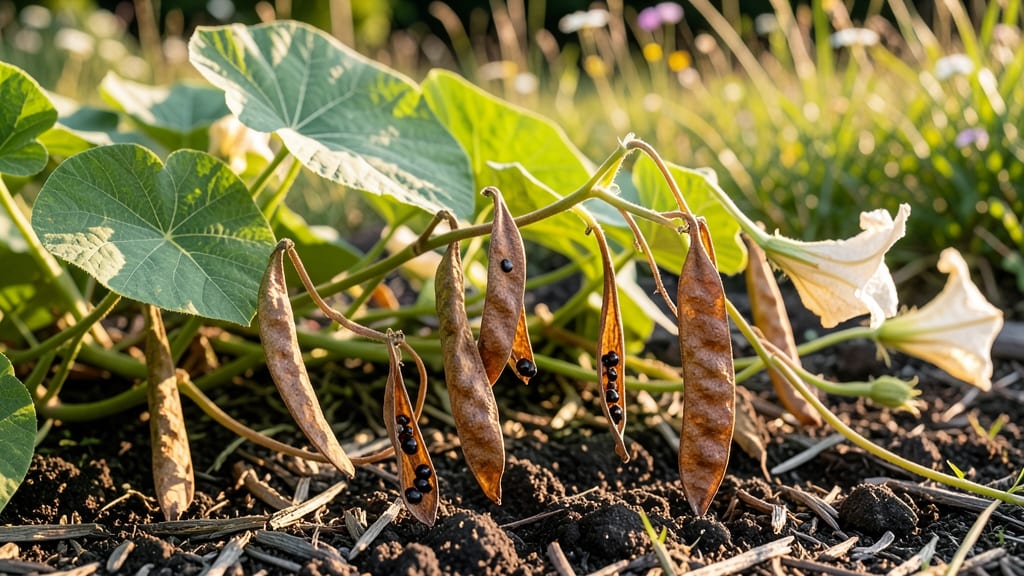
Moon vine seed pods need a quick twist-free viability check before drying—skip this step and you might waste months waiting for seeds that won’t sprout. 🌱 I’ve learned the hard way that not all moon vine pods contain viable seeds, and a simple test saves time (and frustration) when starting these dramatic vines from scratch.
The secret lies in the pod itself: healthy seeds rattle when you gently shake the pod, while empty ones stay silent. Once you’ve confirmed viability, dry the pods in a warm, dry place for about 10-14 days—no need for fancy equipment, just a paper bag and patience.
This ensures seeds stay fresh until planting season rolls around. What you’ll end up with are plump, dark seeds ready for germination, whether you’re starting them indoors in early spring or direct-sowing after the last frost.
The key is consistent moisture during germination—keep the soil damp (not soggy) and expect sprouts in 2-4 weeks under the right conditions.
This method works for moon vine varieties like Ipomoea alba or Ipomoea nil, and the same principles apply whether you’re growing for their stunning flowers or just the thrill of watching them climb. Let’s get those seeds ready!
📚 In This Guide
- What you need
- Instructions
- Tips and common mistakes
- Wrapping up and next steps
What you need
- ● Fresh moon vine seed pods: Harvest only fully mature pods (turned brown/dry but still intact). Aim for 50–100 pods, depending on your drying needs.
- ● Sharp pruning shears or scissors: For cleanly cutting stems without damaging pods (sterilize with rubbing alcohol if reusing).
- ● Paper towels or newspaper: 2–3 sheets to line your drying surface and absorb excess moisture.
- ● Drying tray or mesh screen: A 12"x12" or larger tray with 1/4"–1/2" grid holes (or a breathable cloth) to elevate pods for airflow.
- ● Rubber bands or twist ties: 5–10 (for bundling stems if drying whole vines).
- ● Small paper bags or envelopes: 5–10 (for storing dried pods; opt for unbleached, breathable material).
- ● Fine-mesh sieve or colander: 8"–10" diameter (to separate seeds from dried pods later).
- ● Labeling tags & permanent marker: To mark pods by harvest date/variety.
- ● Dehumidifier or fan: Speeds up drying in humid climates (place near drying area).
- ● Food dehydrator: Set to 95°F (35°C) for even, controlled drying (great for large batches!).
- ● Desiccant packets (silica gel): Place 1–2 in storage bags to prevent moisture buildup.
- ● Magnifying glass: For inspecting pods for pests or mold before drying.
- ● Digital scale: Weigh pods pre- and post-drying to track moisture loss (target: ≤10% remaining).
How to test moon vine seed pods for viability before drying
Skip the guesswork—this simple twist-free test tells you which pods hold healthy seeds.
🌱 Step 1: Harvest Pods at Peak Ripeness
Pick moon vine seed pods when they turn a deep brown and begin to split naturally along the seams. If you harvest too early, the seeds inside won’t be fully mature, and if you wait too long, they’ll scatter on their own. I like to check pods every few days during their ripening phase—just give them a gentle squeeze to test firmness.
Once you’ve gathered your pods, lay them out on a clean, dry surface. This gives you a clear view of their condition before you proceed. Look for any pods that are moldy, shriveled, or have holes—these should be discarded immediately. Healthy pods feel firm but yield slightly when pressed, like a ripe avocado.
💧 Step 2: Perform the Twist Test for Viability
Take one pod and hold it between your thumb and forefinger. Apply gentle pressure and twist the pod slowly in a circular motion. If the pod twists easily and the seeds inside rattle freely, it’s a good sign of viability. This twisting motion helps release any seeds that might be stuck inside, making them easier to extract later.
If the pod resists twisting or feels stiff, it might be empty or contain non-viable seeds. I usually test 3-4 pods from each batch to get a sense of overall health. Real talk: if more than half of your pods fail this test, it’s time to reconsider your moon vine source or growing conditions next season.
☀️ Step 3: Separate Healthy Seeds from Debris
Once you’ve confirmed viable pods, carefully open them by gently prying apart the seams with your fingers or a small knife. Avoid tearing the pods—this can damage the seeds inside. Empty the contents onto a clean, dry surface, like a piece of white paper or a seed-saving tray.
Use a fine-mesh strainer or your fingers to separate the seeds from any chaff, husks, or debris. Healthy moon vine seeds are typically small, dark, and firm to the touch. Discard any seeds that look shriveled, discolored, or soft—these won’t germinate. I like to spread the seeds out in a single layer on the paper to inspect them closely under natural light.
⏰ Step 4: Dry Seeds Properly for Long-Term Storage
Spread the viable seeds out on a screen or piece of mesh in a warm, dry, and well-ventilated area. Avoid direct sunlight, as it can overheat the seeds and reduce their viability. A temperature of 70-75°F is ideal for drying. It should take about 5-7 days for the seeds to dry completely—they’re ready when they’re brittle to the touch and break easily when bent.
Once dry, transfer the seeds to a labeled envelope or airtight container. Store them in a cool, dark place, like a seed vault or the back of your pantry. Properly dried and stored seeds can remain viable for 2-3 years, though moon vine seeds often lose viability faster—so I recommend planting them as soon as possible for the best results.
✂️ Step 5: Verify Germination Before Planting
Before you commit to planting a batch of seeds, do a quick germination test. Place 10-15 seeds between two damp paper towels in a sealed plastic bag. Keep them in a warm spot (75-80°F) and check daily. You should see sprouts within 7-10 days. If fewer than half of the seeds sprout, it’s a sign that your storage conditions or seed quality might need improvement.
This test gives you confidence that your seeds are ready for planting. Once you’ve confirmed viability, you’re all set to sow them in your garden or containers. I always plant a few extra seeds just in case—germination rates can vary even with the best prep.
Tips & tricks for perfect moon vine seed pod testing
Avoid common pitfalls that waste time and effort with these essential insights for testing moon vine seed viability.
Harvesting Timing: In Step 1, check pods every other day during ripening—they should be deep brown with slight seam splitting. Overripe pods scatter seeds on their own, while underripe ones yield immature seeds. I've learned the hard way that waiting too long means losing your entire harvest to wind dispersal.
Twist Test Precision: During Step 2's twist test, focus on both the ease of twisting AND the sound inside. Viable pods make a distinct rattling noise when twisted—this indicates full seed development. I test 3-4 pods per batch to get an accurate reading; if more than half fail, your vine might need better growing conditions next season.
Seed Inspection Lighting: For Step 3's seed separation, use natural daylight or a bright LED lamp when inspecting seeds. Artificial lighting can hide subtle discoloration or damage. Spread seeds on white paper to spot any imperfections—healthy seeds should be uniformly dark and firm, never dull or wrinkled.
Drying Environment: Step 4's drying process requires consistent 70-75°F temperatures—avoid attics or garages that can get too hot. A mesh screen works best for airflow, and I recommend checking daily for moisture. Seeds are ready when they snap cleanly when bent; if they bend without breaking, they need more drying time.
Pro Tips for Moon Vine Seed Pods
- Avoid common pitfalls that waste time and effort with these essential insights for testing moon vine seed viability.
- Harvesting Timing: In Step 1, check pods every other day during ripening—they should be deep brown with slight seam s...
- Twist Test Precision: During Step 2's twist test, focus on both the ease of twisting AND the sound inside. Viable pod...
Frequently asked questions
How do I know if my moon vine seed pods are ready for harvesting?
Moon vine seed pods typically turn a light brown or tan color when mature. Gently press a pod—if it opens easily and releases seeds, it’s ready. Harvest on a dry day to prevent moisture damage. Avoid harvesting if pods are still green or too hard, as seeds may not germinate properly.
Can I dry moon vine seed pods indoors? What’s the best method?
Yes, but avoid high humidity. Spread pods in a single layer on a mesh screen or paper towels in a well-ventilated area (like a sunny windowsill or near a fan). For faster drying, use a dehydrator at 95°F (35°C) for 4–6 hours. Check periodically—they’re done when brittle and fully brown.
What if my moon vine seed pods mold or develop black spots?
Mold or black spots mean excess moisture. If caught early, spread pods in direct sunlight to dry faster. If mold is already present, discard affected pods immediately to prevent spoilage. Store remaining pods in an airtight container with a silica gel packet to absorb moisture.
Are there alternatives to moon vine seed pods for erosion control?
Yes! Consider morning glory (similar fast-growing vine), kudzu (though invasive in some regions), or native ground covers like creeping thyme. For seed pods, wisteria or honey locust are also effective. Always research local climate suitability and invasiveness risks.
How long can I store dried moon vine seed pods before planting?
Properly dried and stored pods remain viable for 1–2 years in a cool, dark place (50–60°F / 10–15°C). Use airtight containers with a desiccant to extend shelf life. Test germination annually by planting a few seeds—if they sprout, the rest are still good!
Wrapping up and next steps
Moon vine seed pods are a fantastic addition to your lawn or garden—if they’re viable! 🌱 By testing their twist-free viability before drying, you ensure stronger, healthier growth and save time on failed planting. Remember, a simple twist check can make all the difference in your gardening success.
Ready to take the next step? Gather your pods, follow the steps, and watch your green space thrive! Whether you’re a seasoned gardener or just starting, this easy method will help you grow with confidence. 🌿