
Planting
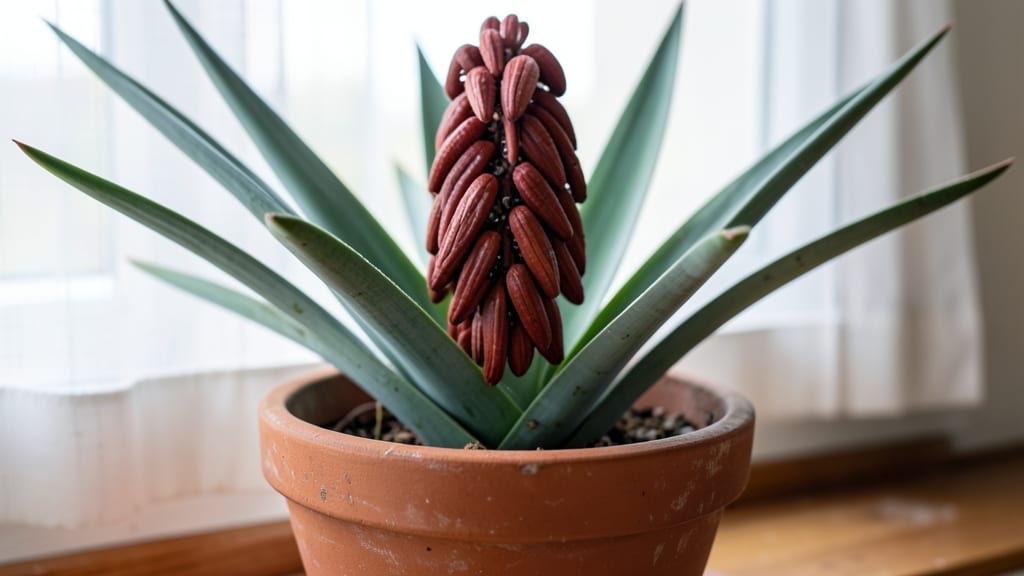
Harvesting red yucca seed pods is like uncovering nature’s secret stash of desert gold. 🌵 The pods crack open on their own when mature, revealing tiny black seeds ready for planting—no fancy tools needed, just patience and timing.
I’ve collected hundreds this way, and the process gets easier every year once you know what to watch for.
You’ll need just a few simple things: sharp pruners or scissors, a paper bag for collecting pods, and a dry, warm spot to store them until they open. The pods are easiest to spot in late summer or early fall, when they turn from green to a papery brown.
Once they’re dry enough to rattle when shaken, they’re ready to be gently twisted off the plant.
Planting these seeds is where the magic happens—they germinate best in well-draining soil and warm conditions, mimicking their natural desert habitat. Scatter them on the surface, barely pressing them in, and keep the soil lightly moist until sprouts appear in 2-4 weeks.
The seedlings grow slowly at first but reward you with striking red flower spikes in just a season or two.
Don’t worry if some pods don’t crack right away—store them in a cool, dry place for up to a year, and they’ll eventually release their seeds when ready.
The key is to be patient and let nature do the work. Once you’ve mastered this, you’ll have red yucca plants popping up everywhere—just like they’re meant to.
📚 In This Guide
- What you need
- Instructions
- Tips and common mistakes
- Wrapping up and next steps
What you need
- ● Ready to harvest and grow red yucca plant seed pods? Here’s everything you’ll need to get started—whether you’re collecting pods from your garden or sourcing them elsewhere! 🌱
How to extract and plant red yucca seeds from dried pods
Here's how I handle these unique seed pods—no special tools needed, just patience.
🌱 Step 1: Collect and Dry the Seed Pods
Harvest the pods when they turn completely brown and begin to crack open naturally. I leave them on the plant until they're fully dry—this ensures the seeds inside are mature and ready. Once collected, place them in a paper bag and store in a warm, dry spot for an additional 2-3 weeks if they haven't opened yet. The pods will eventually split on their own, releasing the seeds inside.
Don't rush this process. If you try to force the pods open too early, you'll damage the seeds. Watch for the pods to split along their seams—that's your signal they're ready. I like to lay them out on a tray lined with newspaper to catch the seeds as they fall. This keeps everything organized and prevents losing tiny seeds.
🪴 Step 2: Remove Seeds and Prepare for Planting
Once the pods crack open, gently separate the seeds from the dried pod material. I use my fingers to pull the seeds out—there's no need for tools, as the seeds are large enough to handle easily. You'll notice they have a papery coating that protects them. This coating will eventually break down naturally in the soil, so don't remove it.
Count out 4 seeds for each planting spot, as red yucca seeds can be slow to germinate and may not all sprout. Store any extra seeds in a small envelope in a cool, dry place until you're ready to plant them. I label the envelope with the date to keep track of how long they've been stored.
☀️ Step 3: Plant Seeds in Well-Draining Soil
Fill small pots or seed trays with a mix of cactus or succulent soil blended with perlite or coarse sand to ensure excellent drainage. Red yucca roots hate soggy soil, so this mix is critical. Plant the seeds ¼ inch deep, pressing them lightly into the soil but not covering them too heavily. Space them about 1 inch apart in the pot.
Water the soil gently until it's moist but not soggy. You want the soil to feel like a damp sponge—not dripping or waterlogged. Place the pots in a location with bright, indirect light for the first 2 weeks. After that, you can gradually introduce them to full sun, as the seedlings will need plenty of light to grow strong.
💧 Step 4: Maintain Moisture and Wait for Germination
Keep the soil consistently moist but never waterlogged. I check the soil every 2-3 days and water lightly when the top ½ inch feels dry. Red yucca seeds can take anywhere from 2-6 weeks to germinate, so patience is key. During this time, avoid moving the pots around—consistency in their environment helps encourage germination.
Once the seedlings emerge, they'll look like tiny, grass-like shoots. This is normal—red yucca seedlings don't resemble the mature plant at all. Once they reach about 2 inches tall, you can transplant them into individual pots or directly into the ground if you're planting outdoors. Just be sure to harden them off first by gradually exposing them to outdoor conditions over 1-2 weeks.
✂️ Step 5: Transplant and Care for Young Plants
Transplant the seedlings into larger pots or into the ground once they're strong enough to handle it. Red yucca thrives in full sun and well-draining soil, so choose a spot that gets at least 6 hours of sunlight daily. Dig a hole slightly larger than the root ball and place the seedling in, covering the roots with soil but not burying the stem too deeply.
After transplanting, water the plants deeply to help them establish roots. Going forward, water them only when the soil feels dry to the touch. Red yucca is drought-tolerant once established, so don't worry about overwatering. In fact, too much water can harm the plant, so it's better to err on the side of less. With proper care, your red yucca will grow into a striking, low-maintenance plant that attracts pollinators and adds texture to your garden.
Tips & tricks for perfect red yucca seed pod handling
These simple tricks will help you avoid common pitfalls when working with red yucca seed pods.
Patience Pays Off: The 2-3 week drying period in Step 1 is crucial—don't be tempted to speed this up. I learned this the hard way after forcing pods open too early and damaging the seeds. The pods will split naturally when ready, so lay them out on newspaper-lined trays to catch seeds as they fall. This keeps everything tidy and prevents losing those tiny seeds.
Seed Selection Tip: When counting out 4 seeds per planting spot in Step 2, choose the largest, plumpest seeds you can find. The papery coating is protective—don't remove it! I've found that storing extra seeds in labeled envelopes helps track their freshness. If you're unsure about seed viability, you can do a quick float test: place seeds in water—those that sink are more likely to germinate.
Soil Mix Matters: The cactus/succulent soil blend with perlite in Step 3 is non-negotiable for red yucca. I've had best success with a 60/40 mix of soil to perlite. When planting those ¼-inch deep seeds, use your finger to make small dimples rather than pressing too hard—this prevents crushing the delicate seeds. The 1-inch spacing gives seedlings room to grow without competing for nutrients.
Germination Strategy: During the 2-6 week germination window in Step 4, I've found that placing pots on a heat mat set to 70°F speeds up germination without needing to move them. The key is consistency—once seedlings emerge as grass-like shoots, resist the urge to move them. Even small disturbances can shock delicate seedlings. When they reach 2 inches, you can start the 1-2 week hardening process by placing them outside for increasing durations each day.
Pro Tips for Red Yucca Plant Seed Pods
- These simple tricks will help you avoid common pitfalls when working with red yucca seed pods.
- Patience Pays Off: The 2-3 week drying period in Step 1 is crucial—don't be tempted to speed this up. I learned this ...
- Seed Selection Tip: When counting out 4 seeds per planting spot in Step 2, choose the largest, plumpest seeds you can...
Frequently asked questions
Got questions about harvesting, storing, or growing red yucca seed pods? You’re not alone! Here are answers to the most common queries—plus a few pro tips to keep your plants thriving.
When do red yucca seed pods ripen and crack open?
Seed pods typically mature in late summer to early fall (August–October, depending on your climate). They’ll turn brown, dry out, and eventually split open on their own—sometimes with a pop! If they don’t crack naturally, gently tap them with a stick to release seeds.
How should I store red yucca seed pods or seeds?
Store dried pods in a cool, dry place (like a paper bag) for up to a year. For seeds, keep them in an airtight container with silica gel or a moisture absorber. Pro tip: Label them with the harvest date to track freshness!
What if my seed pods rot or get moldy before cracking?
Overly moist conditions cause rot. If pods feel slimy or fuzzy, remove them immediately. Prevent this by:
- Ensuring good drainage in the soil.
- Avoiding overhead watering once pods form.
- Harvesting pods early if rain is forecasted.
Can I grow red yucca from seed, or should I propagate from cuttings?
While seeds work, they’re slow (1–2 years to bloom). For faster results, take stem cuttings in spring or early summer. Dip cuttings in rooting hormone, plant in well-draining soil, and keep them lightly moist until roots form (4–6 weeks).
Are red yucca seed pods edible or useful for anything else?
Nope—not edible for humans, but they’re great for wildlife! Birds and small mammals love the seeds. Plus, dried pods make stunning dried arrangements or natural decor. Just avoid handling them if you have latex allergies (some people react to the sap).
Wrapping up and next steps
Growing red yucca from seed pods is a rewarding journey that connects you to nature’s cycles. Whether you’re drawn to their striking blooms or the unique charm of dried seed pods, these plants thrive with minimal fuss—just patience and a little care.
Now that you’re armed with the right materials and answers to common questions, why not take the next step? Start collecting those dried pods this season and watch your garden flourish with vibrant red yucca! 🌱✨