
Lawn
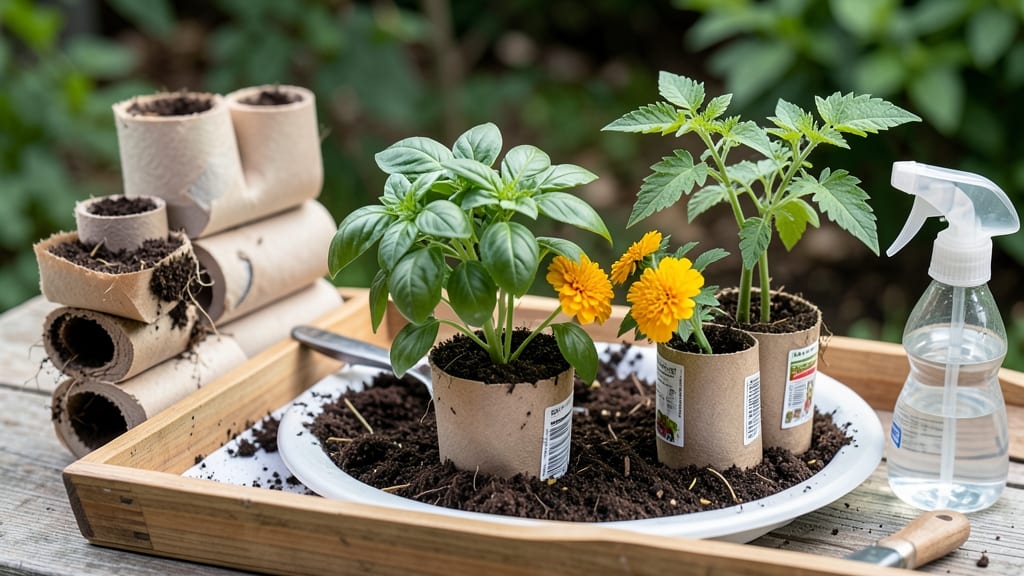
Turn a toilet paper roll seed starter into a zero-waste system that gives seedlings a head start. 🌱 I started using them after watching my first batch of seedlings flop from overcrowding—now they’re stocky, strong, and ready to transplant without stress.
The best part? You’re recycling what would otherwise be trash.
You’ll need toilet paper rolls, potting soil, seeds, and a spray bottle for gentle watering. Cut the rolls into 4-inch sections, fill with moist soil, plant 2-3 seeds per roll, and place them in a sunny spot.
No fancy equipment needed—just what you’ve got lying around. This method works best for fast-growing plants like basil, lettuce, and marigolds.
Seedlings grow 2-3 times faster than in flats because they get direct light from all sides. You’ll avoid the dreaded "leggy" seedlings that collapse when transplanted, and the rolls break down naturally in the soil.
No peeling required—just pop the whole thing into the ground when it’s time to move them outside.
Common mistakes? Overwatering (check soil moisture daily) and forgetting to rotate rolls for even light exposure. For larger plants like tomatoes, use cardboard egg cartons instead—they hold more soil. Either way, you’re saving money, reducing waste, and getting a jump on the growing season.
📚 In This Guide
- What you need
- Instructions
- Tips and common mistakes
- Wrapping up and next steps
What you need
- ● Empty toilet paper rolls – 5–10 rolls (clean, dry, and free of labels or tape)
- ● Potting soil – 1–2 cups of lightweight, seed-starting mix (or a DIY blend of 60% peat moss/coir + 40% perlite)
- ● Seeds – Choose fast-growing varieties like basil, marigolds, or lettuce (or your favorite lawn-friendly grass seeds!)
- ● Water spray bottle – 8–12 oz (for gentle hydration)
- ○ Scissors or craft knife – For cutting rolls (optional, if you prefer shorter starters)
- ● Biodegradable mesh or coffee filters – To cover the bottom of rolls and prevent soil leaks
- ● Plastic wrap or clear bag – For a mini greenhouse effect (great for humidity-loving seeds!)
- ● Markers or labels – To track seed types and planting dates
- ● Tray or shallow container – To hold rolls upright while sprouting
Step-by-step instructions for toilet paper roll seed starters
Turn empty toilet paper rolls into a zero-waste system that gives seedlings a head start.
🌱 Step 1: Prepare the Rolls and Soil
Unroll one toilet paper tube and cut it into 2-inch sections—this gives each seedling its own space. I like to stack them in a shallow tray or egg carton for easy organization. Fill each section with your seed-starting mix until it reaches the top rim, then press down gently to remove air pockets. The soil should feel like a damp sponge, not soggy.
Here's the thing—don't pack it too tightly. You want roots to push through easily, so give the mix a light tap to settle it naturally. If the soil crumbles when you squeeze it, you're good. If it holds a shape, add a little more moisture and fluff it with a chopstick.
💧 Step 2: Plant the Seeds Properly
Follow the seed packet's depth guidelines—usually twice the seed's diameter. I use a toothpick to poke a tiny hole in the center of each soil section, then drop in 1-2 seeds per roll. Cover them lightly with more soil, just enough to hide them completely. Press down very gently to ensure good soil-to-seed contact.
Water immediately with a spray bottle until the soil looks evenly moist. Don't soak it—you'll wash away the seeds. I like to mist until water runs out the bottom of the tray, then let it drain completely. This prevents rot while keeping roots happy.
☀️ Step 3: Provide Ideal Germination Conditions
Place the tray in a warm spot with bright, indirect light—a sunny windowsill works, but avoid direct midday sun. I've found that a 70-75°F environment speeds up germination. If your home runs cooler, set the tray on top of the fridge or use a seedling heat mat.
Cover the tray loosely with plastic wrap to retain moisture, but prop it up slightly so condensation doesn't drown the seeds. Check daily for sprouts—you'll see tiny green hooks appear in 5-14 days, depending on the plant. Once they break through, remove the plastic immediately to prevent fungal growth.
🌿 Step 4: Care for Seedlings Until Transplant
When the first true leaves (not the initial seed leaves) appear, it's time to move them under grow lights if natural light is insufficient. Keep the lights 2-3 inches above the seedlings and provide 14-16 hours of light daily. You'll know they're getting enough when leaves stay dark green and stems stay sturdy.
Water from the bottom of the tray to encourage strong root development. Let the top inch of soil dry out between waterings—this prevents overwatering, which is the #1 killer of young seedlings. Fertilize lightly with a diluted fish emulsion after the first true leaves appear, but don't overdo it.
🪴 Step 5: Transplant with Minimal Root Disturbance
When seedlings have 2-3 sets of true leaves (usually 3-4 weeks after planting), they're ready for the garden. Gently squeeze the sides of each toilet paper roll to break it down—this prevents root circling. Plant the entire roll 1 inch deeper than it was in the starter, which encourages stronger root growth.
Water thoroughly after transplanting to settle the soil around the roots. The toilet paper will decompose naturally, so no need to remove it. Space plants according to their mature size—crowding now leads to weak, disease-prone plants later. You'll see them establish quickly in their new home.
Tips & tricks for perfect toilet paper roll seed starters
These clever strategies will help you maximize your zero-waste seedling system for healthier, stronger plants.
Roll Preparation Secret: For even better drainage and root development, make small slits along the sides of each 2-inch roll section before filling with soil. This creates additional air pockets that prevent compaction while allowing roots to explore beyond the tube. I use a pair of clean scissors to make two small cuts per side—just enough to let roots peek through without falling apart.
Soil Texture Matters: The ideal seed-starting mix should hold moisture without becoming waterlogged. If your mix feels too dense after filling the rolls, add a handful of perlite or vermiculite to improve aeration. I've found that a 50/50 blend of potting soil and perlite works wonders for preventing root rot while maintaining moisture. The goal is that damp sponge consistency mentioned in Step 1.
Lighting Upgrade: While natural light works, grow lights provide consistent 14-16 hours of light daily without fail. Position your lights 2-3 inches above seedlings and adjust as they grow. I use energy-efficient LED grow lights that stay cool enough to leave on 24/7—just turn them off during the plant's natural rest period if you're growing light-sensitive varieties. This continuous light exposure prevents that leggy growth you sometimes see with window sills.
Transplanting Hack: When it's time to move your seedlings to the garden, give the toilet paper rolls a quick soak in water for 10-15 minutes before planting. This helps break down the fibers faster and reduces transplant shock. The rolls will decompose completely within weeks, so you're not adding any non-biodegradable waste to your soil—just giving your plants a strong start.
Pro Tips for Toilet Paper Roll Seed Starter
- These clever strategies will help you maximize your zero-waste seedling system for healthier, stronger plants.
- Roll Preparation Secret: For even better drainage and root development, make small slits along the sides of each 2-in...
- Soil Texture Matters: The ideal seed-starting mix should hold moisture without becoming waterlogged. If your mix feel...
Frequently asked questions
Got questions about toilet paper roll seed starters?
You’re not alone! Here are answers to the most common ones to help you grow confidently—without the waste.
Can I use any type of toilet paper roll?
Yes! Most toilet paper or paper towel rolls work, but avoid rolls with plastic coatings or waxy finishes. Cardboard rolls (like egg cartons or shipping tubes) also work—just cut them to size. Pro tip: Flatten used rolls first to save space before repurposing them!
How long do seeds need to stay in the toilet paper roll?
Seedlings typically stay in their rolls for 2–4 weeks, depending on the plant. Check the seed packet for germination time—once sprouts have 2–3 true leaves (not just the initial seed leaf), they’re ready to transplant. Watch for: Overcrowding or roots circling the bottom.
What if my seedlings outgrow the roll too fast?
No stress! If roots escape the bottom or seedlings get leggy, it’s time to transplant. Gently slide the seedling (still wrapped in the moist paper) into a small pot with soil. Troubleshoot: Add a drainage hole to the roll’s bottom if water pools—this prevents root rot.
Are there eco-friendly alternatives to toilet paper rolls?
Try these zero-waste swaps:
- Egg cartons (perfect for tiny seeds like herbs or lettuce).
- Newspaper or junk mail (folded into mini pots).
- Coconut coir or burlap sacks (biodegradable and compostable).
- Muffin tins (reuse them for larger seeds like tomatoes).
Why are my seeds not sprouting in the roll?
Check these 3 culprits:
- Moisture: Keep the paper damp (like a wrung-out sponge)—not soggy.
- Light: Place rolls near a sunny window or under grow lights (12–16 hours/day).
- Temperature: Most seeds need warmth (70–75°F). A seedling heat mat helps if your home is chilly.
Wrapping up and next steps
Transforming empty toilet paper rolls into thriving seed starters is a simple, eco-friendly way to kickstart your gardening journey—no experience needed! 🌱 By repurposing household waste, you’ll nurture stronger seedlings while reducing plastic use, proving that sustainability and success go hand in hand.
Ready to grow? Start small with a few rolls today, and soon you’ll be harvesting confidence (and herbs!) like a pro.
💡 Next step: Pick your favorite seeds, gather your supplies, and let nature do the rest—your future garden (and the planet) will thank you!