
Lawn
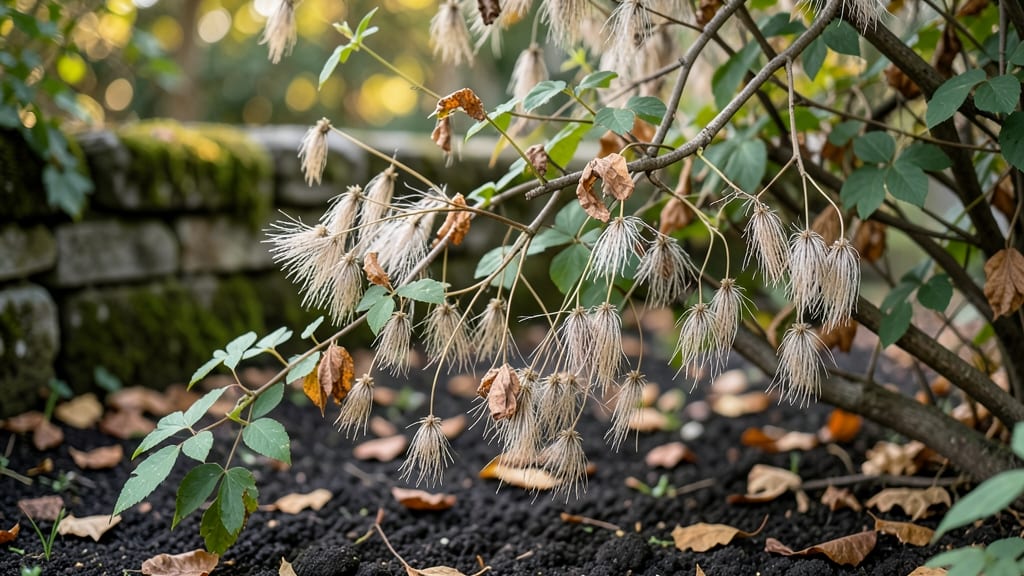
Drying clematis seed heads transforms last season’s blooms into next year’s garden treasures. ✨ I’ve saved seeds from my own plants for years, and the process is simpler than it looks—no fancy equipment, just patience and a dry spot.
These fluffy seed plumes aren’t just pretty; they’re packed with potential for new vines that match (or even surpass) their parents.
The best time to harvest is when the seed heads turn brown and papery—usually late summer or early fall. Snip them carefully, leaving about an inch of stem attached, then lay them on newspaper in a warm, dry place for a few weeks.
This lets the seeds fully mature while keeping them protected from moisture. Once completely dry, gently rub the seed heads between your fingers to release the seeds—no need for fancy seed-cleaning tools.
Store the seeds in a paper envelope or small jar in a cool, dark place until spring planting. When you’re ready to grow, scatter them lightly over moist soil—they don’t need light to germinate, so a thin layer of compost on top keeps them cozy.
Within weeks, you’ll see tiny shoots pushing through, and before you know it, you’ll have a new clematis vine to train along your trellis.
This method works for all clematis types, whether you’re growing hardy varieties in cold climates or tender ones in milder zones. Just remember: the key is timing—harvest too early, and the seeds won’t be viable; leave them too long, and they might scatter on their own.
Either way, you’ll end up with more clematis than you started with!
📚 In This Guide
- What you need
- Instructions
- Tips and common mistakes
- Wrapping up and next steps
What you need
- ● Fresh clematis seed heads: Harvest when fully mature (brown, dry, and slightly papery). Aim for at least 10-15 heads for a good yield.
- ● Pruning shears or sharp scissors: Clean, sterilized tools to avoid damaging the stems.
- ● Paper bags (brown kraft or breathable fabric bags): 2-3 bags, sized to loosely hold seed heads (avoid plastic—it traps moisture!).
- ● Drying rack or wire mesh screen: Elevate seed heads 2-3 inches off the ground for airflow (a wooden frame or even a colander works!).
- ○ Desiccant packets (optional but helpful): 1-2 packets (like silica gel) to absorb excess moisture during storage.
- ● Air-tight containers: 1-2 glass jars or sealed plastic boxes with tight lids (quart-sized or larger).
- ● Permanent marker or labels: To note the variety and harvest date.
- ○ Fine-mesh sieve or sifter (optional): For separating seeds from chaff later.
- ○ Rubbing alcohol (70% or higher) and cotton swabs (optional): For sterilizing tools between cuts if working with multiple plants.
- ● Dry, warm location: 60–75°F (15–24°C) with low humidity (a garage, shed, or indoor space with good airflow).
- ● Patience: Seed heads need 4–6 weeks to fully dry before storage.
- ● Sunlight: Indirect light is best—avoid direct sun to prevent overheating.
- ● Safety first: Wear gloves if your clematis has thorns (some varieties are prickly!).
Step-by-Step instructions for preserving clematis seed heads
Here's my foolproof method for drying and storing clematis seed heads so they stay viable for planting next spring.
🌿 Step 1: Harvest Mature Seed Heads
Wait until clematis seed heads turn completely brown and begin to split open—this usually happens in late fall after the first frost. Use clean, sharp pruners to cut the entire seed head from the stem, leaving a 1-inch stem attachment for handling. Harvest on a dry day when humidity is low to prevent mold.
I always collect seed heads before they fall to the ground. Spread them out on a clean, dry surface immediately after harvesting. This prevents moisture buildup that can cause premature germination or rot. If you must store them temporarily, place them in a paper bag with a few holes punched in the sides for airflow.
💧 Step 2: Dry the Seed Heads Thoroughly
Arrange the harvested seed heads in a single layer on a mesh screen or a piece of window screen. Place this setup in a dry, well-ventilated area with indirect sunlight—direct sun can overheat and damage the seeds. Keep the space at room temperature, around 65-75°F, for optimal drying conditions.
Turn the seed heads every 2-3 days to ensure even drying. You'll know they're properly dried when the seed pods feel light and brittle, and the stems snap easily when bent. This usually takes 2-4 weeks, depending on your climate's humidity levels. If your home is particularly damp, consider using a small fan on low setting to improve airflow.
⏰ Step 3: Separate and Store the Seeds
Once completely dry, gently break open the seed pods to release the seeds. I like to do this by placing the pods in a paper bag and gently crushing them with my hands. The seeds will naturally separate from the chaff. Sift through the contents to remove any remaining plant debris or empty pods.
Store the clean seeds in an airtight container, such as a small glass jar or resealable plastic bag. Add a packet of silica gel or a few drops of mineral oil to absorb any residual moisture. Label the container with the clematis variety and the harvest date. Store in a cool, dark place like a pantry or refrigerator to maintain viability for up to 2 years.
🌱 Step 4: Prepare for Planting Next Season
When you're ready to plant, soak the seeds in lukewarm water for 24 hours before sowing. This softens the seed coat and encourages faster germination. Plant the seeds in a well-draining seed-starting mix at a depth of ¼ inch, keeping the soil consistently moist but not soggy.
Place the containers in a warm, bright location with a grow light if natural light is insufficient. Germination typically occurs within 2-4 weeks, though some varieties may take longer. Once seedlings emerge, provide bright, indirect light and gradually introduce them to outdoor conditions before transplanting.
Tips & tricks for perfectly preserved clematis seed heads
Here's what I've learned after years of perfecting this method—small details make all the difference!
Timing is Everything: Harvest clematis seed heads immediately after they turn completely brown and begin splitting—don't wait until they fall to the ground. The 24-hour soaking before planting is non-negotiable for breaking seed dormancy, but if you forget, don't worry—most seeds will still germinate, just more slowly. The key is consistency in both drying and storage conditions.
Drying Strategy: In Step 2, when arranging seed heads on a mesh screen, space them out so airflow circulates freely between each one. I've found that using a small fan on low setting in humid climates cuts drying time from 4 weeks to just 2-3 weeks—just keep it at least 2 feet away to avoid overheating. The 65-75°F temperature range is ideal because it prevents mold while allowing even moisture evaporation.
Storage Wisdom: For long-term viability, I double up on moisture protection by storing seeds in a glass jar with both silica gel packets AND a few drops of mineral oil. The oil creates a moisture barrier while the silica absorbs any residual humidity. Labeling containers with the variety and harvest date is a game-changer when you're planting multiple types—trust me, you'll forget otherwise!
Planting Prep: When you're ready to plant, use room-temperature water for soaking—not boiling or ice cold. The 24-hour soak should feel like a warm bath for the seeds, around 70-75°F. I like to place the seeds in a small jar with a loose lid so they can "breathe" during soaking, which prevents mold growth while they soften.
Pro Tips for Clematis Seed Heads
- Here's what I've learned after years of perfecting this method—small details make all the difference!
- Timing is Everything: Harvest clematis seed heads immediately after they turn completely brown and begin splitting—do...
- Drying Strategy: In Step 2, when arranging seed heads on a mesh screen, space them out so airflow circulates freely b...
Frequently asked questions
Got questions about preserving clematis seed heads? You’re not alone! Here are some of the most common queries—and their answers—to help you master the process like a pro.
When is the best time to harvest clematis seed heads?
Harvest seed heads in late fall or early winter (after the first frost but before heavy snow). This ensures seeds are fully mature but haven’t dried out or fallen to the ground. Aim for November to December in most climates for optimal viability.
How long can I store dried clematis seeds before planting?
Properly dried and stored seeds (in a cool, dark, and dry place) can stay viable for 1–3 years. Use airtight containers with silica gel packets to prevent moisture damage. Test germination annually if storing long-term!
Can I use seed heads from any clematis variety?
Not all clematis produce viable seeds—herbaceous clematis (Group 3) are the best candidates. Large-flowered hybrids (Groups 1–2) often yield sterile seed heads. Check your plant’s type first to avoid disappointment!
Why are my stored seeds not germinating?
Common culprits: moisture exposure, improper drying, or old seeds. Try stratification (mimicking winter cold) for 4–6 weeks in a damp paper towel in the fridge. If seeds are past their prime, collect fresh heads next season!
What’s an alternative if my clematis isn’t producing seed heads?
If your plant skips seed production, try hand-pollination with a soft brush or propagate via stem cuttings instead. Some clematis varieties (like ‘Jackmanii’) focus energy on foliage—prioritize healthy growth first!
Wrapping up and next steps
Clematis seed heads are a gardener’s hidden treasure—packed with potential for stunning blooms year after year! By drying and storing them properly, you’re not just preserving nature’s artistry; you’re unlocking a low-cost, rewarding way to expand your garden’s beauty.
Whether you’re a seasoned green thumb or just starting your gardening journey, these simple steps make it easy to harvest, dry, and store seeds with confidence.
Ready to turn those fluffy seed heads into next year’s showstoppers? Grab your supplies, follow the steps, and get growing! 🌱 Start small—try a few seed heads this season—and watch your garden transform with effortless elegance.