
Lawn
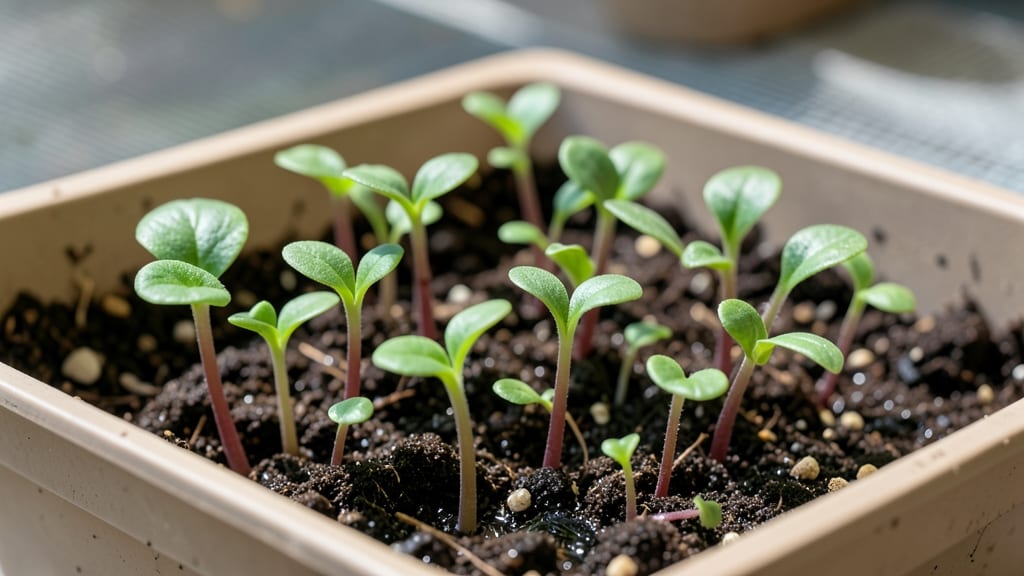
Speed-sprouting zinnia seeds in 5 days isn’t just possible—it’s a game-changer for vibrant summer blooms. 🌱 I’ve learned that the secret lies in mimicking the warm, moist conditions zinnias crave in their native habitats, and it starts with the right soil prep and a little patience.
Most gardeners wait weeks for sprouts, but with this method, you’ll see those first tiny green hooks breaking through the soil faster than you can say "summer garden." The magic happens in a warm, humid environment—think of it like a mini greenhouse for your seeds.
You’ll need a shallow tray, damp paper towels or a seed-starting mix, and a clear plastic lid or plastic wrap to trap moisture. Keep the temperature steady at 70-75°F (a sunny windowsill or seedling heat mat works perfectly), and watch as those seeds pop up in just a few days.
The key is consistency: too dry, and they’ll stall; too wet, and they’ll rot before they even begin. Once those first sprouts appear, you’ll want to keep them thriving until they’re ready for transplanting.
That means gentle watering (bottom-watering prevents damping-off), bright light (a grow light if natural light is weak), and a little space to breathe. In about 10-14 days, you’ll have sturdy seedlings with their first true leaves—ready to move into individual pots or straight into the garden. The best part?
You’ll have zero waste because every sprout is a potential bloom. This method works for zinnias in any climate, but the principles stay the same: warmth, moisture, and light.
Whether you’re a first-time gardener or a seasoned pro, these speed-sprouted zinnias will give you a head start on a showstopping summer garden. Let’s get those seeds growing!
📚 In This Guide
- What you need
- Instructions
- Tips and common mistakes
- Wrapping up and next steps
What you need
- ● Zinnia seeds: 1 packet (50-100 seeds) – Choose heirloom or organic for best results.
- ● Seed-starting tray: 1 (1020-cell or 72-cell) with drainage holes.
- ● Seed-starting mix: 1 bag (1-2 quarts) – Lightweight, sterile mix (e.g., Pro-Mix or coco coir).
- ● Spray bottle: 1 (8-16 oz) with a fine mist nozzle.
- ○ Clear plastic dome or plastic wrap: 1 – For humidity (optional but recommended).
- ● Grow lights or sunny windowsill: 1 – LED grow lights (12-16 hrs/day) or a south-facing window (6+ hrs sunlight).
- ● Tweezers or pencil: 1 – For gently pressing seeds into soil.
- ● Small hand trowel: 1 – For transplanting (if moving to pots later).
- ● Labels & markers: 1 set – Track varieties and planting dates!
- ○ Fertilizer (optional): 1 small bottle – Fish emulsion or seaweed extract (diluted to half-strength).
- ○ Compostable pots (optional): 2-4 – For zero-waste transplanting (e.g., egg cartons or biodegradable peat pots).
- ● 🌡️ Warmth matters: Keep seeds in a spot 70-75°F (21-24°C)—a sunny windowsill or seedling heat mat helps!
- ● ✨ Zero-waste hack: Skip plastic trays! Use compostable egg cartons or mushroom packaging instead.
- ● 💧 Moisture control: Mist soil daily—not soggy, not dry—zinnias love consistent dampness.
How to speed-sprout zinnia seeds in 5 days
Here’s my foolproof method for getting zinnia seeds to pop in record time—no fancy gear needed.
🌱 Step 1: Prep Seeds for Faster Germination
Zinnia seeds have a tough outer shell that slows things down. To speed them up, soak them in a bowl of lukewarm water for 12 hours before planting. I like to use a small glass jar with a lid so I don’t forget about them. This softens the shell and gets the seeds ready to sprout faster.
After soaking, drain the seeds and let them sit on a paper towel for 30 minutes to dry slightly. This prevents them from sticking together when you plant. You’ll know they’re ready when they feel slightly damp but not wet—like a wrung-out sponge. Plant them within 24 hours for best results.
💧 Step 2: Plant in Warm, Moist Soil
Fill your seed-starting tray with a light, well-draining mix (I use a blend of potting soil and perlite). Press it down gently so it’s firm but not packed. Zinnia seeds need warmth to germinate, so place the tray on a seedling heat mat set to 75°F—this cuts germination time in half.
Sow seeds ¼ inch deep, spacing them ½ inch apart in rows. Mist the soil lightly with water until it’s evenly damp but not soggy. Cover the tray with plastic wrap to trap moisture, and place it in a warm, dark spot (like a cabinet). Check daily—you’ll see tiny sprouts in 3-5 days.
☀️ Step 3: Move to Light and Monitor Growth
Once the first true leaves appear (not the tiny seed leaves), remove the plastic wrap and move the tray to a bright spot with 6-8 hours of indirect light daily. If your space is dim, use a grow light 2-3 inches above the seedlings. Zinnias need light to stay sturdy—if they stretch toward the light, they’re leggy and weak.
Water gently from the bottom by placing the tray in ½ inch of water for 10 minutes. This keeps roots from sitting in soggy soil. You’ll know it’s time to water again when the top inch of soil feels dry to the touch. Avoid wetting the leaves to prevent fungal issues.
✂️ Step 4: Thin and Harvest Strategically
When seedlings have 2-3 sets of true leaves (about 2 weeks after sprouting), thin them to 2 inches apart to give roots room to grow. Use scissors to snip unwanted sprouts at soil level—this prevents disturbing the roots of the plants you’re keeping.
For zero-waste harvesting, start picking flowers when they’re half-open (usually 4-6 weeks after planting). Cut stems at a 45-degree angle just above a leaf node to encourage bushier growth. Deadhead spent blooms regularly to keep the plant producing new flowers all season.
Tips & tricks for speed-sprouting zinnia seeds
Between us, these little tricks will help you avoid the most common pitfalls while keeping your zinnias on track for that 5-day sprout window.
Soaking Secret: Don't skip the 12-hour soak—this is where the magic happens for breaking through that tough zinnia seed shell. I've seen seeds sprout in just 2 days when properly soaked, but if you forget about them, they'll still germinate within 24 hours of planting. Pro tip: Set a phone alarm labeled "Zinnia Soak Time" to avoid over-soaking, which can cause seeds to rot.
Heat Hack: That 75°F heat mat is non-negotiable for speed. If you don't have one, place your seed tray on top of your refrigerator (not inside) for consistent warmth. I've had great results using a heating pad on low under the tray too. Just monitor the soil—it should feel warm but not hot to the touch. The key is maintaining that consistent warmth during those critical first 3-5 days of germination.
Light Transition: When moving seedlings to light in Step 3, be patient—don't rush this transition. Start with just 2-3 hours of light the first day, then gradually increase to the full 6-8 hours over 2-3 days. Sudden bright light can shock young seedlings and cause them to bolt (grow too quickly). Think of it like sunbathing—you wouldn't go from zero to full sun exposure either!
Pro Tips for Zinnia Seed Sprouts
- Between us, these little tricks will help you avoid the most common pitfalls while keeping your zinnias on track for ...
- Soaking Secret: Don't skip the 12-hour soak—this is where the magic happens for breaking through that tough zinnia se...
- Heat Hack: That 75°F heat mat is non-negotiable for speed. If you don't have one, place your seed tray on top of your...
Frequently asked questions
Got questions about speed-sprouting zinnia seeds?
You’re not alone! Here are answers to the most common queries—from timing to troubleshooting—to help you grow vibrant blooms in just five days with zero waste.
How do I know when zinnia seed sprouts are ready to harvest?
Zinnia sprouts are ready for a zero-waste harvest when they’ve developed 2-3 true leaves (not just the initial seed leaves). For speed-sprouting, this usually happens within 5-7 days under ideal conditions. Look for plump stems and bright green leaves—they’re your cue! Harvest by snipping just above the soil line with clean scissors.
Why aren’t my zinnia seeds sprouting within 5 days?
Slow sprouting often comes down to moisture, warmth, or light. Ensure your sprouting tray stays consistently damp (not soggy), maintain a warmth of 70-75°F, and provide indirect light (direct sun can overheat seeds). If using organic seeds, soak them for 4-6 hours first to kickstart germination. Patience is key—some varieties may take 7-10 days.
Can I reuse the sprouting tray or growing medium after harvesting zinnias?
With a zero-waste approach, rinse your sprouting tray thoroughly with hot, soapy water and sanitize it with a 10% vinegar solution to prevent mold or bacteria. For the growing medium (like coconut coir or hemp mats), compost it immediately—it’s nutrient-rich and breaks down quickly. Never reuse contaminated medium to avoid fungal growth.
Do zinnia sprouts need sunlight, or is artificial light okay?
Zinnia sprouts thrive with 12-16 hours of light daily, but artificial grow lights (LED or fluorescent) work perfectly for speed-sprouting. Place lights 2-4 inches above the tray to avoid overheating. If using natural light, avoid direct midday sun, which can dry out the medium. A sunny windowsill or grow tent with a timer is ideal!
What’s the best way to transition zinnia sprouts from tray to soil?
After harvesting, let your zinnias harden off for 1-2 hours in a shaded outdoor area (or under a fan indoors) to toughen their stems. Plant them in well-draining soil with 1 inch of spacing between sprouts. Water gently to avoid displacing them, and keep soil moist but not waterlogged. Mulch lightly to retain humidity—your zinnias will thank you with bold, colorful blooms!
Wrapping up and next steps
Growing zinnia seed sprouts in just five days isn’t just possible—it’s a rewarding, eco-friendly adventure that brings vibrant blooms to your garden with minimal waste! Whether you’re a seasoned gardener or a curious beginner, these fast-sprouting zinnias prove that big results come from small, intentional steps.
Now that you’re armed with the right techniques, why not turn your balcony, windowsill, or backyard into a burst of color?
Ready to dive deeper? Start with just one tray—experiment with different lighting or soil mixes, and watch your confidence (and zinnias!) grow. Happy sprouting! 🌱✨