
Planting
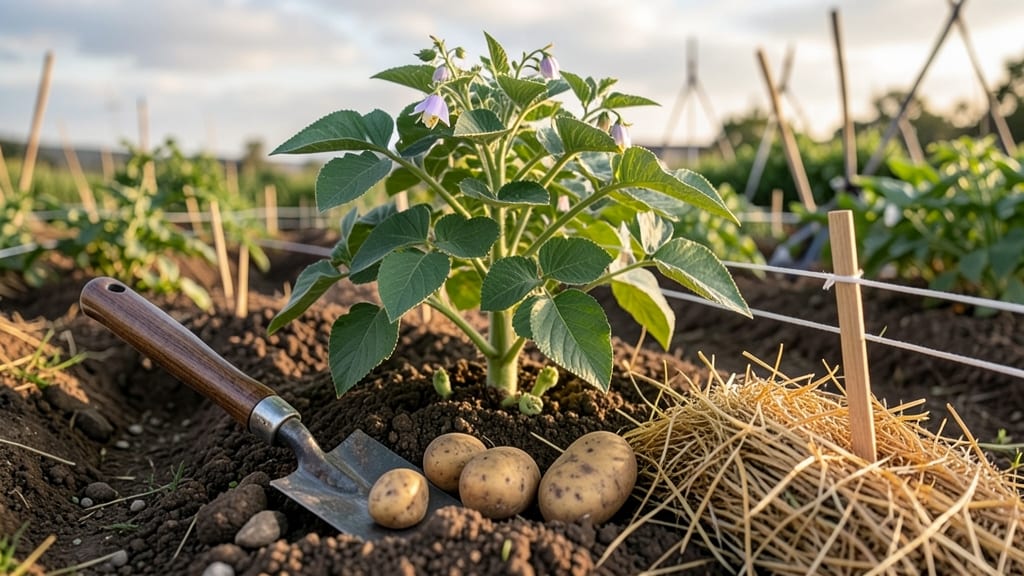
Planting seed potatoes in the ground transforms those chubby little tubers into a bumper crop of earthy, golden potatoes in just 90 days. 🌱 I’ve planted them every spring for years, and the secret isn’t complicated—it’s about timing, soil prep, and knowing which end goes up (yes, those "eyes" matter).
The first time I ignored the orientation, my potatoes barely sprouted, but once I got it right, my harvest tripled. You’ll need a sunny spot with loose, well-draining soil (think crumbly, not compact), and seed potatoes—not grocery store spuds.
Cut larger tubers into chunks with at least two eyes each, let them dry for a day, and plant them 4 inches deep, eyes facing up. Spacing them 12 inches apart in rows gives plants room to sprawl without competing.
After planting, mulch with straw or grass clippings to keep soil moist and suppress weeds. Water deeply once a week unless rain does the work—drought stress stunts growth. By early summer, you’ll see green foliage, and by harvest time, you’ll pull out pounds of potatoes from a single patch.
This method works for garden beds, raised beds, or even containers. The key? Start early, avoid overwatering, and resist the urge to dig too soon—new potatoes form near the surface, but the real harvest happens when the tops die back.
Patience pays off with a mountain of spuds ready for mashing, roasting, or storing.
📚 In This Guide
- What you need
- Instructions
- Tips and common mistakes
- Wrapping up and next steps
What you need
- ● Seed potatoes: 2–3 lbs (about 3–5 medium-sized potatoes per person, depending on yield goals). Choose certified disease-free seed potatoes (e.g., Yukon Gold, Red Pontiac, or Fingerlings).
- ● Garden soil: Well-draining, loose soil with a pH of 5.0–6.5. Amend with compost or aged manure if your soil is heavy or clay-like.
- ● Fertilizer: Balanced organic fertilizer (e.g., 10-10-10 or 5-5-5) or compost (1–2 cups per planting hole).
- ○ Optional: Potassium-rich fertilizer (like wood ash or greensand) for late-season growth.
- ● Garden tools: Trowel or hand fork for digging planting holes.
- ● Garden shovel for turning soil.
- ● Hoe for weeding and hilling.
- ● Mulch: Straw, grass clippings, or leaves (2–3 inches) to retain moisture and suppress weeds.
- ○ Planting container or raised bed (optional): If your soil is poor or you’re in a small space, use a 12-inch-deep container with drainage holes.
- ● Potato planting box or wire mesh cage (to contain tubers in small gardens).
- ● Row covers or frost cloth (for early planting in cold climates).
- ● Potato grow bags (if vertical gardening is your style!).
- ● Garden twine or stakes (to secure row covers if needed).
Step-by-step instructions for planting seed potatoes in the ground
Here's the foolproof method I use every spring to grow potatoes that fill my kitchen with homegrown abundance.
🌱 Step 1: Pre-Chit Your Seed Potatoes Indoors
Start by placing your seed potatoes in a bright, cool spot (around 50-55°F) for 4-6 weeks before planting. I set mine on a windowsill where they get morning sun but stay shaded from hot afternoon rays. You'll see sprouts (chits) emerge from the "eyes"—these are your future stems.
Once the chits reach about 1-2 inches long, they're ready for the ground. Don't rush this step—I've learned the hard way that planting too early leads to weak, rot-prone tubers. The chits give your potatoes a head start, especially in cooler climates where the growing season is short.
☀️ Step 2: Choose the Right Location and Prepare the Soil
Potatoes thrive in loose, well-draining soil with a pH between 5.0-6.5. Work in 2-3 inches of compost or well-rotted manure before planting to give your tubers plenty of nutrients. I always test my soil first—if it's heavy clay, I mix in a bucket of sand per 10 square feet to improve drainage.
Select a spot with full sun (6-8 hours daily) and good air circulation. Avoid planting where tomatoes, peppers, or potatoes grew last year to prevent disease buildup. The soil should be 55-65°F at planting time—wait for the last frost date in your area, then add 2 weeks to be safe.
🪴 Step 3: Plant the Chitted Potatoes Properly
Dig trenches 12 inches deep and 3 feet apart for rows. Place your seed potatoes in the trench with the chits facing up, about 12 inches apart within the row. Cover them with 2-3 inches of soil—enough to protect the sprouts but not bury them too deeply.
Here's the thing—I always mark my rows with stakes so I don't accidentally disturb them later. As the plants grow, gently mound soil around the stems (called "hilling") every 2-3 weeks until the soil reaches the top leaves. This prevents sunlight from turning tubers green and bitter, and encourages more spud production underground.
💧 Step 4: Water and Maintain Through the Growing Season
Keep the soil consistently moist but not soggy—1-1.5 inches of water per week is ideal. I water deeply in the morning so the foliage dries quickly, preventing disease. You'll know you're doing it right when the soil feels damp 2 inches down but not waterlogged.
Watch for signs of blight (brown spots on leaves) and remove affected plants immediately. I also rotate my potatoes every year to prevent soil-borne diseases. When the plants flower, I stop adding nitrogen-heavy fertilizers—too much greenery means fewer tubers. Instead, I switch to a low-nitrogen, high-phosphorus feed to boost tuber formation.
⏰ Step 5: Harvest at the Right Time for Perfect Potatoes
New potatoes are ready when the plants flower and you can see small tubers forming at the base of the stems. Dig a few to check—they should be golf-ball sized with smooth, unblemished skins. For full-sized potatoes, wait until the foliage yellows and dies back completely, about 90 days after planting.
Use a fork to gently loosen the soil around the plants, then pull them up carefully. Brush off excess dirt and cure the potatoes in a dark, 50-60°F spot for 1-2 weeks to toughen their skins. This makes them store better and keeps them from bruising when cooked. I always save the best ones for next year's planting!
Tips & tricks for perfect seed potato planting
These practical insights will help you avoid common pitfalls and maximize your potato harvest this season.
Pre-Chitting Precision: The 4-6 week indoor chitting period is non-negotiable for cool climates. I've found that placing potatoes on egg cartons with the "eyes" facing up creates perfect drainage while keeping them stable. If your sprouts grow unevenly (one side longer than 1-2 inches), gently twist the potato to encourage balanced growth. Uneven sprouts often lead to lopsided plants that produce fewer tubers.
Soil Temperature Secret: The 55-65°F soil temperature window is critical—below 55°F and growth stalls, above 65°F and you risk rot. I use a soil thermometer to verify conditions before planting. For cooler climates, consider using black plastic mulch to warm the soil by 5-10°F. This simple trick can shave weeks off your growing season by creating ideal conditions from day one.
Hilling Technique: When you mound soil every 2-3 weeks during Step 3, aim to create gentle slopes rather than steep piles. This gradual approach prevents stem breakage while encouraging tuber formation along the entire stem length. I use a hoe to create small ridges rather than piling soil directly—this gives the stems room to grow upward while still protecting the developing tubers from sunlight.
Watering Watch: The 1-1.5 inches of water per week guideline assumes average rainfall. In my experience, morning watering is crucial—it gives foliage time to dry completely before evening, which dramatically reduces blight risk. I test soil moisture by squeezing a handful: it should hold together slightly but not be dripping wet. Overwatering is the #1 cause of potato rot in my garden.
Pro Tips for Plant Seed Potatoes In The Ground
- These practical insights will help you avoid common pitfalls and maximize your potato harvest this season.
- Pre-Chitting Precision: The 4-6 week indoor chitting period is non-negotiable for cool climates. I've found that plac...
- Soil Temperature Secret: The 55-65°F soil temperature window is critical—below 55°F and growth stalls, above 65°F and...
Frequently asked questions
Got questions about planting seed potatoes? You’re not alone—growing these spuds is easy once you know the tricks! Here are answers to the most common queries to help you avoid pitfalls and grow a bountiful harvest.
When is the best time to plant seed potatoes?
Plant seed potatoes 2 to 3 weeks before your last expected frost date—typically March to April in most U.S. zones. They thrive in cooler soil (40–50°F) and need 90–120 days to mature. If your growing season is short, opt for early-maturing varieties like ‘Yukon Gold’ or ‘Red Pontiac.’
Can I plant seed potatoes in the fall or winter?
Nope! Seed potatoes won’t survive freezing temperatures—they need active soil to sprout. If you live in a warm climate, you can plant in late fall or early winter (like Florida or California), but most gardeners stick to spring planting. For colder regions, start them indoors in pots 4–6 weeks before the last frost.
How do I protect seed potatoes from pests and diseases?
Prevent issues by choosing disease-resistant varieties (e.g., ‘Kennebec’ or ‘Russet Burbank’) and rotating crops—don’t plant potatoes where tomatoes, peppers, or eggplants grew last year. For pests like colorado potato beetles, use row covers early in the season. Avoid overhead watering to prevent blight.
What if my seed potatoes only grow green or skinny?
Green potatoes = too much sunlight (toxic solanine builds up). Move them to partial shade or cover with mulch. Skinny sprouts? Your soil may be too cold or nutrient-poor. Try planting deeper (6–8 inches) or amending soil with compost. If sprouts rot, check for overwatering or poor drainage.
Can I plant store-bought potatoes instead of seed potatoes?
Technically yes, but it’s risky! Store-bought potatoes may carry diseases or have been treated to prevent sprouting. If you try it, chit them first (place in a bright, cool spot for 4–6 weeks) and inspect for rot. For best results, buy certified seed potatoes from a nursery—they’re disease-free and bred for growth.
Wrapping up and next steps
Planting seed potatoes is a rewarding way to grow your own delicious harvest—just follow these simple steps! With the right soil, spacing, and care, you’ll be enjoying homegrown potatoes in as little as 90 days.
Whether you’re a beginner or a seasoned gardener, this guide makes it easy to get started.
Now that you’re ready to plant, grab those seed potatoes and get digging! 🌱 Next, mark your calendar for harvest time and watch your garden transform into a spud-filled success. Happy planting!