
Lawn
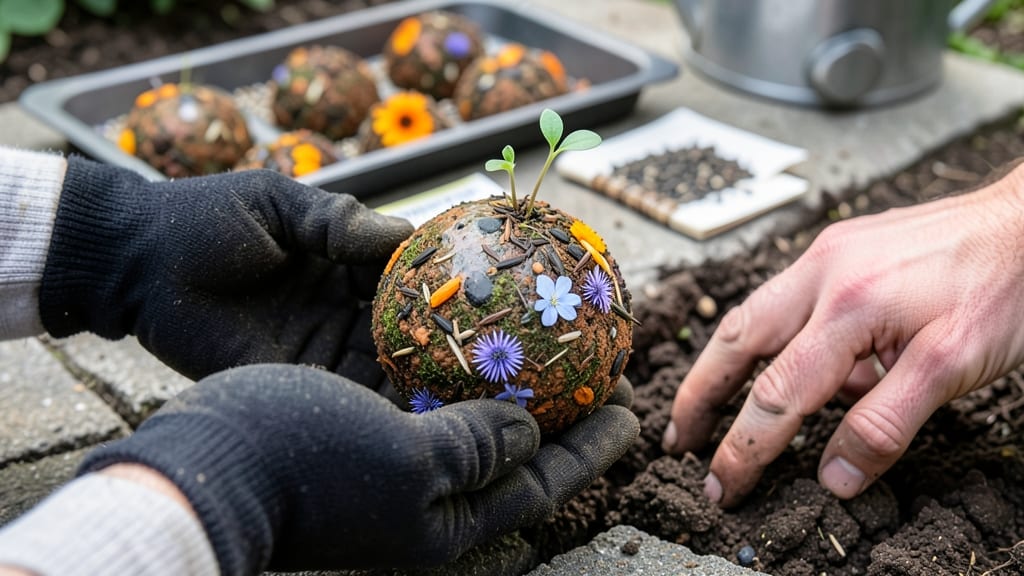
Creating modern sprout seed bombs turns gardening into a hands-on, eco-friendly project that fits in your pocket. 🌱 These soil-free planting kits let you grow flowers, herbs, or vegetables anywhere—even cracks in concrete—with just a toss and a little water.
My first batch sprouted within days, proving how simple and effective this method can be when you nail the clay-to-seed ratio.
The beauty of these seed bombs lies in their simplicity: just clay, compost, seeds, and a pinch of nutrients wrapped into a ball. Unlike traditional seed starting, you skip the pots and soil prep entirely.
Perfect for urban spaces, guerrilla gardening, or teaching kids about plant growth, they’re a foolproof way to bring life to neglected areas. The process takes less than 30 minutes, and the results are shockingly lush for such minimal effort.
Once planted, these seed bombs transform bare spots into vibrant patches of greenery with minimal care. Water them once, then let nature take over—rainfall often does the rest. You’ll see sprouts within 7-14 days, depending on the seeds, and the plants establish roots quickly in any soil type.
The best part? No digging, no mess, just pure, instant greening.
Whether you’re reviving a sidewalk, brightening a balcony, or teaching kids about sustainability, these seed bombs deliver instant gratification with long-term impact. The only downside? You might get hooked on making more than you plant. Let’s get started with the exact recipe that’s worked for me every season.
📚 In This Guide
- What you need
- Instructions
- Tips and common mistakes
- Wrapping up and next steps
What you need
- ● Seeds: Choose fast-growing, edible sprouts like alfalfa, radish, clover, or sunflower (1–2 tbsp per batch). Opt for organic, non-GMO seeds for best results.
- ● Clay: Air-dry clay (1 cup) – the binder that holds everything together. Look for natural, non-toxic clay.
- ● Compost: Well-aged, nutrient-rich compost (½ cup). Avoid fresh manure or compost with large chunks.
- ● Water: Distilled or dechlorinated water (¼ cup) to mix everything into a dough-like consistency.
- ● Mixing bowl: Medium-sized (8–10 inches in diameter) for combining ingredients.
- ● Wooden spoon or hands: For stirring—get messy and have fun!
- ○ Cookie cutters or molds: Optional! Use heart, star, or circle shapes (3–4 inches wide) for creative seed bombs.
- ● Plastic wrap or parchment paper: To prevent sticking while drying.
- ● Drying rack or tray: A wire rack or flat surface to air-dry bombs for 24–48 hours.
- ● Labeling tags: Tiny sticks or biodegradable labels to mark seed types (e.g., "Radish Sprouts").
- ○ Gloves (optional): If you’re sensitive to clay dust or compost.
Step-by-Step instructions for crafting modern sprout seed bombs
These eco-friendly planting kits grow fast, require no soil, and bring instant greenery to any space.
🌱 Step 1: Gather and Prepare Your Materials
You'll need 4 tablespoons of organic clay, 2 tablespoons of compost, 1 tablespoon of diatomaceous earth, 1 tablespoon of alfalfa or clover seeds, and a small bowl for mixing. The clay acts as the binding agent, while the compost provides essential nutrients for the sprouts. I like to use a ceramic or glass bowl because it's non-porous and easy to clean—plastic can absorb moisture and alter the mixture's consistency.
Measure everything precisely. Too much clay makes the bombs too hard, and too little compost weakens the nutrient profile. Place all ingredients in the bowl and mix thoroughly with your hands until the texture resembles damp sand. It should hold together when squeezed but still crumble slightly. If it feels too dry, add a few drops of water; if too sticky, sprinkle in a pinch more clay.
💧 Step 2: Form the Seed Bombs
Wet your hands slightly to prevent the mixture from sticking. Roll 4 equal portions into 1-inch diameter balls, keeping them firm but not compacted. The size matters—too small and they'll dissolve too quickly; too large and the center may not sprout properly. Place each bomb on a parchment-lined tray to dry for 24 hours in a shady, well-ventilated area. Avoid direct sunlight during this phase, as it can cause uneven drying and cracking.
While drying, test one bomb by squeezing it gently. If it crumbles easily, it's ready. If it holds its shape too firmly, let it dry another hour. Once fully dried, store them in a paper bag or airtight container in a cool, dry place until use. They'll keep for up to 6 months, though germination rates improve when planted sooner.
☀️ Step 3: Plant and Water for Germination
Find a moist, shaded area—think garden beds, cracks in pavement, or even a hanging planter. Press each bomb ½ inch deep into the soil or surface. Water gently but thoroughly, ensuring the area stays consistently moist for the first 7-10 days. You'll see tiny sprouts emerge within 3-5 days if conditions are ideal. The key here is patience—don't water again until the top inch of soil feels dry to the touch, or you risk suffocating the delicate shoots.
For best results, plant in partial shade during the first 2 weeks, then gradually introduce 4-6 hours of morning sun as the sprouts mature. If planting in urban environments, avoid areas with heavy foot traffic or pesticide use. Once established, these seed bombs will self-seed and create lush, low-maintenance ground cover. Watch for first true leaves—they’ll appear bright green and slightly fuzzy, signaling healthy growth.
🌿 Step 4: Maintain and Encourage Growth
After the initial 2-week establishment period, reduce watering to once every 5-7 days, unless your climate is extremely dry or hot. The sprouts will thrive with moderate moisture—think of a wrung-out sponge. Avoid overhead watering, which can spread disease. Instead, water at the base with a gentle stream from a watering can or hose nozzle. You'll notice the plants develop a taller, bushier structure within 3-4 weeks, indicating they're ready for their next growth phase.
If you're growing edible sprouts like clover or alfalfa, harvest by snipping the top 2 inches when leaves reach 3-4 inches tall. This encourages bushier growth and prevents bolting. For ornamental use, let them flower—they'll attract pollinators and add vibrant color to your space. Real talk: these seed bombs are low-maintenance, but consistent moisture is the only non-negotiable. Skip that, and you’ll see wilting or stunted growth.
Tips & tricks for perfect sprout seed bombs
Here's what I learned the hard way after experimenting with these eco-friendly planting kits—these tricks will help you avoid common pitfalls and get the best results.
Mixing Consistency: When combining the 4 tablespoons of organic clay, 2 tablespoons of compost, and 1 tablespoon of diatomaceous earth, aim for a texture that resembles damp sand. It should hold together when squeezed but still crumble slightly—this ensures proper moisture retention and seed release. If your mixture feels too dry, add just a few drops of water; if too sticky, sprinkle in a pinch more clay. This balance is crucial for the 24-hour drying process in Step 2, where uneven consistency can lead to cracking or crumbling.
Size Matters: The 1-inch diameter for each seed bomb is intentional—too small and they'll dissolve too quickly, releasing seeds prematurely; too large and the center may not sprout properly. Use a ruler or measuring tape to ensure uniformity. For the 4 equal portions, divide the mixture by weight if possible, as visual estimates can vary. This precision ensures consistent germination across all bombs.
Drying Strategy: The 24-hour drying period in Step 2 is critical, but environmental factors can affect it. If your space is particularly humid, extend drying to 36 hours to prevent mold. Test one bomb by squeezing it gently—if it crumbles easily, it's ready. If it holds its shape too firmly, let it dry another hour. Store dried bombs in a paper bag (not plastic) to allow moisture to escape, preserving their integrity for up to 6 months.
Planting Depth: Press each bomb ½ inch deep into the soil or surface—this depth ensures seeds stay protected while allowing moisture to reach them. In urban environments, consider planting in cracks in pavement or hanging planters where soil isn't available. The 7-10 days of consistent moisture in Step 3 is non-negotiable; use a spray bottle for gentle watering if rainfall isn't reliable. Watch for the first true leaves—bright green and slightly fuzzy—as your cue for healthy growth.
Pro Tips for Modern Sprout Seed Bomb
- Here's what I learned the hard way after experimenting with these eco-friendly planting kits—these tricks will help y...
- Mixing Consistency: When combining the 4 tablespoons of organic clay, 2 tablespoons of compost, and 1 tablespoon of d...
- Size Matters: The 1-inch diameter for each seed bomb is intentional—too small and they'll dissolve too quickly, relea...
Frequently asked questions
Got questions about modern sprout seed bombs? You’re not alone! Here’s what people ask most often—and how to tackle them like a pro.
What’s the best time of year to plant seed bombs?
Seed bombs thrive in spring or early fall when temperatures are mild (50–75°F). Avoid extreme heat or frost—they need moisture to activate! If you’re in a warm climate, plant after rain or in shaded spots to retain moisture. Pro tip: Test soil moisture first—stick your finger in 1 inch deep; if dry, water before planting.
How long until I see sprouts?
Most seed bombs sprout in 7–21 days, depending on the seeds and conditions. Fast growers like clover or microgreens may pop up in a week, while slower seeds (e.g., sunflowers) take 2–3 weeks. Keep soil moist but not soggy—consistency is key! If nothing emerges after 3 weeks, check for pests or overwatering.
Can I make seed bombs without clay?
Swap clay for alternative binders like:
- Coconut coir (biodegradable, holds moisture)
- Compost (rich in nutrients, but may crumble)
- Bentonite powder (lightweight, great for travel)
Why did my seed bomb turn into a bug buffet?
Pests love seed bombs! To deter them:
- Use organic neem oil or garlic spray on soil.
- Plant in shady or hard-to-reach spots (e.g., under trees).
- Add chili powder (1 tsp per bomb) as a natural repellent.
Are seed bombs safe for urban environments?
Yes! Seed bombs are non-invasive when made with native or non-aggressive seeds (e.g., clover, wildflowers). Avoid planting near sidewalks or driveways—roots can crack concrete. For cities, opt for edible sprouts (like alfalfa or radish) or pollinator-friendly mixes. Always check local regulations—some areas restrict planting near water sources.
Wrapping up and next steps
Modern sprout seed bombs are more than just a fun gardening trend—they’re a simple, sustainable way to grow fresh, nutrient-packed greens without soil or space constraints.
Whether you’re a busy urban gardener or an eco-conscious beginner, these seed bombs make it easy to cultivate vibrant sprouts in minutes. Why not start small? Try making a batch this weekend and watch your kitchen or balcony transform into a mini green oasis! 🌱
Ready to take the next step? Experiment with flavors—swap seeds, adjust ratios, or even create seed bombs for herbs like basil or cilantro. Share your sprouts with friends or donate extras to local food banks. Every seed you plant is a tiny victory for the planet! 🌍✨