
Size
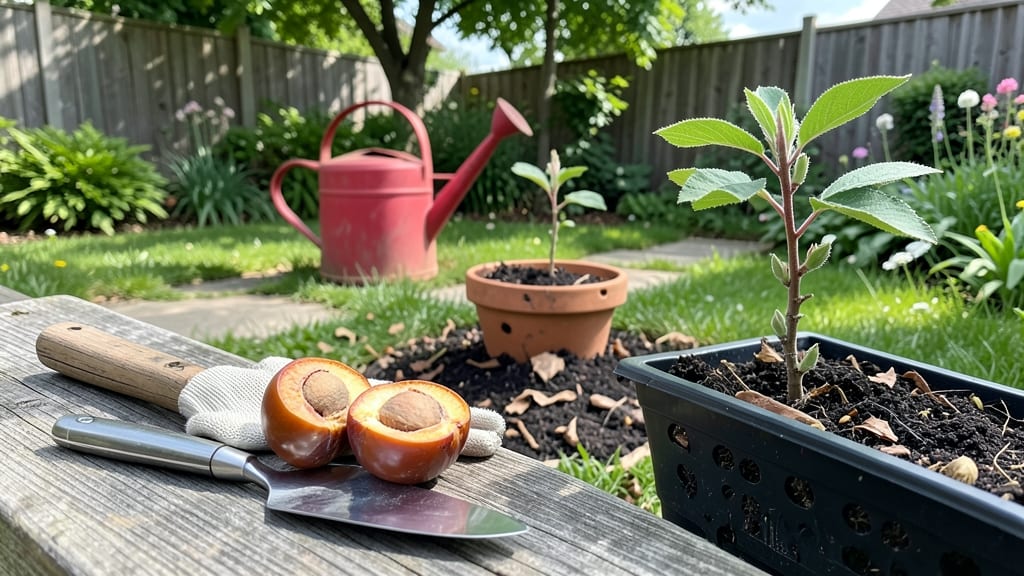
Growing a peach tree from a seed in your garden feels like magic—except it’s science you can do in your kitchen. 🌱 I’ve turned grocery-store peach pits into sturdy saplings, and the process is simpler than most people think, though it takes patience.
The first step is breaking dormancy, which turns a hard pit into a seed ready to sprout.
You’ll need just a few supplies: fresh peach pits (no store-bought ones—they’re often treated), a damp paper towel, a small pot, and well-draining soil. The trick is soaking the pits for 24 hours before planting, then keeping them warm and moist until germination.
Most seeds sprout in 2-4 weeks, but some take months—don’t give up!
Once sprouted, your seedling will need bright light (at least 6 hours daily) and consistent moisture, but avoid soggy soil. After a year, it’ll be ready to transplant outdoors, though fruit won’t appear for 5-7 years.
The trees may not bear the same fruit as the parent, but they’re hardy and beautiful.
Common mistakes? Overwatering or planting too deep. Pests like aphids can be an issue, but a strong spray of water usually clears them. If you’re patient, you’ll end up with a tree that’s more about the journey than the harvest—though you might get lucky with a few peaches!
📚 In This Guide
- What you need
- Instructions
- Tips and common mistakes
- Wrapping up and next steps
What you need
- ● Peach pits: 2–3 fresh, organic peach pits (avoid store-bought pits treated with fungicides). Pro tip: 💡 Save pits from ripe, homegrown peaches for the best germination rates!
- ○ Small pots or containers: 3–4 biodegradable pots (3–4 inches wide) or a seed-starting tray with individual cells. Optional: Use plastic cups with drainage holes if pots aren’t available.
- ● Potting mix: A well-draining seed-starting mix (sterile and lightweight). Avoid garden soil—it can harbor diseases!
- ● Plastic wrap or humidity dome: To create a mini greenhouse effect and retain moisture.
- ● Spray bottle: For gentle watering (avoid over-saturating the soil).
- ● Grow lights or sunny windowsill: A south-facing window or a 12–16 hour daily light source (LED grow lights work great).
- ○ Fertilizer (optional): A balanced, water-soluble fertilizer (5-5-5 or 10-10-10) for transplanting.
- ● Patience: Peach seeds can take 4–6 weeks (or longer!) to germinate. Be ready for a slow start!
- ● Climate check: Peach trees thrive in USDA Zones 5–9. If you’re in a colder zone, plan to grow the seedling indoors first.
- ● Space for maturity: A peach tree can grow 15–25 feet tall. Ensure you have room for it to flourish (or plan for pruning!).
- ○ Cold stratification (optional but helpful):
Step-by-step instructions for germinating peach seeds
Here's how to turn a single peach pit into a thriving young tree—no fancy tools needed.
🌱 Step 1: Extract and Prepare the Seeds
Start with fresh, organic peaches—store-bought seeds often won’t germinate. Cut the pit open lengthwise with a sharp knife, then scoop out the seed inside. You’ll see two halves; use both if possible. Remove any remaining fruit flesh, as it can attract mold. Rinse the seeds under cool water to clean them thoroughly, then let them dry on a paper towel overnight.
This drying step prevents rot during stratification. If you’re impatient, skip to cold treatment—but I’ve found the extra day ensures stronger germination. Store the dry seeds in a sealed container until you’re ready for the next step.
🥶 Step 2: Stratify for 3 Months
Peach seeds need a winter-like chill to break dormancy. Place them in a plastic bag with a damp paper towel—just enough moisture to keep it slightly damp, not soggy. Seal the bag and refrigerate for 90-120 days. Check monthly: if the towel dries out, add a few drops of water and reseal.
This mimics nature’s timing. Without stratification, seeds may sprout weak or not at all. I label my bags with the date—real talk, I’ve forgotten and replanted twice. The cold period also helps prevent the seed’s natural defense mechanisms from blocking growth.
☀️ Step 3: Plant After Stratification
After cold treatment, plant each seed 1 inch deep in a 4-inch pot filled with sterile potting mix. Use a pencil to make a small hole—don’t press too hard, or you’ll compact the soil. Place two seeds per pot in case one fails to sprout. Water gently until the soil feels damp 1 inch below the surface.
Keep the pot in a warm, bright spot (65-75°F) but out of direct sunlight. A sunny windowsill can overheat the soil. If condensation forms on the pot’s sides, that’s perfect—it means moisture levels are just right. Germination can take 2-6 weeks, so patience is key.
🌿 Step 4: Transplant and Harden Off
Once seedlings show 3-4 true leaves (not the first tiny cotyledons), transplant them into 6-inch pots with fresh potting mix. Handle the roots gently—peach seedlings are delicate. Water thoroughly after transplanting, then place the pots in partial shade for a week to recover.
After that, gradually introduce them to morning sun only, increasing exposure by 1 hour daily. By the time they’re 6 inches tall, they should handle 4-6 hours of direct sun. This slow transition prevents leaf scorch. I’ve seen seedlings crisp up overnight when rushed—don’t make that mistake.
🪴 Step 5: Move Outdoors Permanently
When nights stay above 50°F and no frost is forecasted, plant your seedlings in the ground or 1-gallon containers. Choose a spot with full sun and well-draining soil. Dig a hole twice as wide as the root ball but no deeper—peach trees hate having their roots buried too deep.
Water deeply after planting to settle the soil around the roots. Mulch with 2 inches of organic matter (like shredded leaves) to retain moisture and regulate soil temperature. Avoid overwatering—peach seedlings are prone to root rot if the soil stays soggy. You’ll know you’ve done it right when new leaves appear within 2 weeks.
Tips & tricks for growing peach trees from seeds
Transforming a simple peach pit into a thriving tree is easier when you know these game-changing strategies.
Seed Selection Matters: Not all peach pits are created equal—choose seeds from ripe, organic peaches that have been grown in your region. The genetic memory of local varieties often translates to better adaptation. I've found that heirloom peaches produce stronger seedlings than grocery store varieties. Store-bought seeds often fail because they're treated with fungicides that inhibit germination.
Stratification Success: The 90-120 day cold treatment is non-negotiable for peach seeds. I've learned the hard way that skipping this step results in weak, spindly seedlings that rarely survive beyond the first year. Place your sealed bag on a refrigerator shelf—not the crisper drawer—where temperatures stay consistently between 35-40°F. This mimics natural winter conditions perfectly. Check your seeds monthly by gently squeezing the towel—it should feel like a wrung-out sponge, not a damp rag.
Transplanting Technique: When moving your seedlings to larger pots in Step 4, use the "root ball method" to minimize stress. Gently squeeze the sides of the small pot while sliding the seedling out—never pull by the stem. This preserves the delicate root structure. After transplanting, water thoroughly until you see moisture emerge from the drainage holes. The first week after transplanting is critical; place your pots in indirect light and mist the leaves daily to maintain humidity levels.
Sunlight Transition: That gradual 1-hour daily increase in sunlight exposure is your secret weapon against transplant shock. I've seen seedlings go from vibrant green to crispy brown overnight when moved too quickly. Start with just morning sun, then gradually add afternoon exposure over 10-14 days. By the time your seedlings reach 6 inches, they should be able to handle 4-6 hours of direct sun without wilting. A simple shade cloth can help during this adjustment period if your windowsill gets too intense.
Pro Tips for Peach Seed Grow A Garden
- Transforming a simple peach pit into a thriving tree is easier when you know these game-changing strategies.
- Seed Selection Matters: Not all peach pits are created equal—choose seeds from ripe, organic peaches that have been g...
- Stratification Success: The 90-120 day cold treatment is non-negotiable for peach seeds. I've learned the hard way th...
Frequently asked questions
Got questions about growing a peach tree from seed?
You’re not alone! Here are answers to the most common queries to help you navigate from pit to plant with confidence.
Can you grow a true-to-parent peach tree from a seed?
Unfortunately, no! Peach seeds are not true to the parent tree—meaning the fruit may differ in taste, size, or even ripening time. For consistent results, graft a known variety onto your seedling later. Think of this as a fun experiment rather than a guaranteed heirloom harvest!
How long does it take for a peach seed to sprout?
Patience is key! Peach seeds can take 4–12 weeks to sprout, depending on temperature and moisture. Keep them in a warm, damp environment (like a paper towel or potting mix) and check weekly. Cold stratification (refrigerating for 3–4 months) can speed up germination for some varieties.
What’s the best temperature for germinating peach seeds?
Ideal germination temps are 70–85°F (21–29°C). If your home is cooler, use a seedling heat mat or place them near a sunny window. Avoid extreme heat or cold—both can stall or kill the sprouting process. A mini greenhouse or clear plastic wrap over the pot helps retain warmth and humidity.
How big should my seedling be before transplanting outdoors?
Wait until your seedling has 3–5 true leaves and is at least 6–12 inches tall before moving it outside. Harden it off gradually (acclimate to outdoor conditions over 7–10 days) to prevent shock. Choose a sunny spot with well-draining soil—peach trees hate soggy roots!
Why isn’t my peach seed sprouting? Troubleshooting tips.
Try these fixes if your seed sits stubbornly dormant:
- Check moisture: Keep the soil or towel damp (not soggy). Dryness is the #1 killer of germinating seeds.
- Test viability: Soak the seed in water for 24 hours—if it sinks, it’s alive! If it floats, it’s likely dead.
- Adjust warmth: Move to a warmer spot (like near a heater vent) or use a seedling heat mat.
- Scratch the seed: Gently file the hard outer shell with sandpaper to help water penetrate.
Wrapping up and next steps
Growing a peach tree from seed is a rewarding journey that connects you to nature’s sweetest surprises—literally! While patience is key (those juicy peaches won’t appear overnight), every step—from scarification to transplanting—builds your green thumb and nurtures a lasting bond with your garden. 🌱✨
Now that you’re armed with knowledge, take the first bite—literally! Grab a fresh peach, save the seed, and start your own tree today. Who knows? In just a few years, you might be sharing homegrown peaches with neighbors (or sneaking extra slices for yourself). Happy planting!