
Lawn
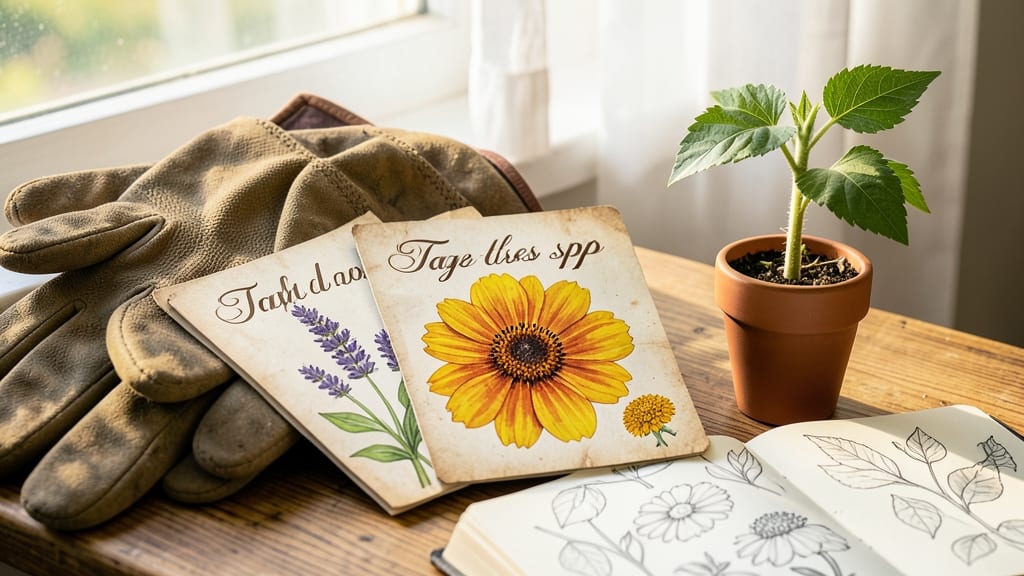
Transforming last year's seed packets into garden art is the most satisfying way to plan your spring planting. 🌱 I used to toss them after planting, but now they become the foundation for my garden's aesthetic—color-coded, themed, and displayed with pride.
These little paper treasures hold more than just planting instructions; they're the story of what you'll grow and how it will look together.
You don't need fancy supplies—just a few basic tools like scissors, glue sticks, and some decorative elements like twine, washi tape, or even frames. I love creating seed packet wreaths for my front door or framing my favorite varieties to hang above my workbench.
The process takes less than 30 minutes and turns something disposable into something meaningful that inspires your garden design.
Imagine walking through your garden and seeing vibrant blooms that match the colors on your seed packet art—it creates a magical connection between planning and reality. You'll find yourself referencing those labels all season long, from planting dates to companion planting ideas.
The best part? You can adapt this for any garden style, from cottage charm to modern minimalism.
This project works year-round: use old packets to plan next season's garden or create seasonal decor that celebrates what you're growing now. It's a creative way to keep your gardening journal alive and make every planting season feel special. Let's get those packets out and start creating!
📚 In This Guide
- What you need
- Instructions
- Tips and common mistakes
- Wrapping up and next steps
What you need
- ● Seed packets: 5–10 (mix of colors, sizes, and textures for variety—think heirloom, vintage, or even blank kraft paper packets).
- ● Mod Podge (matte or glossy): 1 small bottle (for sealing and adding shine).
- ● Acrylic paint: Small bottles in 2–3 colors (e.g., metallic gold, deep green, or pastel hues).
- ● Paintbrushes: 2–3 sizes (fine tip for details, medium for larger areas).
- ● Scissors or craft knife: For trimming and cutting intricate shapes.
- ● Glue (e.g., E6000 or hot glue gun): To attach embellishments.
- ○ Embellishments (optional but fun!): Lace, doilies, or fabric scraps
- ● Buttons, beads, or sequins
- ● Pressed flowers or dried botanicals
- ● Washi tape or decorative paper strips
- ● Pencil & eraser: For sketching designs before painting.
- ● Palettes or disposable plates: For mixing paint colors.
- ● Ruler or stencils: For crisp lines and geometric patterns.
- ● Clear sealant spray: 1 can (to protect your artwork from weather).
- ● Stapler or tape: To attach finished art to stakes or frames.
- ● Wooden dowels or bamboo skewers: For hanging labels in the garden.
Step-by-Step instructions for creating whimsical seed packet art
Turn ordinary seed packets into charming garden markers with these creative, easy steps.
🎨 Step 1: Gather Your Art Supplies
Start by collecting the materials you’ll use to transform seed packets into art. You’ll need seed packets themselves, along with water-based markers, paint pens, or fine-tip paintbrushes for detailing. If you want texture or durability, grab mod podge, clear sealant spray, or laminating sheets to protect your designs from weather. I like to use cardstock or thick paper for extra sturdiness if the seed packets feel flimsy.
Don’t overlook stickers, washi tape, or decorative paper for added flair—these can elevate simple designs into something truly unique. If you’re feeling bold, glitter glue or metallic markers add a touch of sparkle that catches the eye in the garden. Keep your workspace clean and organized; you’ll be making multiple packets, and a clutter-free area helps creativity flow.
✂️ Step 2: Design Your Garden Labels
Sketch your ideas lightly on the seed packets with a pencil first—this lets you experiment without committing to permanent lines. Think about the theme: whimsical, botanical, or playful? I often draw tiny flowers, leaves, or even cartoon characters to match the plant’s name. For example, a packet of sunflowers might get a cheerful sun with smiling petals, while basil could feature a tiny chef’s hat.
Use light pencil guidelines to keep proportions even, especially if you’re adding multiple elements. If you’re not confident in freehand drawing, print out stencils or use transfer paper to trace designs. The key is to keep it simple—seed packets are small, so intricate details can be tricky. Leave space at the top for the plant’s name and a small icon or doodle to represent it.
🖍️ Step 3: Bring Your Designs to Life
Once your pencil sketches are ready, start coloring with water-based markers or paint pens. Work in layers, letting each color dry slightly before adding details. For example, fill in larger shapes like flowers or leaves first, then add finer lines or shading. If you’re using mod podge, apply a thin layer to seal the design before adding more colors—this prevents bleeding and gives a glossy finish.
Don’t forget to write the plant’s name clearly at the top. Use a fine-tip black marker for readability, and consider adding a small icon or symbol next to it. If you’re using glitter or metallic accents, apply them last so they don’t smudge. Let everything dry completely before moving to the next step—rushing can lead to smudges or uneven colors.
🪴 Step 4: Seal and Protect Your Art
To ensure your seed packet art lasts through seasons, seal it with clear sealant spray or mod podge. Hold the packet a few inches away and apply an even coat, letting it dry completely before flipping it over. If you’re using laminating sheets, trim them to size and press the packet between two sheets to create a sturdy, weather-resistant label. For extra durability, consider coating the back with clear tape to prevent moisture damage.
Once sealed, your art is ready for the garden! Insert the labeled packets into the soil at planting time or use them as markers for established plants. The contrast of vibrant art against green foliage makes the garden feel like a curated space. If you’re worried about fading, store extras in a dry place—sunlight can dull colors over time, but sealed packets hold up surprisingly well.
⏰ Step 5: Display and Enjoy Your Creative Garden
Plant your seeds or place your labeled packets in the garden where they’ll be most visible. I like to group them by theme—whimsical packets together, botanical designs near their matching plants, or playful ones in a family garden corner. Take photos of your labeled garden to track growth and share your creative process with fellow gardeners.
If you run out of seed packets, repurpose old book pages, scrapbook paper, or even recycled cereal boxes for a unique look. The key is to have fun and let your personality shine through each design. Your garden will thank you with a burst of creativity that’s as delightful as the plants themselves!
Tips & tricks for perfect seed packet art
Here's what nobody tells you about making your seed packet art truly stand out—without the frustration.
Design for Durability: When sketching in Step 2, avoid placing intricate designs near the edges of seed packets. The corners tend to wear first from handling, so keep your artwork centered. I also recommend using a pencil with a fine tip—it gives you more control over small details and prevents smudging when you start coloring. This simple habit saves you from redrawing entire packets later.
Layering Secrets: In Step 3, when using water-based markers, work from lightest to darkest colors. This prevents dark colors from bleeding into lighter areas as they dry. For example, start with white or pale yellow, then move to greens and finally deep reds or blues. If you accidentally smudge, let it dry completely before gently rubbing with a cotton swab dipped in a tiny bit of rubbing alcohol—it lifts marker without damaging the paper.
Sealing Strategy: For Step 4, if you're using clear sealant spray, work in a well-ventilated area and apply the spray in light, even coats. Too much at once can cause drips or make the packet stick together. For extra protection, I like to apply two thin coats with a 10-minute drying break between them. This creates a stronger barrier against moisture without making the packets stiff or difficult to handle.
Theme Consistency: In Step 5, when arranging your finished packets in the garden, consider creating a visual story. For example, group all your whimsical designs together in one section, or arrange them in alphabetical order by plant name. This makes your garden feel intentional and cohesive. I also recommend taking a photo of your finished layout—it's a great way to track which plants thrive in which locations over the seasons.
Pro Tips for Seed Packet Art
- Here's what nobody tells you about making your seed packet art truly stand out—without the frustration.
- Design for Durability: When sketching in Step 2, avoid placing intricate designs near the edges of seed packets. The ...
- Layering Secrets: In Step 3, when using water-based markers, work from lightest to darkest colors. This prevents dark...
Frequently asked questions
about seed packet art—because every creative project deserves a little extra guidance! Here are answers to the most common queries to help you craft stunning, functional labels for your garden.What’s the best way to preserve seed packet art from weather damage?
Use a laminating machine or a clear sealant spray (like Mod Podge Outdoor) to protect your designs. For extra durability, embed labels in plastic sleeves or tuck them into small wooden stakes buried slightly into the soil. Avoid direct sunlight exposure for long-term vibrancy!
How long does it take to dry painted or decorated seed packets?
Drying time varies! Acrylic paints typically dry in 1–2 hours, while watercolors or markers may take 4–6 hours (or overnight for full cure). Rush the process with a fan on low or a heat gun on cool setting. Always let glue or sealant dry 24 hours before planting!
Can I use seed packet art for indoor plants too?
Swap garden stakes for miniature plant tags (like tiny wooden sticks or washi tape labels) for indoor herbs or succulents. Use lightweight materials (e.g., cardstock) to avoid weighing down pots. Bonus: Add glow-in-the-dark paint for a fun nighttime touch!
What if my seed packet art smudges or peels after planting?
Start over! If labels degrade, try waterproof ink pens (like Sharpie Ultra Fine) or print designs on vinyl sticker paper for a peel-and-stick solution. For stubborn smudges, reapply sealant or replace the label with a biodegradable twine tag tied to the plant.
Are there eco-friendly alternatives to traditional seed packet materials?
Yes! Opt for recycled seed packets, seed paper (made from plant fibers), or biodegradable wood pulp tags. Skip plastic laminates—use beeswax wraps or natural shellac for sealing. Even dried flower petals or pressed leaves can double as rustic, compostable labels!
Wrapping up and next steps
Seed packet art is more than just a creative pastime—it’s a way to infuse your garden with personality and charm while celebrating the magic of growth.
Whether you’re decorating for fun, preserving memories, or adding a whimsical touch to your outdoor space, these handcrafted labels turn ordinary seeds into little works of art. 🌱✨
Ready to bring your garden to life? Start small—grab a packet, some art supplies, and let your imagination bloom! Share your creations with fellow gardeners or even turn it into a family project. Every seed you label is a story waiting to grow.