
Lawn
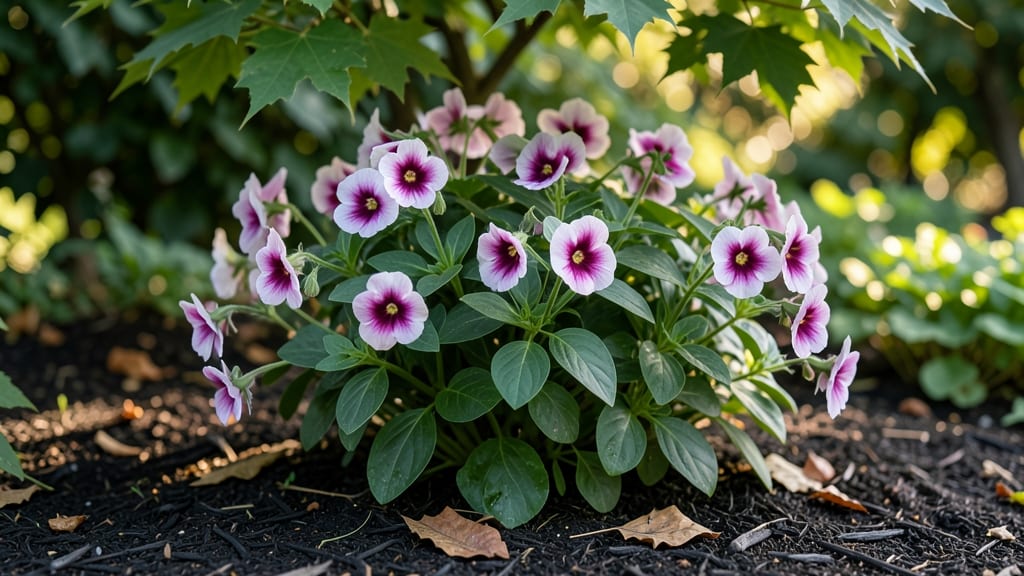
Growing American Seed Impatiens from seed means showstopper blooms that last all summer—if you start right. 🌸 These shade-loving beauties are easier than they look once you know the tricks, like keeping seeds cozy and soil consistently moist.
I’ve grown them for years, and the secret to their success lies in patience and the right conditions.
You’ll need a warm spot (70°F is ideal), a shallow tray with drainage, and a mix of peat moss and perlite to keep those tiny seeds from rotting. Unlike many flowers, impatiens don’t like to dry out, so misting the soil daily is key until germination—usually within 10-14 days.
Once sprouted, they’ll grow fast, but they’re finicky about light and water.
By the time you transplant them outdoors after the last frost, you’ll see lush green foliage and the first hints of those signature vibrant pink, red, or white blooms.
They thrive in partial shade, making them perfect for under trees or along shady fences. With the right care, your impatiens will keep flowering until frost—no deadheading required.
Even if you’ve struggled with impatiens before, this method works for beginners and pros alike. The payoff? A garden bursting with color where others fail. Let’s get those seeds started!
📚 In This Guide
- What you need
- Instructions
- Tips and common mistakes
- Wrapping up and next steps
What you need
- ● Seeds: American Seed Impatiens seeds (choose your favorite colors!)
- ● Seed-starting trays: 1020-cell or 72-cell trays with domes (for humidity)
- ● Seed-starting mix: Lightweight, sterile potting mix (e.g., Pro-Mix or Fox Farm)
- ● Grow lights or sunny windowsill: 12–16 hours of light daily (grow lights preferred)
- ● Misting bottle: For gentle watering (avoids disturbing seeds)
- ● Spray bottle: For humidity maintenance (or a humidity dome)
- ● Fertilizer: Water-soluble, balanced fertilizer (5-10-5 or 10-10-10, diluted to half-strength)
- ● Transplant pots or garden beds: 4–6" pots or prepared garden soil (well-draining, rich in organic matter)
- ● Heat mat: Keeps soil warm (70–75°F for faster germination)
- ● pH meter: Ensures soil pH is 6.0–6.5 (ideal for impatiens)
- ● Pruning shears: For pinching back leggy seedlings
- ● Stakes or cages: Supports taller varieties as they grow
- ● Mulch: Retains moisture and suppresses weeds (e.g., pine bark)
Step-by-Step instructions for growing american seed impatiens
Here's how to coax vibrant impatiens from tiny seeds into a summer-long floral display.
🌱 Step 1: Prepare Seed Starting Mix and Containers
Fill your seed trays with a sterile seed-starting mix—never garden soil, which can harbor fungal diseases that love damp impatiens seeds. I like to press the mix down lightly with my fingers until it's firm but still fluffy, like a well-packed pillow. This creates just enough resistance for delicate impatiens roots to anchor properly.
Moisten the mix until it feels like a wrung-out sponge—damp but not dripping. The key here is even moisture without waterlogging. If you squeeze a handful and water beads form on the surface, you've got it right. Place the tray in a shallow dish of water for 10 minutes to help the moisture penetrate evenly, then drain any excess.
🌱 Step 2: Sow Seeds and Create Ideal Germination Conditions
Sprinkle impatiens seeds directly onto the soil surface—don't bury them. These tiny seeds need light to germinate, so covering them would delay sprouting for weeks. I use a clean toothpick to gently press each seed into the soil, ensuring good contact without covering. For 4 plants, you'll need about 20-30 seeds—they germinate readily but thin later.
Cover the tray with a clear plastic dome or plastic wrap to create a greenhouse effect. Place it in a warm spot (70-75°F)—a seedling heat mat works wonders if your home runs cooler. Check daily for condensation on the plastic. If you see droplets, remove the cover for 10 minutes to prevent fungal rot. Germination typically occurs in 10-14 days, but be patient—some seeds may take up to 3 weeks.
☀️ Step 3: Provide Gentle Light and Prevent Leggy Growth
The instant those first tiny leaves appear, move the seedlings to bright, indirect light immediately. A south-facing window works, but impatiens seedlings stretch toward light like magnets if they're not strong enough. You'll notice leggy growth when stems grow thin and leaves space far apart—this is your warning sign to act.
Use a grow light positioned 4-6 inches above the seedlings if natural light isn't sufficient. Keep the light on for 14-16 hours daily. Rotate the tray quarter-turn daily so plants grow straight rather than leaning. Once seedlings have 2 sets of true leaves (not the initial seed leaves), you can transplant them into 4-inch pots with fresh potting mix.
🪴 Step 4: Transplant and Encourage Bushy Growth
Handle seedlings by their leaves rather than stems to avoid damaging the delicate root systems. Plant each seedling 1 inch deep in its new pot, pressing the soil gently around the base to eliminate air pockets. Water thoroughly until water runs from the drainage holes—this helps settle the soil and removes any air gaps.
Pinch off the top set of leaves when seedlings are 3-4 inches tall to encourage bushier growth. This might seem counterintuitive, but removing the top growth forces energy into side shoots, creating a fuller plant. After pinching, move pots to a spot with morning sun and afternoon shade—impatiens appreciate protection from intense afternoon rays.
💧 Step 5: Maintain Consistent Moisture and Fertility
Keep the soil evenly moist but never soggy. Impatiens roots rot quickly in waterlogged conditions, so always check the top inch of soil before watering—if it's dry to the touch, it's time. Water at the base rather than overhead to prevent fungal diseases. I like to use a watering can with a narrow spout to direct moisture precisely where it's needed.
Feed seedlings with a balanced liquid fertilizer (10-10-10) diluted to half strength every 2 weeks once they've developed their second set of true leaves. This gentle feeding prevents burning while providing the nutrients they need to grow strong. Watch for dark green leaves and sturdy stems—they're your signs of healthy growth.
Tips & tricks for growing american seed impatiens
These little tricks will help you transform those tiny impatiens seeds into a vibrant summer display without the common pitfalls.
Soil Prep Secret: For Step 1, I swear by adding a sprinkle of perlite to the sterile seed-starting mix before pressing it down. Just mix in about 10% perlite by volume—this improves drainage and prevents that dreaded waterlogging while still keeping the delicate roots anchored. The perlite also helps maintain that perfect "wrung-out sponge" moisture level you're aiming for.
Germination Game-Changer: In Step 2, if your kitchen stays below 70°F, don't despair—just place the covered tray on top of your refrigerator (not inside!) for the first 3-5 days. The warm compressor area creates ideal conditions without needing a heat mat. Once you see condensation forming, switch to your warm spot as directed. This two-phase approach works wonders in cooler homes.
Lighting Troubleshooting: When you notice leggy seedlings in Step 3, don't just move them closer to the light—rotate their position every 8 hours instead of just daily. This prevents them from growing toward one light source and creates more uniform growth. If you're using a grow light, consider adding a second light source on the opposite side for even coverage.
Transplanting Wisdom: For Step 4, here's what nobody tells you about the 1-inch deep planting: Use a pencil to make small holes in the soil first. This creates perfect pockets for each seedling and prevents root damage when you gently press them in. After transplanting, give the pots a gentle tap on the counter—this helps settle the soil around the roots and eliminates those pesky air pockets.
Pro Tips for American Seed Impatiens
- These little tricks will help you transform those tiny impatiens seeds into a vibrant summer display without the comm...
- Soil Prep Secret: For Step 1, I swear by adding a sprinkle of perlite to the sterile seed-starting mix before pressin...
- Germination Game-Changer: In Step 2, if your kitchen stays below 70°F, don't despair—just place the covered tray on t...
Frequently asked questions
Got questions about growing American Seed Impatiens? You’re not alone!
Here are answers to the most common queries—from timing to troubleshooting—so you can cultivate a showstopping display with confidence.
When is the best time to plant American Seed Impatiens?
Start seeds indoors 8–10 weeks before your last frost date (typically February–March in most climates). For direct sowing, wait until soil is warm (60–70°F) and after the last frost—usually late spring. These tender annuals hate cold, so don’t rush it!
How long does it take for American Seed Impatiens to flower?
With proper care, you’ll see blooms 8–12 weeks after sowing. For faster results, opt for transplants (available at nurseries) instead of seeds—they’ll flower 4–6 weeks sooner. Patience pays off, but the wait is worth it for those vibrant clusters!
What pests or diseases should I watch for with Impatiens?
Keep an eye out for aphids, spider mites, and downy mildew—common issues for Impatiens. Prevent pests with neem oil or insecticidal soap, and avoid overhead watering to deter mildew. If leaves yellow or wilt, check for root rot (a sign of overwatering).
Can I grow American Seed Impatiens in containers?
They thrive in hanging baskets, pots, or window boxes as long as the container has drainage holes and is at least 6–8 inches deep. Use a well-draining potting mix and fertilize regularly for compact, bushy growth. Perfect for patios or balconies!
Do American Seed Impatiens need full sun?
Nope! These beauties prefer partial shade (2–4 hours of morning sun). Too much direct sun can scorch leaves and fade blooms. In hot climates, dappled shade (like under trees) is ideal. They’re the perfect shade-loving annual for brightening dark corners!
Pro Tip: Deadhead spent blooms regularly to encourage nonstop flowering all season long!
Wrapping up and next steps
Growing American Seed Impatiens from seed is a rewarding journey that brings vibrant color and life to your garden—no green thumb required! 🌸 With the right soil, sunlight, and care, you’ll enjoy a stunning display of blooms that’ll make your outdoor space the talk of the neighborhood.
Start small, stay consistent, and soon you’ll be sharing your showstopper garden with pride.
Ready to dive in? Grab your seeds, pick a sunny spot, and get planting! Whether you’re a beginner or a seasoned gardener, every seed you sow is a step toward a brighter, more beautiful garden. Happy growing! 🌱