
Lawn
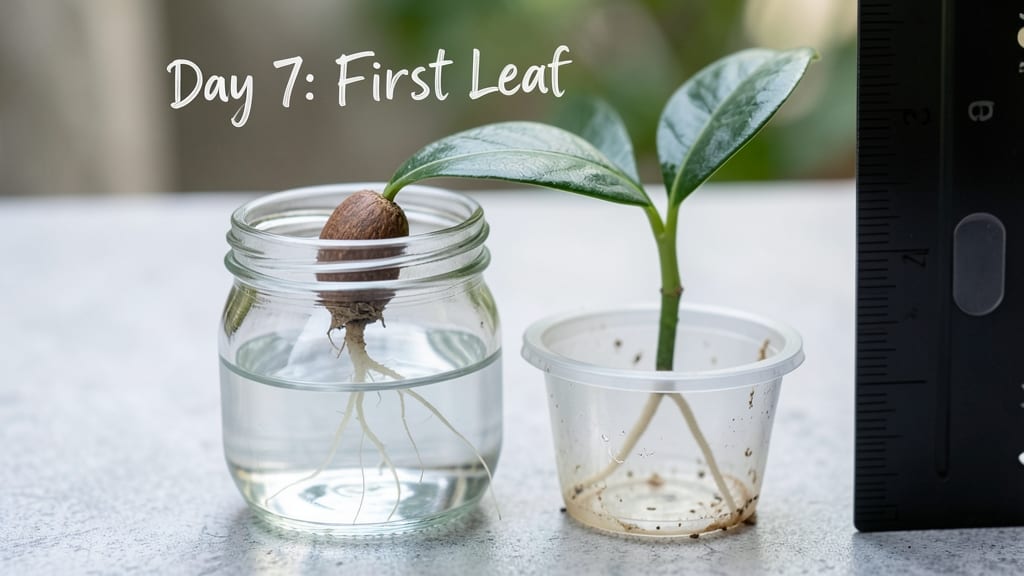
Growing an avocado plant through the avocado seed growing stages feels like watching a tiny miracle unfold—especially when you see those first green leaves break through the pit after just a few weeks. 🌱 The journey from kitchen countertop to lush houseplant is simpler than you think, and I’ve walked this path myself, turning store-bought avocado pits into thriving plants that now grace my kitchen windowsill.
The magic starts with the right setup: a glass jar, toothpicks, and patience. You’ll need to balance moisture without drowning the seed, and light without scorching those delicate first sprouts.
Most beginners overwater or rush the process, but with the right rhythm, you’ll see steady growth—think 2-3 inches per month once it’s established.
By month six, your seedling will sport its first true leaves, signaling it’s ready for a bigger pot and more sunlight. The real reward? Watching it bloom (yes, avocado trees flower!) and eventually produce fruit—though that takes years.
Every stage builds confidence, and the payoff is a plant that’s uniquely yours.
This method works for any avocado pit, from Hass to Fuerte, and thrives in containers. Here’s how to keep it alive—and growing—through every phase.
📚 In This Guide
- What you need
- Instructions
- Tips and common mistakes
- Wrapping up and next steps
What you need
- ● Avocado pit: 1 fresh, organic avocado pit (preferably from a ripe Hass avocado for best results).
- ● Toothpicks or small skewers: 3-4 (to suspend the pit).
- ● Glass or jar: 1 (wide-mouth, ~16 oz or larger, to hold water and the suspended pit).
- ● Water: Room-temperature, filtered if possible (change every 2-3 days).
- ● Potting soil: 1 bag (well-draining, organic mix for seedlings).
- ● Small pot: 1 (4-6 inches in diameter, with drainage holes).
- ● Spray bottle: 1 (for gentle watering).
- ● Rooting hormone: 1 small bottle (speeds up root growth).
- ● Grow lights or sunny windowsill: (if natural light is limited).
- ● Humidity dome or plastic wrap: (to retain moisture during early stages).
- ● Fertilizer: Balanced, diluted liquid fertilizer (once roots are established).
- ● Labels & markers: (to track planting dates).
Step-by-Step guide to growing an avocado from a pit
Here’s the straightforward method I’ve used to grow avocado plants from seed—no fancy tools, just patience and these clear steps.
🌱 Step 1: Prepare Your Avocado Pit
Start with a fresh avocado pit—one that’s firm but not dried out. Rinse it under water to remove any remaining fruit residue, then use a clean knife to carefully slice off the pointed end (the top) where the stem was attached. This exposes the seed inside.
Next, insert three toothpicks evenly around the pit, about ¼ inch from the top. The toothpicks will hold it steady as you balance it over a glass of water. Here’s the thing—don’t skip this part. A wobbly pit will tip over, and you’ll waste weeks waiting for it to stabilize again.
💧 Step 2: Balance the Pit Over Water
Fill a glass with about 2 inches of water—enough to cover roughly half the pit’s bottom. The toothpicks should suspend the pit so the bottom half sits in the water, while the top half stays dry. Change the water every 2-3 days to prevent mold or bacteria from forming.
Place the glass in a warm spot, like near a sunny window or under a grow light. You’ll see roots emerge from the bottom in about 2-6 weeks. Watch for the first tiny white tendrils—this is your signal that germination has started. Don’t overwater now; just keep the water level steady.
☀️ Step 3: Wait for Roots and a Sprout
Once roots reach about 2-3 inches long, it’s time to check for the sprout. The top of the pit will eventually crack open, and a small green shoot will push through. This can take another 2-4 weeks after the roots appear, so be patient.
Here’s where it gets fun—watch the cotyledons pop through the soil after a few days. These are the first true leaves, and they’ll look like tiny, rounded green pads. Keep the pit balanced over water until the sprout is at least 4-6 inches tall, with a sturdy stem.
🪴 Step 4: Plant in Soil
Once your avocado seedling has a 4-6 inch stem and a few leaves, it’s ready for soil. Fill a small pot (about 6 inches deep) with well-draining potting mix. Dig a hole just deep enough to cover the roots but leave the bottom half of the pit exposed—this prevents rot.
Water lightly after planting, then place the pot in bright, indirect light. Avoid direct sunlight at first; it can scorch the delicate new leaves. You’ll know it’s thriving when the leaves stay vibrant and the stem grows upright. This is the moment that matters: proper planting sets the stage for years of growth.
✂️ Step 5: Care for Your Young Avocado Tree
Keep the soil lightly moist but never soggy. Avocado trees hate wet feet—overwatering will kill the roots quickly. Water when the top 1 inch of soil feels dry to the touch. Fertilize lightly every 2-3 months with a balanced houseplant fertilizer to encourage steady growth.
Rotate the pot every few weeks so the tree grows straight toward the light. You’ll notice leggy growth if it’s not getting enough light—this is your cue to move it closer to a window or under a grow light. Prune any yellow or damaged leaves to keep the plant healthy and encourage new growth.
🌿 Step 6: Transplant as It Grows
When your avocado tree reaches about 12-18 inches tall, it’s time to upgrade to a larger pot (about 10-12 inches deep). Choose a pot with drainage holes to prevent root rot. Gently remove the tree from its current pot, loosen the roots slightly, and replant it in fresh potting mix.
Don’t skip this step—crowded roots stunt growth. After transplanting, water thoroughly and place the tree back in bright, indirect light. You’ll see new leaves emerge within a week—that’s your signal everything is working. Keep fertilizing lightly to support its rapid growth phase.
⏰ Step 7: Long-Term Care for a Thriving Tree
As your avocado tree matures, it’ll need more space. Eventually, you can transplant it outdoors in a warm, tropical climate. But here’s the reality check: indoor-grown avocado trees rarely bear fruit. They’re more about the journey than the harvest.
Keep the soil moist but well-draining, and prune regularly to shape the tree and encourage bushier growth. If you notice brown leaves, it’s usually a sign of overwatering or low humidity. Mist the leaves occasionally or place the pot on a tray of pebbles with water to increase humidity.
Tips & tricks for growing avocado seedlings
These little tricks will help you avoid common pitfalls and keep your avocado seedling thriving through every stage.
Pit Selection Matters: Choose a pit from a ripe but not overripe avocado—it should be firm with no soft spots. I’ve learned the hard way that dried-out pits won’t sprout, no matter how much water you give them. If your pit feels mushy when squeezed gently, start fresh with a new one.
Toothpick Placement: When inserting toothpicks in Step 1, position them about ¼ inch from the top and space them evenly around the pit. This creates a stable triangle that prevents wobbling. I’ve seen pits tip over within hours when toothpicks weren’t placed correctly—trust me, it’s frustrating to watch weeks of progress go down the drain.
Root Monitoring: In Step 2, watch for roots that are at least 2-3 inches long before considering soil planting. The roots should be thick and white, not thin and translucent. Thin roots indicate the pit isn’t getting enough oxygen—this is your cue to check water levels or adjust the toothpick suspension. A healthy root system is the foundation for everything that comes next.
Transplant Timing: Don’t rush to plant in soil until your sprout reaches 4-6 inches tall with several leaves. I’ve seen seedlings collapse when moved too soon because their delicate stems couldn’t support themselves. The 4-6 inch mark ensures the stem is sturdy enough to handle the transition from water to soil.
Pro Tips for Avocado Seed Growing Stages
- These little tricks will help you avoid common pitfalls and keep your avocado seedling thriving through every stage.
- Pit Selection Matters: Choose a pit from a ripe but not overripe avocado—it should be firm with no soft spots. I’ve l...
- Toothpick Placement: When inserting toothpicks in Step 1, position them about ¼ inch from the top and space them even...
Frequently asked questions
Got questions about growing an avocado tree from seed? You’re not alone! Here are answers to the most common queries—from patience to pit prep—to help you succeed.
How long does it take for an avocado seed to sprout?
Patience is key! With the right conditions (warmth, moisture, and consistency), your avocado seed can sprout in 2–8 weeks. Some seeds take longer—don’t give up if yours hasn’t sprouted in 6 weeks. Keep the toothpick method setup moist and in indirect light.
What if my avocado seed rotts or mold grows?
If your seed turns mushy, smells bad, or grows fuzzy mold, it’s overwatered. Troubleshoot: Remove the seed, let it dry for a day, and replant in fresh water or a well-draining medium. Use a clean container and change the water every 3–4 days to prevent bacteria.
Can I grow an avocado tree indoors year-round?
Avocado trees thrive indoors with bright, indirect light (near a south-facing window) and temperatures above 50°F (10°C). Rotate the pot weekly for even growth, and move it outside in summer for fresh air—just avoid harsh sun or frost.
How long until my avocado tree bears fruit?
Don’t expect avocados for years! A seed-grown tree may take 5–13 years to bear fruit, and even then, it might not match store-bought flavors. For faster results, consider grafting a fruiting variety onto your seedling—but that’s an advanced step!
What if my seed never sprouts? Can I try another method?
If your seed stays dormant after 2–3 months, it might be dormant or non-viable. Try these alternatives:
- Soak the seed in warm water for 24 hours before replanting.
- Use a paper towel method: Wrap the seed in a damp towel and place it in a sealed bag until sprouting (check weekly).
- Plant directly in moist potting mix (keep humidity high with a plastic cover).
Wrapping up and next steps
Growing an avocado from seed is a rewarding journey that blends patience with the joy of nurturing life! 🌱 From sprouting roots in water to transplanting a thriving sapling, each stage teaches you the magic of nature’s growth.
Whether you’re a gardening novice or a green-thumb enthusiast, your little avocado tree is a living reminder that great things take time—and yours is just getting started.
Now that you’ve mastered the stages, why not level up your green skills? Try experimenting with different soil mixes, fertilizers, or even propagating other fruit seeds. Your garden (and future harvests!) will thank you. Happy growing! 🌿