
Lawn
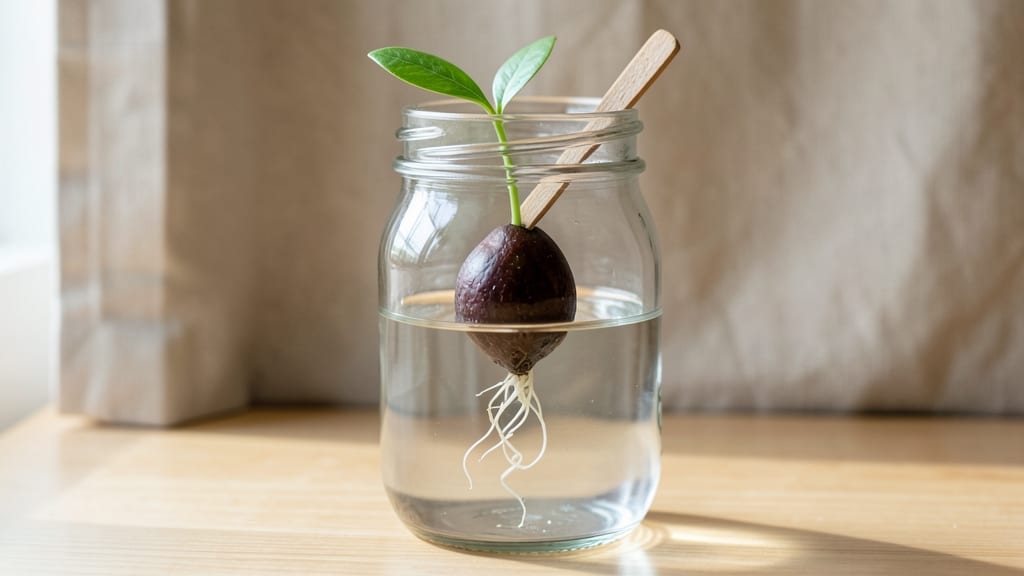
Growing an avocado seed in water feels like magic—especially when you see those first roots unfurl. 🌱 I’ve sprouted dozens of seeds this way, and the key isn’t just patience but knowing how to balance moisture, air, and light from day one.
Most people give up after two weeks, but with the right setup, you’ll see roots in 1-2 weeks and a sprout within 4-8 weeks. Start with a 4-6 inch seed, two toothpicks, and a jar of water—no fancy tools needed.
The toothpicks hold the seed above the water so the base stays submerged but the top stays dry, preventing rot. Change the water every 2-3 days to keep it fresh, and place the jar in bright, indirect light (no direct sun yet). That’s it.
No soil, no stress—just watch those roots grow like tiny green fingers reaching for the water. When roots hit 2-3 inches, you’ll spot a tiny bump on the seed’s top—your future plant breaking through. This is where many beginners panic, but slow growth is normal.
Keep the water level steady, and avoid touching the seed. Within weeks, you’ll have a 6-inch sapling ready for a pot, all from something you’d have tossed in the trash. The real reward?
A living reminder of patience, plus a chance to grow a full avocado tree (if you’re lucky enough for it to fruit). Troubleshooting is simple: mold? Use less water. No roots? Check your seed—some are just stubborn. Either way, this project is zero-waste, zero-pressure, and endlessly satisfying.
📚 In This Guide
- What you need
- Instructions
- Tips and common mistakes
- Wrapping up and next steps
What you need
- ● 1 ripe avocado – Choose one with a firm, unblemished skin for best results.
- ● 1 avocado seed – Remove it carefully (see pro tips for tricks!).
- ● 1 glass or jar – A clear container (8–16 oz) works best for visibility.
- ● Toothpicks (3–4) – For suspending the seed (or skewers as an alternative).
- ● Water – Room-temperature, filtered if possible (chlorine-free is ideal).
- ○ Optional: Small pebbles or marbles – To weigh down the seed if needed.
- ● Measuring cup – To track water levels (aim for ~1 inch of water).
- ● Spray bottle – For gentle misting if the seed dries out.
- ● Notebook or app – To log growth progress (fun for kids or science lovers!).
- ● Humidity dome or plastic wrap – To create a mini greenhouse effect (great for faster sprouting).
Step-by-Step instructions for growing avocado roots in water
Here's my foolproof method for coaxing roots from avocado pits—no fancy tools, just patience and the right technique.
🌱 Step 1: Prep the Pit for Faster Germination
Start with a fresh avocado pit—one that's firm and free of mold. I like to rinse it under cool water to remove any fruit residue, then gently pat it dry with a paper towel. The key is to expose the seed inside without damaging it. Use a sharp knife to carefully slice off the hard outer shell, stopping just before you reach the seed itself.
Here's the thing—avocado seeds have a thick, protective coating that slows germination. To speed things up, I soak the exposed seed in lukewarm water for 12-24 hours. This softens the outer layer and kickstarts the rooting process. Place the seed in a bowl of water, making sure it's fully submerged but not floating. You'll know it's ready when you see the first signs of a tiny white root emerging from the bottom.
💧 Step 2: Set Up the Water Culture System
Once the root reaches about ½ inch long, it's time to move it to your water culture setup. Grab a clean glass or jar with a mouth wide enough to support the pit. I like to use a 6-8 ounce glass because it gives the root room to grow without tipping over. Place 3-4 toothpicks around the pit, spacing them evenly about ½ inch from the edges. Gently insert the toothpicks so they hold the pit just above the waterline—about ⅓ of the pit should be submerged, but never the top half.
Fill the glass with room-temperature water (around 65-75°F) until it covers the bottom ½ inch of the root. Change the water every 3-4 days to prevent bacteria buildup. You'll see the root grow faster when the water stays clean and fresh—watch for it to thicken and branch out within 2-3 weeks. If the water gets murky or smells funky, that's your cue to refresh it immediately.
☀️ Step 3: Provide Ideal Light and Humidity
Place your avocado pit in a spot with bright, indirect light—think east-facing window or a south-facing shelf filtered through a sheer curtain. Direct sunlight will scorch the pit, while too little light slows growth. You'll know the light is right when the root grows steadily without turning yellow or brittle. A grow light works too, but keep it 6-12 inches away to avoid overheating.
Humidity matters here. If your home is dry, mist the air around the pit lightly with a spray bottle once daily or place the glass on a tray of pebbles filled with water (just don't let the pit touch the tray). The goal is to keep the environment 60-70% humidity. You'll notice the root grows faster in a humid space—it thrives when the air feels slightly damp, like a greenhouse.
🌿 Step 4: Transition to Soil When Roots Are 2-3 Inches Long
When the root reaches 2-3 inches and you see tiny leaves starting to unfurl at the top, it's time to plant! Fill a small pot (4-6 inches wide) with well-draining potting mix—I mix ½ potting soil and ½ perlite for extra airflow. Dig a hole deep enough to bury half the pit, leaving the top exposed. Gently press the soil around it to secure it without compacting.
Water lightly until the soil is moist but not soggy. Place the pot in bright, indirect light again and keep the soil evenly moist (not waterlogged). You'll see new leaves emerge within 1-2 weeks—that's your signal the plant is settling in. Real talk: Don't rush this step. A root system this size gives your avocado tree the best chance to thrive in soil.
⏰ Step 5: Maintain and Care for Your Young Tree
Once planted, keep your avocado tree in bright, indirect light for 4-6 weeks to avoid shock. Water when the top inch of soil feels dry—stick your finger in the soil to check. Overwatering is the biggest mistake here; yellow leaves mean you're watering too much. After the initial adjustment period, you can gradually introduce more direct sunlight to strengthen the stem.
Fertilize lightly once a month with a balanced liquid fertilizer (diluted to half strength) starting 3 months after planting. You'll know it's working when the leaves stay deep green and the plant grows 2-4 inches taller each month. Patience is key—avocado trees grow slowly, but with consistent care, you'll have a 3-foot-tall plant in 2-3 years.
Tips & tricks for growing avocado roots in water
These little-known tricks will help your avocado pit grow roots faster and healthier—without any special equipment.
Pit Selection Matters: Not all avocado pits are created equal. Choose a pit that's completely firm with no soft spots or mold—this means it's fresh and full of life. I've found Hass avocado pits work best because they're thicker and more resilient. If your pit feels light or hollow when tapped, it's past its prime and won't sprout well. Here's what nobody tells you—even a perfectly good avocado can have a pit that's already starting to decompose inside, so always check for firmness first.
Soak Like a Pro: The 12-24 hour soak in Step 1 is your secret weapon. I like to use lukewarm water (around 75°F) because it mimics the warm, tropical environment avocados love. Pro tip: Place a small piece of aluminum foil over the water's surface during soaking—this reduces evaporation and keeps the water temperature stable. After 24 hours, check for that first tiny root. If you don't see anything after 48 hours, don't panic—some pits take longer to wake up from their dormant state.
Toothpick Placement Technique: When setting up your water culture in Step 2, the toothpick positioning makes all the difference. Instead of just sticking them in randomly, I create a little "suspension bridge" by angling them slightly outward. This gives the root more room to grow downward without touching the sides of the glass. The goal is to have about ⅓ of the pit submerged—any more and it can rot, any less and it might not get enough moisture to keep growing. Watch how the root naturally grows toward the water; if it starts curving toward the glass, gently adjust the toothpicks to guide it straight.
Lighting Hacks: That bright, indirect light in Step 3 is crucial, but here's my secret: I rotate my avocado pit every 2-3 days. This prevents the root from growing crooked toward the light source. For indoor growers without good windows, a simple LED desk lamp on a timer works wonders—just keep it 6-12 inches away and run it for 12 hours a day. You'll notice the root grows faster and straighter when it gets consistent, gentle light from all directions. And if you see yellowing leaves, that's your signal to move it to a shadier spot immediately.
Pro Tips for Avocado Seed In Water
- These little-known tricks will help your avocado pit grow roots faster and healthier—without any special equipment.
- Pit Selection Matters: Not all avocado pits are created equal. Choose a pit that's completely firm with no soft spots...
- Soak Like a Pro: The 12-24 hour soak in Step 1 is your secret weapon. I like to use lukewarm water (around 75°F) beca...
Frequently asked questions
Got questions about growing an avocado seed in water? You’re not alone! Here are some of the most common queries—and their easy, zero-waste-friendly answers.
How long does it take for avocado seeds to sprout roots in water?
Patience is key! Most avocado seeds start showing tiny roots in 2–4 weeks, but some take up to 6 weeks. Keep the water fresh (changed every 2–3 days) and place the jar in bright, indirect light. If nothing happens after a month, try adjusting the water level or giving the seed a gentle twist to encourage growth.
Can I reuse the water from my avocado seed jar?
Nope—it’s best to ditch the old water every 2–3 days. Stagnant water breeds bacteria, which can rot your seed before roots even form. Use room-temperature water to avoid shocking the seed. Pro tip: Save the used water for houseplants—they’ll love the nutrient boost!
What do I do if my avocado seed starts to rot in water?
If your seed smells funky, feels mushy, or develops black spots, it’s time for a reset. Remove it from the water, rinse it gently, and let it dry for a day. Then, start fresh with clean water. If the seed is already too soft, it’s likely too far gone—try another seed! Prevention tip: Use filtered or distilled water to reduce bacteria risks.
Can I grow an avocado seed without water—just in soil?
While the water method is fun for watching roots grow, you can skip the water step and plant the seed directly in moist soil. Just bury half the seed (the wider end down) in a pot with well-draining soil. Keep it damp (not soggy) and place it in bright light. Roots will emerge faster this way, and you’ll have a tiny tree sooner!
How long until my avocado seed grows into a full plant?
Rushing won’t help—avocado trees are slow growers! After rooting, it may take months to years to see significant growth. With patience, proper light (6+ hours daily), and occasional fertilizer, your seedling could reach 1–2 feet tall in 1–2 years. Remember, indoor-grown avocados may never fruit, but they’re a stunning, low-maintenance houseplant!
Wrapping up and next steps
Growing an avocado seed in water isn’t just a fun experiment—it’s a zero-waste, rewarding way to nurture life while learning patience and sustainability. Whether you’re aiming for a lush plant or simply curious about nature’s magic, this method proves that even small actions can spark big results. 🌱
Ready to take the next step? Once your roots are thriving, transplant your seedling into soil and watch it flourish into a full-grown avocado tree—your future snack (and eco-friendly win) in the making! 🌿