
Lawn
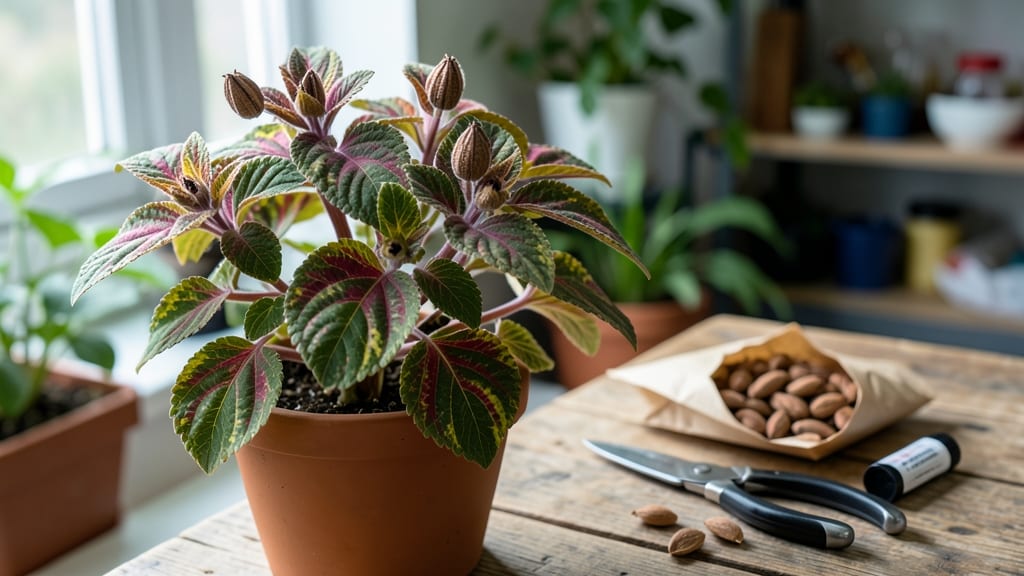
Coleus seed collection might seem like a wild goose chase—because most hybrid varieties produce sterile seeds. 🌿 But if you’ve got a plant that does set seed, here’s how to test their viability and save them for next year’s garden without the guesswork.
The twist-free viability test is simple: pick mature seed pods, let them dry completely, then gently squeeze. If seeds rattle inside, they’re ready for storage.
Most coleus seeds stay viable for 1-2 years if kept dry and cool—though honestly, your time’s better spent propagating from stem cuttings, which work every time.
You’ll end up with tiny, papery seeds that look more like dust than planting material. But if you’re lucky enough to get germination, your new plants might not match the parent’s colors—coleus seeds often revert to wild-type traits. That’s why most gardeners skip seeds entirely and stick to cuttings instead.
For the best results, collect seeds in late fall, store them in a paper envelope, and label them clearly. Even if germination rates are low, this test gives you a quick way to check viability without wasting time or space on dead seeds.
📚 In This Guide
- What you need
- Instructions
- Tips and common mistakes
- Wrapping up and next steps
What you need
- ● Mature coleus plants: Choose healthy, disease-free plants with fully developed seed pods (usually brown and papery). Aim for 3–5 plants for a good seed yield.
- ● Scissors or pruning shears: Sharp, clean tools to snip seed pods without damaging stems. 1 pair is sufficient.
- ● Paper bags or envelopes: 2–3 breathable bags/envelopes (brown paper works best) to store seeds and prevent moisture buildup.
- ● Labeling tags or markers: To tag seed sources (e.g., plant variety, collection date). 5–10 tags recommended.
- ● Drying surface: A flat, clean tray or screen to spread pods for drying (e.g., a baking sheet or mesh screen).
- ○ Fine mesh sieve or sifter: (Optional but helpful) to separate seeds from chaff after drying.
- ● Desiccant packets: Tiny silica gel packs to absorb excess moisture in seed storage containers.
- ● Air-tight containers: Small jars or resealable bags with zip locks for long-term seed storage.
- ● Hand lens or magnifying glass: To inspect seed viability (check for plump, intact seeds).
- ● Humidity monitor: If storing seeds long-term, keep humidity below 40% for optimal viability.
Step-by-Step instructions for testing coleus seed viability
Here's how I ensure my favorite coleus varieties stay true to form year after year.
🌱 Step 1: Harvest Seeds at Peak Maturity
Wait until your coleus flowers fade to brown and the seed pods turn a papery tan color—this usually happens in late summer. Gently twist the dried pods between your fingers until they release tiny, 1/8-inch seeds. I spread a sheet of paper underneath to catch them; seeds are so small they disappear into the soil if you're not careful.
Store the seeds in a paper envelope (plastic traps moisture and causes mold) and label with the variety and harvest date. Keep them in a cool, dry place—my basement works perfectly. The twist-free method starts here: never crush or squeeze the pods, or you risk damaging the delicate seeds inside.
💧 Step 2: Prepare the Viability Test Setup
Fill a small container with moistened paper towels (not soggy—just damp enough to hold together when squeezed). I use a shallow plastic takeout container because it creates a controlled environment. Sprinkle 10-15 seeds evenly across the surface, spacing them about 1 inch apart so they don't crowd.
Cover the container with another paper towel and place it in a warm location (70-75°F). I keep mine on top of my fridge because it stays consistently warm without direct sunlight. The goal is to mimic spring germination conditions without overcomplicating things.
☀️ Step 3: Monitor for Germination Over 10-14 Days
Check the seeds every 2-3 days by lifting the top towel gently. Look for tiny white roots breaking through the seed coat—that's your first sign of life. I mark each germinating seed with a toothpick so I don't accidentally count them twice when checking later.
Keep the paper towels moist but never dripping. If they dry out, mist lightly with water. After 10-14 days, count how many seeds sprouted. A good viability rate is 50% or higher. If fewer than half germinate, those seeds may not store well for next year's planting.
✂️ Step 4: Store Viable Seeds Properly
Transfer only the germinated seeds to a new paper envelope (discard the non-viable ones). Seal it tightly and store in the freezer for up to 2 years. The cold slows metabolic activity and preserves viability. I date each envelope so I can track how long seeds remain viable—my 'Burgundy Velvet' variety lasts longer than the 'Electric Lime' type.
When ready to replant, remove seeds from the freezer and let them acclimate to room temperature for 24 hours before sowing. This gradual change prevents shock. I start seeds indoors 8-10 weeks before last frost for strong, healthy seedlings that'll thrive in summer's heat.
Tips & tricks for perfect coleus seed viability testing
Here's what I've learned after years of testing—these little tricks will help you avoid common pitfalls and maximize your coleus seed success.
Pod Handling: In Step 1, when harvesting seeds, work on a dark-colored paper or light-colored fabric—those tiny seeds blend into white paper! I use a black felt sheet now, and I can see every single seed. Also, twist the pods gently—think of it like opening a tiny, delicate package. Too much pressure, and you'll crush the seeds inside.
Environment Control: The 70-75°F warm location in Step 2 is crucial. If your kitchen is cooler, place the container on top of your refrigerator or near a sunny window with indirect light. I've found that seedling growth accelerates noticeably when temperatures stay consistently in this range. A small seedling heat mat set to low can also help if your home stays chilly.
Moisture Management: In Step 3, the paper towels should feel like a wrung-out sponge—not dripping, not bone-dry. I use a spray bottle with a fine mist setting to keep them moist between checks. Overwatering can cause mold, while too little moisture stalls germination. The goal is to keep the environment humid enough for seeds to drink up water through their tiny coats.
Seed Tracking: When marking germinating seeds with toothpicks in Step 3, I use a different color for each day I check them. This helps me track exactly when each seed sprouted, which can give clues about seed quality. For example, if most seeds sprout on day 5 but a few wait until day 10, those later ones might be less viable for long-term storage.
Pro Tips for Coleus Seed Collection
- Here's what I've learned after years of testing—these little tricks will help you avoid common pitfalls and maximize ...
- Pod Handling: In Step 1, when harvesting seeds, work on a dark-colored paper or light-colored fabric—those tiny seeds...
- Environment Control: The 70-75°F warm location in Step 2 is crucial. If your kitchen is cooler, place the container o...
Frequently asked questions
Got questions about saving coleus seeds for next season? You’re not alone! Here are some of the most common queries—and their straightforward answers—to help you master the process like a pro.
When is the best time to collect coleus seeds?
Collect seeds when the coleus flowers fully mature and turn brown or papery—usually late summer to early fall (August–October, depending on your climate). Wait until the seed pods are dry and crack open easily; harvesting too early risks low viability. Pro tip: Morning collections yield fresher seeds!
How do I know if my coleus seeds are viable?
Perform the float test: Drop seeds in water. Viable seeds sink; floaters are nonviable. For extra assurance, try the paper towel germination test—moisten a towel, place seeds between two, and check for sprouts in 7–14 days. Pro tip: Store seeds in a cool, dry place (like a sealed envelope) to extend their lifespan.
Can I collect seeds from store-bought coleus plants?
Yes, but results vary! Many hybrid coleus (like those with variegated leaves) are sterile and won’t produce seeds. Stick to open-pollinated varieties or heirloom plants for reliable seed collection. If unsure, ask the nursery or check plant tags for seed-saving notes.
What if my seeds won’t germinate?
Try these fixes:
- Ensure seeds are fully dry before storing (moisture = mold).
- Use warmth (70–75°F) and light for germination.
- Soak seeds overnight in lukewarm water to soften hard coats.
- Check for pests—weevils or fungus can sabotage seeds.
How should I store coleus seeds long-term?
Store seeds in a cool, dark, dry place (like a fridge) in an airtight container with a desiccant packet. Label with the variety and date! Most coleus seeds stay viable for 1–2 years, though germination rates drop over time. Pro tip: Freeze seeds for up to 5 years for maximum longevity.
Wrapping up and next steps
Collecting and testing coleus seeds is a rewarding way to ensure vibrant, twist-free growth for next season! 🌱 By following these simple steps—from selecting healthy plants to mastering the viability test—you’ll gain confidence in your gardening skills and set yourself up for success.
Now that you’re equipped with the knowledge, why not grab those seeds and start planning your future garden? Happy growing!
- Next step: Experiment with different coleus varieties and document your results for even better outcomes!