
Vegetables
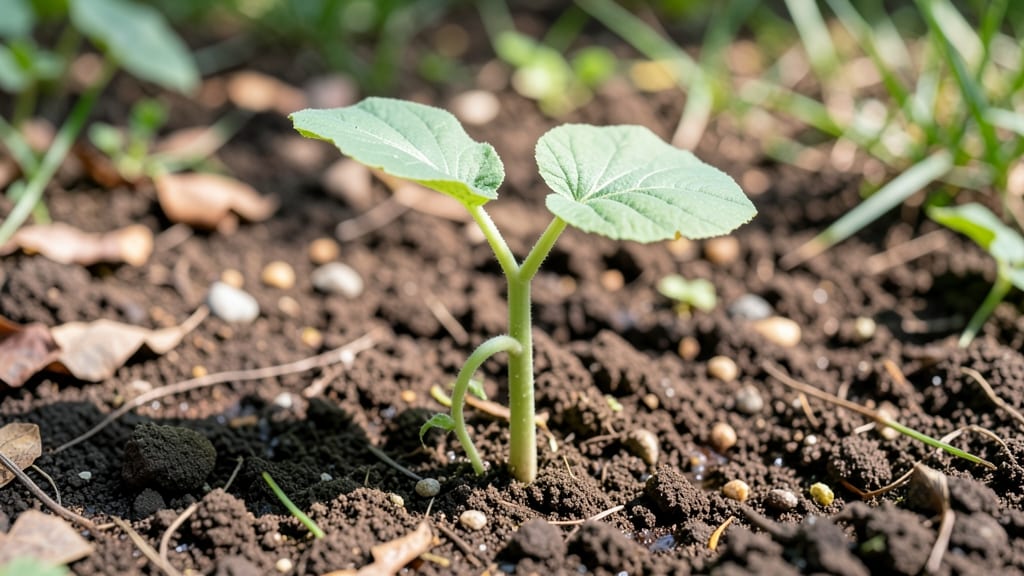
Those first tiny cucumber seed leaves are the plant's secret weapon for survival. 🌱 They're the first true leaves after the initial cotyledons (those little shield-shaped leaves), and they're how your cucumber tells you everything's on track—or when to panic.
The seed leaves appear 7-10 days after planting, looking like small, rounded versions of mature leaves. Healthy ones are deep green, crisp, and free of spots or yellowing. If they're pale, crinkled, or covered in holes, you've got a pest or disease problem that needs fixing fast.
This is where most gardeners go wrong—ignoring these early signs. Proper light, warmth, and moisture during this stage mean the difference between a vibrant vine and a struggling plant. Keep soil moist but not soggy, and watch those seed leaves transform into the powerhouse they're meant to be.
📚 In This Guide
- What you need
- Instructions
- Tips and common mistakes
- Wrapping up and next steps
What you need
- ● Cucumber seeds: 10–20 fresh, organic cucumber seeds (heirloom or hybrid varieties work best). Pro tip: 💡 Choose seeds labeled for "bush" or "slicing" types for faster leaf growth!
- ● Seed-starting mix: 1–2 cups of sterile, seedling-specific soil blend (or a mix of 50% peat moss and 50% perlite for drainage).
- ○ Containers: 2–4 small pots (3–4 inches deep) or a seed tray with drainage holes. Optional: 🌿 Reuse yogurt cups or egg cartons with holes punctured in the bottom!
- ● Watering can or spray bottle: A fine-mist sprayer works best to avoid disturbing seeds.
- ● Clear plastic wrap or dome: To create a mini greenhouse effect (e.g., a plastic bag or a humidity lid).
- ● Grow lights or sunny windowsill: A south-facing window (6+ hours of sunlight/day) or a LED grow light (12–16 hours/day).
- ● Plant labels: To track varieties (toothpicks + masking tape work!).
- ● Fertilizer: A diluted seaweed or fish emulsion spray (after sprouts appear).
- ● Thermometer: To monitor soil temp (ideal: 70–90°F/21–32°C).
- ● Tweezers: For delicate seed placement (if you’re a perfectionist!).
Step-by-step instructions for germinating cucumber seed leaves
Here’s how to coax tender cucumber seedlings from seed in just 10 days—no fancy gear needed.
🌱 Step 1: Prep Containers and Seed Starting Mix
Use small pots or seed trays with drainage holes—cucumbers hate soggy roots. Fill them with a light, sterile seed-starting mix (never garden soil). I like to mix in a handful of perlite for extra drainage. Moisten the mix until it’s damp like a wrung-out sponge—no puddles, just even moisture.
Tap the container gently to settle the soil, then use your finger to create a shallow dimple about ¼ inch deep. This prevents seeds from sinking too low, which slows germination. A warm spot near a sunny window or under a heat mat (70-80°F) speeds things up—cucumbers love warmth.
🌱 Step 2: Plant Seeds and Maintain Moisture
Drop 2-3 seeds into each dimple—you’ll thin later. Cover lightly with a thin layer of mix (just enough to hide the seeds). Mist the surface with water until it’s damp, then cover the container with plastic wrap or a humidity dome. This traps warmth and keeps seeds from drying out.
Check daily for moisture—condensation on the plastic means it’s fine. If the soil feels dry to the touch, mist again. Avoid overwatering; soggy soil smothers seeds. Place the container in indirect light (no direct sun yet) until sprouts appear—usually 3-5 days at 75°F. You’ll see tiny white roots first, then the first true leaves.
☀️ Step 3: Provide Light and Thin Seedlings
Once seedlings break through the soil (about 5-7 days), remove the plastic and move them to bright, indirect light for 24 hours. After a day, introduce 4-6 hours of gentle morning sun—too much direct sun too soon scorches tender leaves. You’ll know they’re happy when leaves are dark green and stems are sturdy.
When seedlings reach 2 inches tall, thin to the strongest one per pot. Snip the extras at the base with scissors—don’t pull, or you’ll disturb roots. Space remaining plants 2-3 inches apart if using a tray. Keep soil moist but not soggy; cucumbers need consistent moisture but hate wet feet.
💧 Step 4: Harden Off for Transplanting
After 10 days, seedlings should have 2-3 true leaves and be ready for outdoor life. Start hardening them off by placing them outside in a shaded spot for 1 hour the first day. Gradually increase time over 5-7 days, ending with full sun exposure. Watch for wilting—if leaves droop, they’re not ready yet.
Transplant on a cloudy day or in late afternoon to reduce stress. Bury seedlings deeper than their original depth—cucumbers grow roots along their stems. Water deeply after planting to settle soil around roots. Within a week, you’ll see new growth signaling they’ve taken hold.
Tips & tricks for perfect cucumber seedling growth
Here's what I learned the hard way about growing cucumber seedlings that thrive from day one.
Warmth is Non-Negotiable: Cucumbers need consistent warmth, especially during germination. If your kitchen stays below 70°F, place containers on top of your fridge or use a seedling heat mat. I've seen germination times double when seeds are too cold—don't let that happen to you. The 75°F optimal temperature in Step 2 is crucial for breaking through the soil within those 3-5 days.
Light Transition Strategy: That 24-hour bright indirect light period after removing plastic is your plants' adjustment phase. I use a south-facing window with sheer curtains to diffuse harsh light. Too much direct sun too soon causes those delicate leaves to bleach out—watch for pale yellowing as your warning sign. After the 24 hours, gradually increase morning sun exposure to 4-6 hours over the next few days.
Thinning Technique: When thinning your 2-inch seedlings, use clean scissors to snip at the base rather than pulling. This prevents root disturbance and keeps the remaining plant stable. I've found that seedlings left too close together develop leggy stems trying to reach light—space them 2-3 inches apart as instructed to encourage sturdy growth.
Harden Off Gradually: The 5-7 day hardening process is where most beginners fail. Start with just 1 hour of shade on day one, then increase by 1 hour each day. If you rush this step, your seedlings will wilt dramatically when transplanted. I've seen plants that looked perfect in pots completely collapse after being moved outside too quickly—don't make that mistake.
Pro Tips for Cucumber Seed Leaves
- Here's what I learned the hard way about growing cucumber seedlings that thrive from day one.
- Warmth is Non-Negotiable: Cucumbers need consistent warmth, especially during germination. If your kitchen stays belo...
- Light Transition Strategy: That 24-hour bright indirect light period after removing plastic is your plants' adjustmen...
Frequently asked questions
Got questions about growing cucumber seed leaves? You’re not alone!
Here are the most common queries—plus quick, actionable answers to get you started in just 10 days.
What are cucumber seed leaves, and how are they different from regular cucumbers?
Cucumber seed leaves are the first true leaves that sprout from cucumber seeds—harvested before the plant flowers. Unlike mature cucumbers, these leaves are tender, nutrient-dense, and packed with vitamin K, magnesium, and antioxidants. Think of them as a microgreen cousin to cucumbers, but with a milder, slightly peppery flavor.
How long does it take to grow cucumber seed leaves from seeds?
With the right setup, you can harvest edible seed leaves in just 10–14 days! The key is using fast-sprouting varieties (like ‘Straight Eight’ or ‘Marketmore’) and keeping conditions warm (70–75°F) and humid. Germination starts in 3–5 days, and leaves are ready when they’re 2–4 inches tall with 2–3 true leaves.
Can I grow cucumber seed leaves indoors, or do they need outdoor sunlight?
Indoor growing is perfect for seed leaves—just place them near a south-facing window or under a grow light (12–16 hours/day). Use a shallow tray (2–3 inches deep) with well-draining soil, and mist leaves daily to maintain humidity. Outdoor plants need 6+ hours of sunlight but risk bolting (flowering too soon), which reduces leaf quality.
What can I do if my cucumber seed leaves turn yellow or wilt?
Yellowing or wilting usually signals one of three issues:
- Overwatering: Seed leaves hate soggy soil. Let the top inch dry out between waterings.
- Underwatering: Droopy leaves? Soak the tray and add pebbles for better drainage.
- Nutrient burn: Use a balanced, diluted fertilizer (like 5-5-5) only after the first true leaves appear.
If leaves turn mushy, it’s likely damping off—a fungal disease. Remove affected plants and sprinkle cinnamon or copper fungicide on the soil.
How do I harvest and store cucumber seed leaves?
Harvest leaves by snipping the entire plant at the base (or individual leaves) when they’re 2–4 inches tall. Rinse gently, pat dry, and store in a sealed container with a paper towel to absorb moisture. They’ll keep in the fridge for 5–7 days. For longer storage, blanch and freeze them—perfect for smoothies or sautéed greens!
What’s a good alternative if cucumber seed leaves don’t work for me?
If you’re short on time or space, try these fast-growing, leafy alternatives:
- Pea shoots (7–10 days, sweet and crisp).
- Radish microgreens (5–7 days, peppery kick).
- Sunflower microgreens (10–14 days, nutty flavor).
- Lettuce sprouts (5–7 days, mild and buttery).
All thrive in similar conditions—just adjust harvest timing!
Wrapping up and next steps
Growing cucumber seed leaves is a rewarding way to kickstart your garden with nutrient-packed greens in just 10 days! 🌱 Whether you’re a beginner or a seasoned gardener, these fast-growing leaves offer a tasty, low-maintenance harvest—perfect for salads, smoothies, or sautéing.
With minimal supplies and effort, you can enjoy fresh, homegrown greens year-round, even in small spaces.
Ready to dive in? Start by gathering your supplies, follow the simple steps, and watch your kitchen turn into a mini greenhouse. Next up: Try experimenting with different cucumber varieties or mix in other fast-growing greens like microgreens for a flavor-packed twist! 🌿