
Propagation
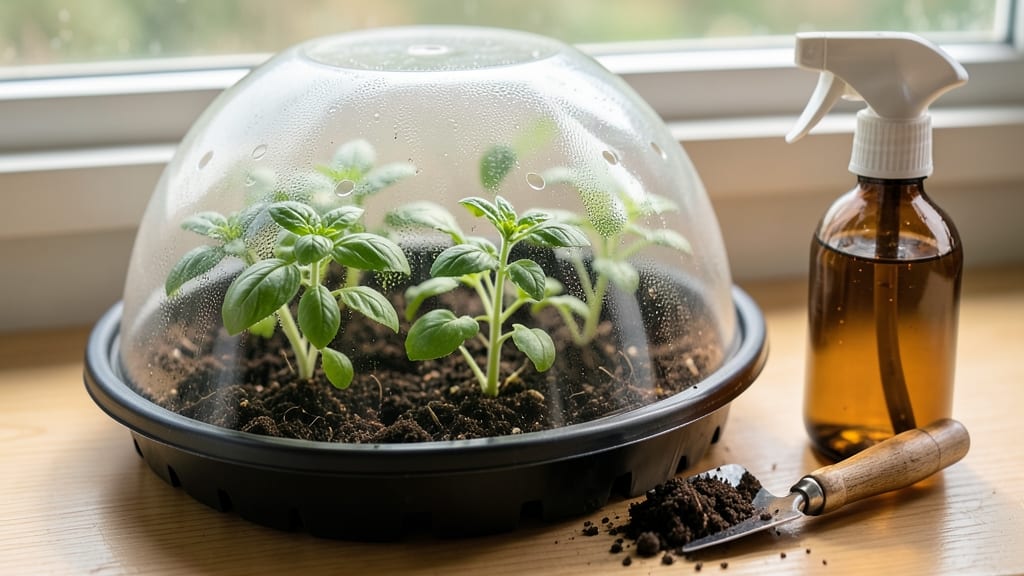
A humidity dome turns your seed-starting setup into a mini greenhouse where seeds sprout faster and stronger. 🌱 I used mine last spring and watched my basil seeds pop up in 5 days instead of the usual 10—no more waiting weeks for tiny sprouts to appear. The secret?
Trapping moisture inside while keeping it breathable. Too much condensation? Simply lift the dome for 10 minutes daily. Too little? Mist the soil lightly. It’s simpler than plastic wrap or cloches because you control the environment without constant fuss. You’ll end up with plump, sturdy seedlings that outgrow store-bought starts.
The dome also prevents damping-off fungus, a common killer of young seedlings. Just add seeds, soil, and a little patience—this method works for tomatoes, peppers, and herbs alike. Works in any sunny spot, from windowsills to grow lights. Here’s how to set it up without the guesswork!
📚 In This Guide
- What you need
- Instructions
- Tips and common mistakes
- Wrapping up and next steps
What you need
- ● Clear plastic dome or lid (e.g., 10-inch salad container lid or a repurposed food storage dome with ventilation holes)
- ● Seed-starting tray or container (10x20 inches or similar, with drainage holes)
- ● High-quality seed-starting mix (sterilized, peat-based or coco coir blend, 1-2 cubic feet)
- ● Seeds (any variety you’re propagating—check planting depth on seed packets!)
- ● Spray bottle (16 oz, with a fine mist nozzle for gentle hydration)
- ● Drill or sharp knife (for creating ventilation holes in the dome, if not pre-perforated)
- ○ Rubber mallet or hammer (optional, for securing dome edges if needed)
- ● Tweezers or small spoon (for seed placement)
- ● Humidity tray (shallow tray with pebbles or water to boost moisture levels)
- ● Mini fan or oscillating fan (to prevent mold and encourage airflow)
- ● Grow lights or sunny windowsill (12-16 hours of light daily for optimal growth)
- ● Thermometer/hygrometer (to monitor temperature and humidity, ideal range: 70-75°F and 80-90% humidity)
- ● Plant labels & markers (to track seed varieties and planting dates)
How to create a humidity dome for seed starting
Here's the simple setup I use to boost germination rates—no fancy equipment needed.
🪴 Step 1: Select Your Dome Materials
You’ll need a clear plastic lid (like those from 6-pack yogurt containers or takeout boxes) that fits snugly over your seed tray. I prefer lids with condensation ridges—they let trapped moisture cling to the underside where seedlings can drink it up. If your lid doesn’t have ridges, a plastic wrap tent works just as well.
For trays, use any shallow container with drainage holes—even repurposed baking sheets with holes drilled in the bottom. The key is keeping the soil moist without drowning the seeds. Place a small piece of mesh or broken pottery over drainage holes to prevent soil from washing out while still allowing excess water to escape.
💧 Step 2: Prepare the Seed Tray and Moisten Soil
Fill your tray with 1-2 inches of seed-starting mix, pressing it down lightly so the surface is firm but not compacted. Water the soil until it’s evenly damp—you should see moisture bead up at the surface, but not pool. Overwatering now will drown seeds before they even sprout.
I like to water from the bottom by placing the tray in a shallow pan of water for 10 minutes, then letting it drain completely. This ensures even moisture without disturbing the soil surface where seeds will germinate. Tap the tray gently to settle the soil after watering.
🌱 Step 3: Plant Seeds and Cover with the Dome
Sow seeds according to packet instructions, then lightly cover them with a thin layer of soil—usually about ¼ inch deep. Press the soil down just enough to make good contact with the seeds, but don’t pack it. Place the dome or plastic wrap over the tray immediately after planting to trap humidity.
Seeds need consistent moisture to germinate, and the dome creates a mini greenhouse effect. You’ll notice condensation forming on the underside of the dome within hours—that’s exactly what you want. Check daily for moisture levels; the soil should stay damp but not soggy. If condensation stops forming, mist the dome’s underside lightly with water to restore humidity.
☀️ Step 4: Position for Warmth and Light
Place your humidity dome in a warm spot—ideally between 70-80°F. A seedling heat mat works wonders if your home runs cooler, but even a sunny windowsill will do. Avoid direct sunlight at this stage; seedlings need warmth more than light until they sprout. You’ll see the first signs of germination in 3-10 days, depending on the plant.
Once seedlings emerge, remove the dome immediately. Trapped humidity after germination encourages fungal growth that can rot tender stems. Watch for leggy growth—a sign your seedlings need more light. Move them under a grow light if natural light isn’t sufficient, keeping it 2-3 inches above the plants.
⏰ Step 5: Monitor and Adjust Humidity Over Time
After removing the dome, keep the soil consistently moist but never waterlogged. You’ll know moisture is right when the top inch of soil feels damp but not wet. If seedlings start wilting, they need more water; if leaves yellow, you’re overwatering. Reduce humidity gradually by lifting the dome for 1-2 hours daily once true leaves appear.
This slow acclimation prevents shock when you eventually transplant. I always harden off seedlings by placing them outside in a shaded spot for 1 hour daily before their final move to the garden. The dome’s job is done once seedlings can handle normal humidity—then it’s time to focus on light and nutrients.
Tips & tricks for perfect seed starting humidity control
Here's what nobody tells you about keeping your seedlings happy and healthy in that critical first stage.
Material Matters: For the best condensation effect in Step 1, look for lids with condensation ridges—they create more surface area for moisture to collect. If you're using plastic wrap instead, secure it tightly with rubber bands or tape to prevent gaps where humidity escapes. I've found that clear plastic wrap actually works better than some store-bought domes because it creates a tighter seal against the tray edges.
Soil Depth Secret: When filling your tray with 1-2 inches of seed-starting mix in Step 2, use the back of a spoon to create shallow dimples where you'll plant seeds. This helps maintain consistent moisture levels at seed depth while preventing water pooling that could drown them. The dimples also create tiny air pockets that improve oxygen circulation to the roots.
Condensation Check: After placing your dome in Step 3, you should see condensation forming within 2-4 hours. If you don't see any after 6 hours, gently mist the underside of the dome with water—this restores the humidity without disturbing the seeds. The condensation is your visual cue that the humidity level is perfect for germination. I check mine every morning and evening to maintain that ideal moisture environment.
Light Transition: In Step 4, when you remove the dome after germination, place your seedlings under a grow light immediately if your windowsill isn't bright enough. The 2-3 inch distance recommendation is crucial—any closer and you'll scorch tender leaves, any farther and they'll stretch toward the light. I use a simple LED grow light on a timer for 12 hours daily, which gives my seedlings perfect light exposure without the risk of overheating.
Pro Tips for Seed Starting Humidity Dome
- Here's what nobody tells you about keeping your seedlings happy and healthy in that critical first stage.
- Material Matters: For the best condensation effect in Step 1, look for lids with condensation ridges—they create more...
- Soil Depth Secret: When filling your tray with 1-2 inches of seed-starting mix in Step 2, use the back of a spoon to ...
Frequently asked questions
Got questions about humidity domes for seed starting?
You’re not alone! Here are answers to the most common concerns—plus a few pro tips to keep your seedlings thriving.
How often should I open the humidity dome?
Start by lifting the dome for just 5 minutes daily once seedlings sprout (usually 7–14 days). After the first true leaves appear, increase ventilation to 10–15 minutes to prevent mold. Listen to your seeds: If condensation is heavy or leaves look limp, open it sooner. Humidity drops naturally as roots grow!
When can I remove the humidity dome completely?
Remove it gradually over 3–5 days once seedlings have 2–3 sets of true leaves (not just the initial "seed leaves"). Start with 30-minute sessions, then extend daily. Watch for wilting: If leaves curl, slow down—your plants aren’t ready for full exposure yet!
What if condensation causes mold or fungus?
Mold (fuzzy white/green spots) or damping-off (seedlings collapsing at the base) means too much moisture. Act fast: Remove affected seedlings, lift the dome for longer periods, and ensure pots have drainage holes. Bonus: Spritz leaves with a 1:10 hydrogen peroxide/water mix (3%) to sterilize without harming plants.
Can I use a plastic bag or DIY cover instead of a store-bought dome?
A clear plastic bag with holes (secured loosely) or a cut-open milk jug works perfectly. Just ensure it’s not airtight—poke tiny holes to allow airflow. Pro tip: Place a small fan nearby on low to mimic natural airflow and reduce humidity buildup.
What’s the ideal temperature range for a humidity dome?
Keep it between 65–75°F (18–24°C) during the day and no lower than 55°F (13°C) at night. Avoid drafts or heat sources (like radiators). Cold stress? Move domes to a warmer spot—seedlings slow growth in chilly conditions. A seedling heat mat (set to 70°F) can help if your space runs cool.
Wrapping up and next steps
Mastering the art of seed starting with a humidity dome transforms your sprouting game into a controlled, thriving sanctuary! 🌱 By balancing moisture, temperature, and airflow, you’ll give your seeds the perfect head start—whether you’re a seasoned gardener or just beginning.
The key? Patience and precision—your little seedlings will reward you with lush, healthy growth in no time.
Ready to watch your garden dreams take root? Grab your dome, gather your seeds, and get growing! Next, explore transplanting tips to keep those seedlings thriving as they transition to their forever homes. 🌿✨