
Propagation
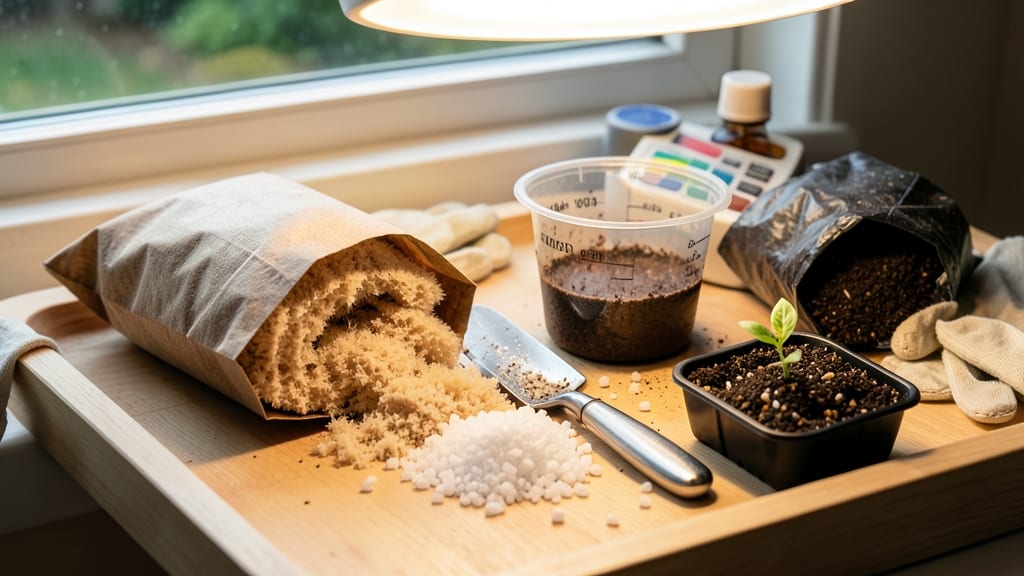
My DIY seed starting mix with coco coir changed how I grow seedlings—no more leggy, weak starts that flop under grow lights. 🌱 The secret lies in coco coir’s perfect balance of moisture retention and aeration, which keeps seeds happy while they germinate and young roots establish.
Unlike heavy potting soil, this lightweight mix prevents damping-off and gives seedlings the strong start they need to thrive. The recipe is simple: just coco coir, perlite, and a pinch of compost for nutrients, all mixed in a 1:1 ratio with optional vermiculite for extra moisture control.
Sterilizing the mix with a light baking or diluted hydrogen peroxide ensures no fungal surprises, and the result is a fluffy, crumbly medium that holds moisture without staying soggy. For indoor seed starting, this mix outperforms store-bought options every time.
What you’ll end up with are seedlings that pop up faster, stand taller, and handle transplanting like pros. The mix stays fresh for months if stored in a sealed container, and you’ll love how it transforms weakling starts into vibrant, stocky plants ready for the garden.
No more wilting or mold—just reliable germination and growth. Works for everything from tomatoes and peppers to delicate herbs and flowers, whether you’re starting seeds in trays, peat pots, or DIY containers. Here’s how to make it foolproof the first time.
📚 In This Guide
- What you need
- Instructions
- Tips and common mistakes
- Wrapping up and next steps
What you need
- ● Coco coir (bricks or blocks) – 1 part (expand in water first; ~2 cups dry = ~5 cups expanded)
- ● Perlite or vermiculite – 1 part (for aeration; blank">perlite is lighter, blank">vermiculite retains moisture better)
- ● Worm castings or compost – ½ part (for nutrients; blank">worm castings are gentler on seedlings)
- ○ Optional: Horticultural charcoal – ¼ part (prevents mold; blank">optional but helpful)
- ● Large mixing bowl or clean bucket (sterilized with a 10% bleach solution if reused)
- ● Measuring cups or scale (for precision ratios)
- ● Spray bottle (to mist the mix after blending)
- ● Seed trays or containers (with drainage holes; plastic or biodegradable pots work well)
- ● Water (room temp or slightly warm) – Enough to hydrate coco coir fully
How to make a lightweight DIY seed starting mix with coco coir
This mix gives seedlings the perfect balance of aeration and moisture retention—no more leggy, weak sprouts.
🌱 Step 1: Measure and Combine the Base Materials
Start with 2 parts coco coir—this is your moisture-retentive base that mimics soil's natural structure while staying lightweight. I use 1 part perlite to create air pockets that prevent compaction and encourage root development. For 4 servings, mix 4 cups coco coir with 2 cups perlite in a large container.
Fluff the coco coir first with your hands to break up any clumps—it arrives compressed, and you want it to resemble fine, damp sand. Then, sprinkle the perlite evenly over the top and stir gently with a clean stick or spoon. You'll see the perlite distribute evenly, creating a uniform texture that's light enough to handle without crumbling.
💧 Step 2: Add Moisture and Conditioners for Germination
Gradually add warm water while mixing until the blend reaches a consistency like a damp sponge—it should hold together when squeezed but not drip. For 4 servings, you'll need about 1.5 cups of water, but adjust slightly based on your coco coir's moisture content (some brands are drier than others).
Here's the thing—coco coir alone lacks nutrients, so stir in 1 tablespoon of worm castings and 1 tablespoon of mycorrhizal fungi per serving. These boost microbial activity and provide gentle, long-lasting nutrition. Mix thoroughly until the amendments are evenly distributed—you'll notice the blend darken slightly as the castings integrate.
☀️ Step 3: Sterilize and Test Before Planting
Transfer the mix to a microwave-safe container and heat on high for 2 minutes to kill any dormant pathogens. Let it cool completely before use—this step prevents damping-off disease, which can wipe out seedlings overnight. While cooling, press a small handful into your palm; it should crumble easily when dry but hold shape when damp.
Fill your seed-starting trays or pots with the mix, leaving ½ inch of space at the top for watering. Tap the containers gently on the table to settle the mix without compacting it. The goal is a fluffy, airy medium that won't suffocate tender roots. Now your mix is ready to use—just wait until seeds are planted to water again.
✂️ Step 4: Maintain Ideal Moisture for Germination
Water the mix only when the top ½ inch feels dry to the touch—overwatering here leads to oxygen deprivation and rot. Use a spray bottle for the first watering after planting to avoid displacing seeds. Place the trays under grow lights (or in a 75-85°F warm spot) and cover with a humidity dome until germination.
Watch for first true leaves (not the initial seed leaves) to appear—this signals successful root establishment. Once they emerge, remove the dome and increase airflow to harden seedlings. This mix stays moist longer than traditional soil but drains excess water quickly, giving you the perfect balance for strong starts.
Tips & tricks for perfect DIY seed starting mix
Here's what nobody tells you about creating the ideal environment for your seedlings to thrive.
Texture is Everything: When mixing your 4 cups coco coir with 2 cups perlite in Step 1, aim for a consistency that resembles fine, damp sand. The perlite should be evenly distributed like popcorn throughout the coco coir—this creates the perfect air-to-moisture ratio. I learned this the hard way after my first batch came out clumpy and compacted, which led to poor root development. Fluff the coco coir thoroughly before adding perlite to prevent this common pitfall.
Nutrient Timing Matters: In Step 2, don't rush adding the 1 tablespoon each of worm castings and mycorrhizal fungi. These microbial boosters need time to integrate fully, so mix them in after the water but before sterilization. The fungi, in particular, are delicate—handle them gently to preserve their beneficial properties. I noticed a significant difference in germination rates when I took this extra step compared to when I added them last minute.
Sterilization Safety: That 2-minute microwave sterilization in Step 3 is non-negotiable for preventing damping-off disease. Use a microwave-safe container with a loose lid to allow steam to escape—this prevents pressure buildup that could cause splattering. After sterilizing, let the mix cool completely before handling, as residual heat can damage delicate seedling roots. I once rushed this step and ended up with moldy trays of seeds that never germinated.
Moisture Management: The top ½ inch dry test in Step 4 is your best friend. Use your finger to check moisture levels—it should feel damp but not soggy. Overwatering here is the #1 killer of seedlings, as it deprives roots of oxygen. For the first watering after planting, a spray bottle creates a gentle mist that won't disturb seeds. I've seen seedlings go from thriving to wilted overnight when the mix was too wet, so this simple check saves countless plants.
Pro Tips for Diy Seed Starting Mix With Coco Coir
- Here's what nobody tells you about creating the ideal environment for your seedlings to thrive.
- Texture is Everything: When mixing your 4 cups coco coir with 2 cups perlite in Step 1, aim for a consistency that re...
- Nutrient Timing Matters: In Step 2, don't rush adding the 1 tablespoon each of worm castings and mycorrhizal fungi. T...
Frequently asked questions
How long does a DIY coco coir mix stay fresh?
A properly stored coco coir mix (kept dry in a sealed container) can last 6–12 months. Once moistened, use it within 2–4 weeks to prevent mold or bacterial growth. For longer shelf life, add a sprinkle of perlite or vermiculite to improve aeration.
Can I use this mix year-round, or is timing critical?
This mix works anytime, but seedling success depends on light, temperature, and humidity—not the mix itself. Start indoors 6–8 weeks before last frost for cool-season crops (like lettuce) or 4–6 weeks for warm-season plants (like tomatoes). Adjust timing based on your climate!
What’s a good alternative if I can’t find coco coir?
Try these budget-friendly swaps:
- Peat moss + perlite (50/50 ratio) – but it’s less sustainable.
- Shredded newspaper + compost (for budget starts, though less sterile).
- Coconut husk fiber (if coco coir is unavailable, check bulk stores).
Why are my seeds rotting, even with coco coir?
Overwatering or poor drainage are the top culprits! Ensure your mix has 20–30% perlite/vermiculite for airflow. Water only when the top inch feels dry, and use trays with drainage holes. If mold appears, discard the batch—don’t reuse it.
Do I need to sterilize the mix before use?
Not always! Coco coir is naturally sterile when bagged, but if using homemade compost or garden amendments, bake the mix at 200°F (93°C) for 30 minutes to kill pathogens. For peace of mind, a 5-minute microwave sterilization (covered) works too!
Wrapping up and next steps
Creating your own seed-starting mix with coco coir is a game-changer for gardeners—it’s cost-effective, lightweight, and packed with benefits like improved germination and root development. 🌱 Whether you’re a seasoned pro or just starting, this DIY approach gives you full control over your plants’ growth environment.
Now that you’ve got the know-how, why not start small? Try a batch for your next batch of seedlings and watch your green thumb shine even brighter!
Next step:
- Grab your coco coir and get mixing!
- Experiment with ratios to find your perfect blend.