
Propagation
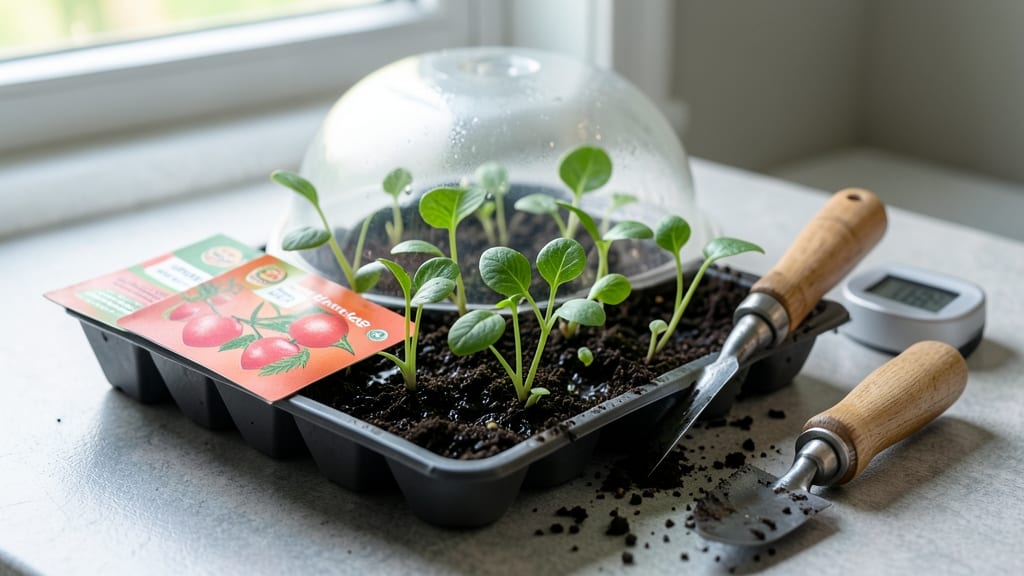
Speeding up fast seed germination from weeks to days is possible—no magic, just science. 🌱 I used to wait 3-4 weeks for my basil to sprout, but after mastering this warmth-and-moisture trick, I now see tiny green hooks breaking soil in 3-5 days.
The secret? Mimicking the cozy, damp conditions seeds crave in nature—without overcomplicating things.
You’ll need just four simple tools: a heat mat (or warm spot), a spray bottle, a clear container, and a damp paper towel. The process takes less than 10 minutes to set up, and the payoff is seedlings that outpace store-bought plants.
Most seeds need 70-85°F soil temps to germinate fast—your kitchen counter or a sunny windowsill often hits the mark, but a heat mat cuts the guesswork.
By the time you’re ready to transplant, you’ll have stocky, true-leaf seedlings instead of leggy, weak ones. The moisture trick keeps seeds from drying out while they wake up, and the warmth signals them to break dormancy faster.
Even finicky seeds like peppers and tomatoes respond within a week with this method—no more staring at empty seed trays.
Works for any seed, from herbs to vegetables, and adapts to small spaces or large batches. The only mistake? Skipping the moisture check—seeds need to stay damp but not soggy. Let’s get those sprouts growing!
📚 In This Guide
- What you need
- Instructions
- Tips and common mistakes
- Wrapping up and next steps
What you need
- ● Seeds: Choose fast-germinating varieties like radishes, beans, or lettuce (check seed packets for germination times). Quantity: 5–10 seeds per experiment.
- ● Germination medium: Paper towels (2–3 sheets, unbleached) or
- ● Peat pellets (1–2 pellets per seed) or
- ● Cocopeat/coco fiber (1 cup, pre-moistened).
- ● Spray bottle (16 oz, with a fine mist nozzle).
- ● Plastic bag or dome lid (to retain humidity; e.g., a ziplock bag or clear container lid).
- ● Heat source: Heating mat (set to 70–85°F) or
- ● Warm water bath (place container in a bowl of warm water) or
- ● Sunny windowsill (near a south-facing window).
- ● Container: Shallow tray, egg carton, or small pots (with drainage holes if transplanting later).
- ● pH meter or test kit (to check water/medium pH, ideal: 6.0–7.0).
- ● Seedling heat mat (for consistent warmth, ~$15–$25).
- ● Grow lights (LED or fluorescent, 12+ hours/day once sprouts emerge).
- ● Humidity dome (pre-made or DIY with a plastic bottle).
- ● Journal/notebook (to track germination progress and conditions).
- ○ Fungicide (optional) (e.g., hydrogen peroxide 3%, 1 tsp per cup of water to prevent mold).
Step-by-step guide to fast seed germination
Here’s how to coax seeds to sprout in record time with the right conditions.
🌱 Step 1: Prep Seeds for Faster Germination
Start by soaking seeds overnight in lukewarm water to soften their outer coating—this trick cuts germination time nearly in half. Use a small bowl or jar and let them soak for 12-24 hours, then drain and blot them dry with a paper towel. The goal is to hydrate the seed without letting it sit in water, which can cause rot.
For delicate seeds like lettuce or snapdragons, a quick rub between your fingers or a light nick with a sharp knife can help break dormancy. Just avoid damaging the seed’s core. This step is especially useful for seeds with hard shells, like peas or beans, which often need this extra encouragement to wake up.
💧 Step 2: Use Warmth to Kickstart Growth
Seeds germinate fastest in warmth—aim for a consistent 75-85°F environment. Place your seed trays on a seedling heat mat or nestle them in a warm spot like the top of your fridge. If you don’t have a heat mat, try setting the tray on a sunny windowsill during the day and moving it to a warm indoor spot at night.
Keep the soil moist but not soggy—press your finger into the mix to check. It should feel damp like a wrung-out sponge, not dripping. Overwatering here slows germination by suffocating seeds, while too little moisture halts the process entirely. A spray bottle helps deliver gentle, even moisture without disturbing seeds.
☀️ Step 3: Cover for Humidity and Light
Seal your seed tray with plastic wrap or a clear dome to trap humidity and warmth, which speeds up the sprouting process. Check daily for condensation—if the inside fogs up, the humidity is perfect. Remove the cover as soon as you see the first signs of sprouts to prevent mold, usually within 3-7 days depending on the seed type.
Once seeds sprout, move them to a bright spot with indirect light to prevent leggy growth. Avoid direct sun at this stage—it can scorch tender seedlings. A south-facing window or grow light works best. You’ll know they’re ready for more light when their first true leaves (not the initial seed leaves) appear, typically within 7-10 days of sprouting.
⏰ Step 4: Monitor and Adjust Conditions
Watch for signs of stress like yellowing leaves or stunted growth—these often mean the soil is too cold or dry. If germination stalls after 10-14 days, try gently pressing the soil around the seeds to encourage root contact. Some seeds, like tomatoes, benefit from a light scratch on their outer shell before planting to break dormancy.
For slow germinators like okra or parsley, patience is key. These seeds may take 2-3 weeks to sprout, but warmth and moisture will still cut that time significantly. Once you see consistent sprouts, thin them to 1-2 inches apart to avoid competition. This ensures stronger, healthier plants from the start.
Tips & tricks for perfect seed germination
Here's what nobody tells you—these small tweaks make all the difference between waiting weeks for sprouts and seeing them pop in days.
Soaking Strategy: The 12-24 hour soak isn't just about hydration—it's about breaking the seed's natural dormancy barrier. For extra stubborn seeds like chives or parsley, try a warm water soak with a pinch of honey (just a teaspoon in the soaking water) to stimulate growth hormones. The honey's natural sugars provide an instant energy boost while preventing bacterial growth. Drain thoroughly after soaking—waterlogged seeds rot faster than they sprout.
Temperature Troubleshooting: That 75-85°F range is non-negotiable for most seeds, but here's the secret: if your home stays below 70°F, use a seedling heat mat under your tray during the day only—overnight, normal room temperature is fine. For seeds like peppers that need even more heat (80-90°F), place your tray on top of your refrigerator during the day—it's warmer than you'd think! Just monitor for condensation buildup which can cause mold.
Light Transition Hack: When moving sprouts to indirect light after 3-7 days, here's the pro move: place them under a white fluorescent bulb (not LED) for 12 hours a day before transitioning to natural light. Fluorescent bulbs emit the right spectrum for early growth without the intensity of sunlight. Watch for that first set of true leaves—they'll be smaller than the initial seed leaves and have a different shape. That's your cue to increase light exposure gradually.
Slow Germinators' Secret: For those 2-3 week seeds like okra or parsley, try this: after your initial 12-24 hour soak, place them in the fridge for 48 hours before planting. This cold treatment mimics winter conditions and actually speeds up germination for these stubborn varieties. The cold breaks down growth inhibitors in the seed while the warm soil after planting provides the perfect contrast to kickstart growth. It's like giving them a natural season change in a hurry!
Pro Tips for Fast Seed Germination
- Here's what nobody tells you—these small tweaks make all the difference between waiting weeks for sprouts and seeing ...
- Soaking Strategy: The 12-24 hour soak isn't just about hydration—it's about breaking the seed's natural dormancy barr...
- Temperature Troubleshooting: That 75-85°F range is non-negotiable for most seeds, but here's the secret: if your home...
Frequently asked questions
Got questions about speeding up those sprouts? You’re not alone! Here are some of the most common queries—and their quick, actionable answers—to help you master fast seed germination like a pro.
How warm does the germination setup need to be?
Aim for 70–90°F (21–32°C)—most seeds thrive in this range. Use a seedling heat mat, warm water, or a sunny windowsill. Avoid extreme heat (above 95°F/35°C), which can "cook" seeds or stunt growth. Pro tip: Place a thermometer nearby to monitor temps accurately!
How long does it take to see sprouts with this method?
Timing varies by seed type! Fast growers like radishes or beans may sprout in 3–7 days, while slower seeds (e.g., tomatoes, peppers) can take 1–3 weeks. Check moisture daily—consistency is key. If nothing emerges after 2x the expected time, test viability (soak in water; sinkers = good, floaters = bad).
What if my seeds aren’t germinating—am I doing it wrong?
Troubleshoot with this checklist:
- Moisture: Paper towels should stay damp (not soggy)—squeeze excess water.
- Airflow: A sealed bag traps condensation; crack it open daily.
- Light: Most seeds don’t need light to sprout (except large seeds like peas).
- Age: Old seeds (2+ years) lose viability—test a few first!
Can I reuse the paper towels or germination setup?
Not safely! Paper towels harbor fungus or bacteria after use—toss them post-germination. For reusable setups, sanitize containers with 10% bleach solution or boiling water. Warning: Never reuse soil or growing medium from failed attempts—it may contain pathogens.
What’s the best alternative if I don’t have paper towels?
No worries—try these DIY swaps:
- Coffee filters (breathable + compostable!)
- Clean kitchen towels (cotton or linen)
- Peat moss or coconut coir (for larger seeds)
- Even a damp sponge in a sealed container works!
Wrapping up and next steps
Fast seed germination isn’t just about patience—it’s about creating the perfect conditions for your plants to thrive from day one. 🌱 With the right balance of warmth, moisture, and a little patience, you can watch sprouts emerge in record time.
Whether you’re a seasoned gardener or just starting out, these tricks will help you grow faster, stronger plants.
Now that you’re armed with the know-how, it’s time to roll up your sleeves and get growing! Start with a small batch of seeds, experiment with the techniques, and soon you’ll be harvesting a bountiful garden. Happy planting! 🌿