
Propagation
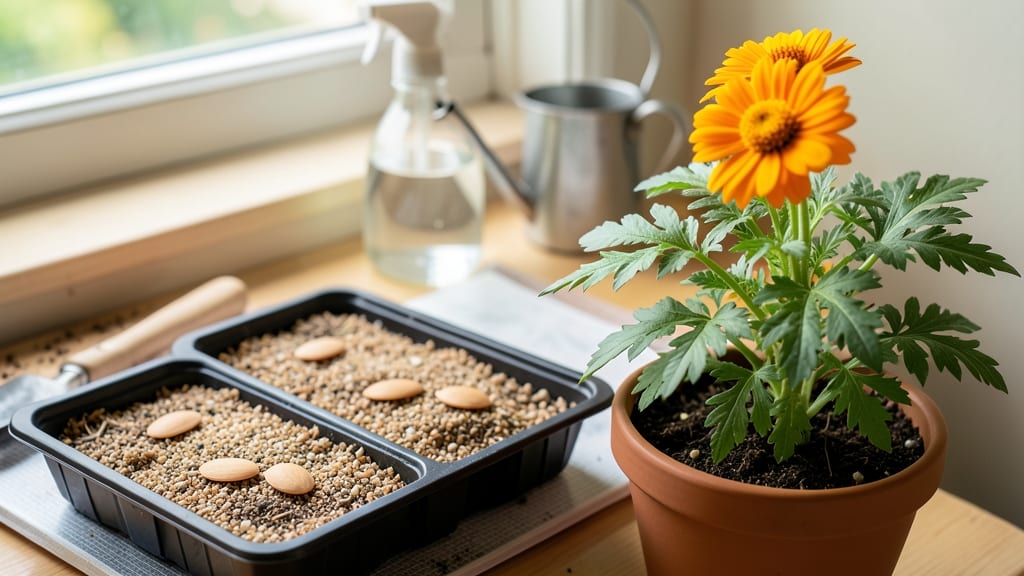
Calendula seeds in pots transform your windowsill into a sunny patch of bright orange blooms in just 6 weeks. 🌱 I’ve grown calendula from seed for years, and the secret isn’t complicated—it’s about timing, the right soil, and a little patience.
These cheerful flowers thrive in containers, making them perfect for small spaces or gardeners with limited room. You’ll need a sunny spot, well-draining soil, and pots at least 6 inches deep. The key? Start seeds indoors 6-8 weeks before your last frost, and keep them moist but not soggy.
Calendula loves warmth and light, so a south-facing window or grow light works best. Once sprouted, thin seedlings to avoid overcrowding—this ensures stronger, healthier plants. By week 6, you’ll be snipping fresh blooms for salads, teas, or bouquets.
The flowers stay vibrant for weeks, and the plants keep producing all season long. Plus, calendula naturally deters pests, making it a great companion plant. This method works for beginners and seasoned gardeners alike. Whether you’re growing for beauty, harvest, or both, calendula is a foolproof choice.
Let’s get those seeds sprouting!
📚 In This Guide
- What you need
- Instructions
- Tips and common mistakes
- Wrapping up and next steps
What you need
- ● Ready to grow vibrant calendula from seed in pots? Here’s everything you’ll need to get started—no fancy tools required, just the essentials for success! 🌱✨
- ● Pro tip: 💡 If you’re short on space, try stackable pots or a vertical garden—calendula thrives in tight quarters!
Step-by-Step instructions for growing calendula from seed in pots
Here’s how to coax vibrant calendula blooms from tiny seeds—no greenhouse required.
🌱 Step 1: Prepare Pots and Seed Starting Mix
Fill 4-inch diameter pots (one per seedling) with a sterile seed-starting mix—never garden soil, which compacts and blocks root growth. I press the mix down lightly with my fingers until it’s firm but not packed. The goal is to eliminate air pockets while keeping it loose enough for delicate roots to penetrate. Moisten the mix thoroughly with lukewarm water until it’s damp to the touch but not soggy. Calendula seeds need consistent moisture to germinate, so I like to water from the bottom to avoid displacing the soil surface.
Place the pots in a shallow tray to catch any excess water. This method ensures even moisture without drowning the seeds. If your mix feels dry after a day, add a little more water—calendula seeds won’t germinate if the soil dries out completely. I always label my pots with the date and variety, because calendula seedlings look identical until they develop true leaves.
🌱 Step 2: Sow Seeds at the Right Depth
Sprinkle 3-4 seeds per pot, spacing them about ½ inch apart—calendula seeds are tiny, so I use a toothpick to place them precisely. Press them into the soil just enough to cover them with ⅛ inch of mix. Sowing too deep delays germination because the seedling must push through more soil, exhausting its energy reserves. I gently mist the surface with a spray bottle to settle the seeds without disturbing their placement.
Cover the pots with a clear plastic dome or plastic wrap to retain warmth and humidity. Calendula seeds germinate best at 65-75°F, so if your home runs cooler, place the pots on a seedling heat mat. Check for sprouts in 7-14 days—you’ll see tiny green hooks breaking through the soil first. Once 50% of seeds sprout, remove the dome immediately to prevent damping-off, a fungal disease that collapses seedlings overnight.
☀️ Step 3: Provide Bright, Indirect Light
The moment seedlings emerge, move them to a bright, indirect light source—a south-facing window works, but calendula seedlings stretch toward light if it’s too weak. I use a grow light positioned 4 inches above the pots and set it to 14-16 hours of light daily. You’ll know the light is sufficient when seedlings grow stocky and dark green rather than leggy and pale.
Rotate the pots a quarter turn every 2-3 days so seedlings grow upright instead of leaning toward the light. If you notice stems elongating and leaves spacing far apart, your light is too distant—move it closer. Calendula seedlings develop first true leaves (the second set after the initial cotyledons) in 2-3 weeks. At this stage, you can gently transplant the strongest seedling to its own pot if you over-sowed.
💧 Step 4: Water and Fertilize for Strong Growth
Water the seedlings when the top inch of soil feels dry, using a watering can with a fine rose attachment to avoid disturbing the soil. Calendula dislikes soggy roots, so always let excess water drain completely. I fertilize with a balanced liquid fertilizer (10-10-10) diluted to half strength when the seedlings have 4-5 true leaves, about 3-4 weeks after sowing. This encourages robust growth without burning tender foliage.
Pinch off the top set of leaves when seedlings reach 3-4 inches tall to encourage bushier growth. This might seem counterintuitive, but it redirects energy to lateral branches, resulting in more flowers. You’ll see new side shoots emerge within 7-10 days—this is your signal that the plant is responding well. Keep the pots in full sun (6+ hours daily) once seedlings are established, as calendula thrives in bright conditions.
⏰ Step 5: Transplant and Maintain for Continuous Blooms
When seedlings reach 4-5 inches tall and have 5-6 true leaves, transplant them to 6-inch pots filled with a mix of potting soil and compost. Calendula grows best in well-draining soil, so I add a handful of perlite or sand to improve aeration. Water thoroughly after transplanting to settle the roots, and place the pots in a sunny spot where they’ll receive at least 6 hours of direct sunlight daily. You’ll see new growth within 5-7 days, indicating the plant has recovered from the shock.
Deadhead spent blooms by snipping them back to the nearest set of leaves to encourage continuous flowering. Calendula is a prolific bloomer, and regular deadheading keeps the plant producing bright orange and yellow flowers for weeks. In cooler climates, calendula may go dormant in winter, but with proper care, it often self-seeds for next year’s garden. The key is consistency—water when the soil dries, fertilize monthly, and keep it in full sun.
Tips & tricks for growing calendula from seed in pots
Took me a while to figure these out, so here's what actually works for vibrant calendula blooms.
Germination Environment: The 65-75°F temperature range is crucial for germination, but don't just rely on your thermostat reading. Place a thermometer near your seed trays to monitor accurately. If your home runs cooler, particularly at night, consider using a seedling heat mat set to 70°F—this can cut your germination time from 14 days down to just 7 days. I've found that consistent warmth at the soil level makes all the difference when dealing with tiny calendula seeds.
Light Transition Strategy: In Step 3, when you're moving seedlings to bright indirect light, here's a pro move: Gradually increase their light exposure over 3-4 days rather than moving them directly to full intensity. Start with 4 hours of light, then add 2 more hours each day until reaching the full 14-16 hours. This helps prevent shock and the leggy growth that occurs when seedlings aren't properly acclimated to stronger light conditions.
Transplanting Technique: When transplanting to 6-inch pots in Step 5, I've learned to make the transition easier by watering both the original pot and the new pot thoroughly before moving the seedlings. Gently squeeze the sides of the original pot to loosen the root ball, then slide the seedling out using a butter knife. This minimizes root disturbance and helps the plant recover faster. The key is to handle the roots as gently as possible—calendula is surprisingly delicate at this stage.
Continuous Care: For the brightest blooms, I've found that deadheading isn't just about appearance—it's about plant health. When you remove spent blooms, you're also preventing energy from going into seed production. I like to use clean, sharp scissors and make the cut just above a set of leaves. This encourages the plant to produce more flowers rather than focusing on seed development, which can actually weaken the plant over time.
Pro Tips for Growing Calendula From Seed In Pots
- Took me a while to figure these out, so here's what actually works for vibrant calendula blooms.
- Germination Environment: The 65-75°F temperature range is crucial for germination, but don't just rely on your thermo...
- Light Transition Strategy: In Step 3, when you're moving seedlings to bright indirect light, here's a pro move: Gradu...
Frequently asked questions
Got questions about growing calendula from seed in pots?
Here are answers to the most common ones—so you can enjoy vibrant blooms without the guesswork!
How long does it take for calendula seeds to germinate?
Calendula seeds typically sprout in 7–14 days when kept warm (around 70°F) and moist. For faster results, soak seeds in warm water for 24 hours before planting. If germination takes longer, check moisture levels—seeds need consistent dampness but not soggy soil.
Can I grow calendula indoors year-round in pots?
Yes! Calendula thrives indoors with 6–8 hours of sunlight daily (a sunny windowsill or grow lights work). Use well-draining pots (6+ inches deep) and keep soil slightly moist. Just watch for leggy seedlings—if they stretch too tall, supplement with light or rotate pots for even growth.
What’s the best soil mix for potted calendula?
Use a light, airy mix like 50% potting soil + 50% perlite or compost. Calendula hates soggy roots, so add a handful of sand or coconut coir if your soil drains slowly. A pH of 6.0–7.0 is ideal—test your mix if blooms look weak or yellow.
Why aren’t my calendula seeds sprouting?
Check these fixes:
- Cold soil: Seeds need warmth (70°F+) to germinate. Use a heat mat or place pots on top of a fridge.
- Old seeds: Calendula seeds lose viability after 2 years. Test viability by soaking seeds overnight—floated seeds are likely dead.
- Too deep: Plant seeds ¼ inch deep max. Over-burying blocks light and air, slowing germination.
Can I harvest calendula petals from potted plants?
Snip fully open blooms in the morning for best potency. Let a few flowers stay to encourage regrowth. Dry petals in a dark, airy spot (like a mesh bag) for 1–2 weeks, then store in jars. Potted calendula may produce smaller harvests than garden-grown, but they’re perfect for small batches of salves or teas!
Wrapping up and next steps
Growing calendula from seed in pots is a rewarding journey that brings vibrant color and natural beauty to your space in just six weeks!
With the right tools, patience, and a little care, you’ll enjoy lush blooms perfect for edible gardens, healing remedies, or simply brightening up your home. 🌼
Now that you’re armed with tips and tricks, it’s time to get those seeds planted. Start small—even a single pot can yield a bounty of cheerful flowers. Once your calendula thrives, consider expanding your garden or sharing cuttings with fellow plant lovers. Happy growing! 🌱