
Propagation
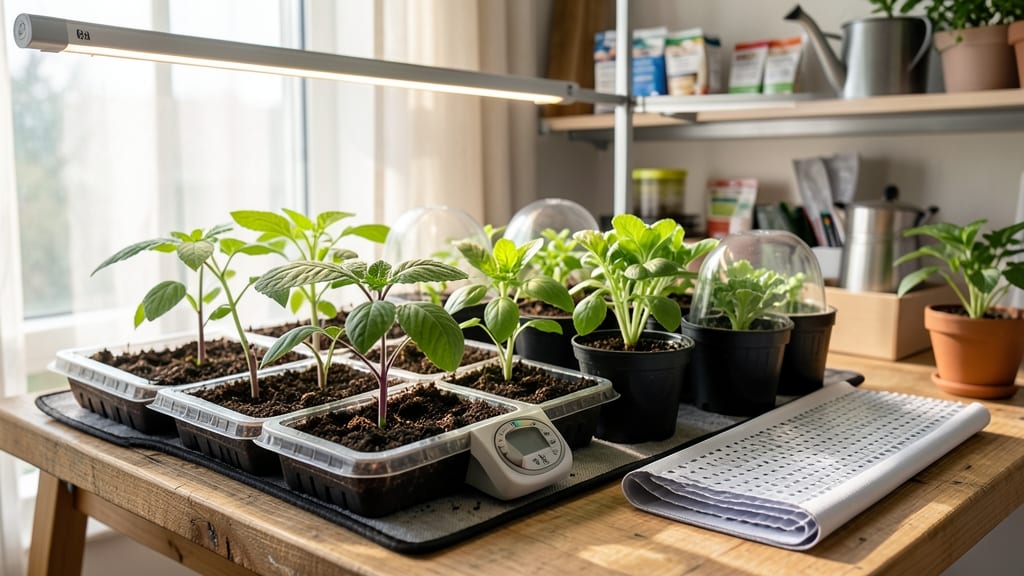
My seed starting game changed the day I tried a heating pad—germination went from weeks to days. 🌱 These simple devices create the cozy warmth seeds crave, especially when your basement stays chilly or spring arrives late. The right setup turns a slow, hit-or-miss process into a predictable, fast-tracked success.
Start with a 100-watt heating pad designed for seedlings—nothing fancy, just consistent warmth. Place it under your seed trays (never directly touching soil) and set the thermostat to match your seeds' needs: most veggies thrive at 70-75°F, while peppers and tomatoes prefer 80-85°F.
A simple thermometer tucked into the soil ensures you're not guessing.
You'll notice the difference immediately: seeds sprout 2-3 times faster, and seedlings emerge stronger, not leggy. The pad also keeps humidity stable, reducing the risk of mold while maintaining that perfect damp-but-not-soggy environment. Even my finicky parsley now germinates reliably—something I never dared hope for.
For best results, pair the pad with a clear plastic dome or humidity tray. Just remember: never leave it unattended—overheating can fry seeds faster than you'd think. With this setup, you'll be transplanting sturdy seedlings in half the usual time, giving your garden a serious head start.
📚 In This Guide
- What you need
- Instructions
- Tips and common mistakes
- Wrapping up and next steps
What you need
- ● Heating pad (1): 150–180 watts (for most seed trays)
- ● Adjustable thermostat (ideal range: 65–85°F)
- ● Self-regulating or thermostatically controlled (safety first!)
- ● Seed starting tray (1): Plastic or aluminum (10"x20" is standard)
- ● Clear lid (for humidity control)
- ● Seed starting mix (1–2 bags): Sterilized, lightweight mix (e.g., Pro-Mix or FoxFarm)
- ● Avoid garden soil (too dense for germination!)
- ● Seeds (your choice!)
- ● Spray bottle (1, for moisture)
- ○ Thermometer (1, optional but helpful for monitoring temps)
- ● DIY heating pad alternative: Incandescent light bulb (40–60W) + reflector (for warmth + light)
- ● Humidity dome (if your tray doesn’t have one)
- ● Heat mat with timer (for automated warmth cycles)
- ● Grow lights (if starting in low-light areas)
Step-by-step guide to using heating pads for faster seed germination
Here's how to harness consistent warmth for reliable, speedy sprouts—no guesswork involved.
🌱 Step 1: Select the Right Heating Pad and Position It Properly
Choose a seedling heat mat rated for at least 75-85°F surface temperature—this range mimics tropical conditions where most garden seeds originate. I recommend a matt black mat (they retain heat better) that’s slightly larger than your seed trays to ensure even coverage. Place the pad on a stable, level surface like a shelf or table where it won’t get jostled.
Position your seed trays directly on top of the mat, ensuring the entire bottom surface makes contact. If using multiple trays, leave a ½-inch gap between them so heat circulates evenly. Never stack trays—they’ll create hot spots and cold zones that confuse germination. I like to use a small plastic tray underneath to catch any condensation that forms during the process.
⏰ Step 2: Set Up Your Seed Trays for Optimal Warmth
Fill your seed trays with moistened seed-starting mix (not garden soil) to within ½ inch of the rim, then gently press the surface to remove air pockets. Plant your seeds according to packet instructions, then cover lightly with a thin layer of mix—about ¼ inch deep for most seeds. Mist the surface with a spray bottle until the mix looks evenly damp but not soggy.
Here’s the thing—warmth accelerates germination, but only if the soil stays consistently moist. Place a clear plastic dome or plastic wrap over the trays to trap humidity, but leave it slightly ajar if condensation builds up. Check daily and remove the cover completely once 50% of seeds have sprouted—this prevents damping-off disease that thrives in overly humid conditions.
☀️ Step 3: Monitor Temperature and Adjust for Success
Use a seedling thermometer placed directly on the soil surface to verify the temperature stays within the 75-85°F range. Most heating pads have built-in thermostats, but I’ve found they often run 5-10°F cooler than advertised. If the soil feels cooler than 70°F, your pad may be too small or the ambient room temperature too low—try moving it to a warmer spot or adding an extra layer of insulation underneath.
Watch for condensation buildup on the plastic cover. If you see heavy fogging, the humidity is too high—lift the cover for 10-15 minutes daily to let excess moisture escape. You’ll know the setup is working when tiny green sprouts appear in 5-10 days (faster than without heat!). If germination takes longer than 14 days, the soil may be too cold or the seeds too old—check your thermometer and consider replacing the seed packet.
🌿 Step 4: Transition Seedlings Off the Heat Mat Safely
Once seedlings develop their first true leaves (not the initial seed leaves), they’re ready to graduate from the heat mat. Reduce heat exposure gradually over 3-4 days by lowering the mat’s temperature setting (if adjustable) or moving the trays to a warmer but not hot spot in the room. This mimics natural temperature shifts and prevents shock. I like to place them under grow lights during this transition to maintain energy production.
After 7-10 days off the mat, your seedlings should look stocky with deep green leaves and no signs of stretching. If they appear leggy or pale, they need more light—move them within 2-3 inches of a grow light or a south-facing window. Avoid placing them directly under the light; seedlings can scorch if the light is too intense.
Tips & tricks for perfect seedling germination with heating pads
Common pitfalls—and how to sidestep every one when using heating pads for seed starting.
Heat Mat Selection: Not all heating pads are created equal. I’ve learned the hard way that cheaper, thinner mats struggle to maintain consistent temperatures—especially in cooler rooms. Look for mats with a thermostat setting and a minimum 75°F rating. I recommend a 12-inch x 24-inch mat for most home setups, as it provides enough surface area for multiple trays while still distributing heat evenly. The black color matters too—it absorbs and retains heat better than white or silver pads.
Soil Temperature Troubleshooting: That 75-85°F range is critical, but most built-in thermostats measure air temperature, not soil temperature. Use a seedling thermometer placed directly on the soil surface to verify—this is the only reliable way to know your seeds are getting the right warmth. If your soil feels cooler than 70°F, try placing the mat on a wooden cutting board first (wood insulates better than metal trays) or add a thin layer of aluminum foil underneath to reflect heat back up.
Condensation Control: Heavy fogging on your plastic cover isn’t just annoying—it’s a sign of too much humidity, which can lead to damping-off disease. The key is balance: lift the cover for 10-15 minutes daily to let excess moisture escape, but don’t remove it completely until 50% of seeds have sprouted. I’ve found that a small fan on low speed aimed at the trays for 5 minutes twice a day helps circulate air without disturbing the seeds. This mimics natural wind patterns and actually speeds up germination.
Transition Timing: The 3-4 day gradual reduction in heat is non-negotiable—seedlings shocked by sudden temperature changes will wilt or stretch unnaturally. Start by moving trays to a warmer room spot (like near a sunny window) during the day while keeping them on the mat at night. After 7-10 days off the mat, if your seedlings look leggy or pale, they’re telling you they need more light. Move them within 2-3 inches of a grow light, but never closer—this distance prevents scorching while still providing optimal energy production.
Pro Tips for Heating Pads For Seed Starting
- Common pitfalls—and how to sidestep every one when using heating pads for seed starting.
- Heat Mat Selection: Not all heating pads are created equal. I’ve learned the hard way that cheaper, thinner mats stru...
- Soil Temperature Troubleshooting: That 75-85°F range is critical, but most built-in thermostats measure air temperatu...
Frequently asked questions
Got questions about using heating pads for seed starting? You’re not alone! Here are some of the most common concerns—and their cozy, straightforward answers.
How warm should a heating pad be for seed starting?
Aim for 70–85°F (21–29°C) for most seeds, depending on the plant type. Check the seed packet for specifics—some tropical plants (like peppers or tomatoes) thrive at the higher end, while cool-season crops (like lettuce) prefer the lower range. Use a thermometer to monitor temperature and adjust as needed.
Can I use a heating pad with LED grow lights?
In fact, combining a heating pad with LED grow lights creates the perfect warmth + light setup for fast germination. Just ensure the pad isn’t too close to the lights to avoid overheating. A few inches of space between them keeps conditions ideal without stressing your seeds.
How long should I keep seeds on a heating pad?
Most seeds germinate within 5–14 days on a heating pad, but timing varies by plant. Once sprouts appear, remove the pad to prevent leggy growth or overheating. Monitor daily—some seeds (like beans) may need the pad longer, while others (like herbs) sprout quickly and can move to regular light.
What’s a good alternative if I don’t have a heating pad?
No heating pad? Try these DIY warmth hacks:
- Bottom heat: Place seed trays on top of a refrigerator (not the freezer!) or a laptop (turned off) for gentle warmth.
- Insulation: Wrap trays in a plastic bag or cover with clear plastic wrap to trap heat.
- Sunny spot: A south-facing windowsill (especially in spring) can work—just rotate trays for even light.
Why aren’t my seeds sprouting on the heating pad?
Check these troubleshooting tips:
- Moisture: Keep soil damp (not soggy)—use a spray bottle or misting setup.
- Depth: Plant seeds at the correct depth (usually 2–3x their size); too deep = slower sprouting.
- Temperature: Verify the pad is in the right range (use a thermometer!). Some pads lose heat over time.
- Fresh seeds: Old seeds (over 1 year) may struggle—test viability with a paper towel germination test.
Wrapping up and next steps
Heating pads for seed starting are a game-changer for gardeners eager to jumpstart their growing season! 🌱 With consistent warmth, they boost germination rates, save time, and create an ideal environment for tiny seeds to thrive.
Whether you're a beginner or a seasoned pro, these cozy tools make propagation easier and more efficient—so you can enjoy lush seedlings (and future harvests) sooner.
Ready to level up your seed-starting game? Grab a heating pad, follow the tips you’ve learned, and watch your garden dreams take root—literally! 🌿 Next, pick your favorite seeds, set up your pad, and get growing!