
Lawn
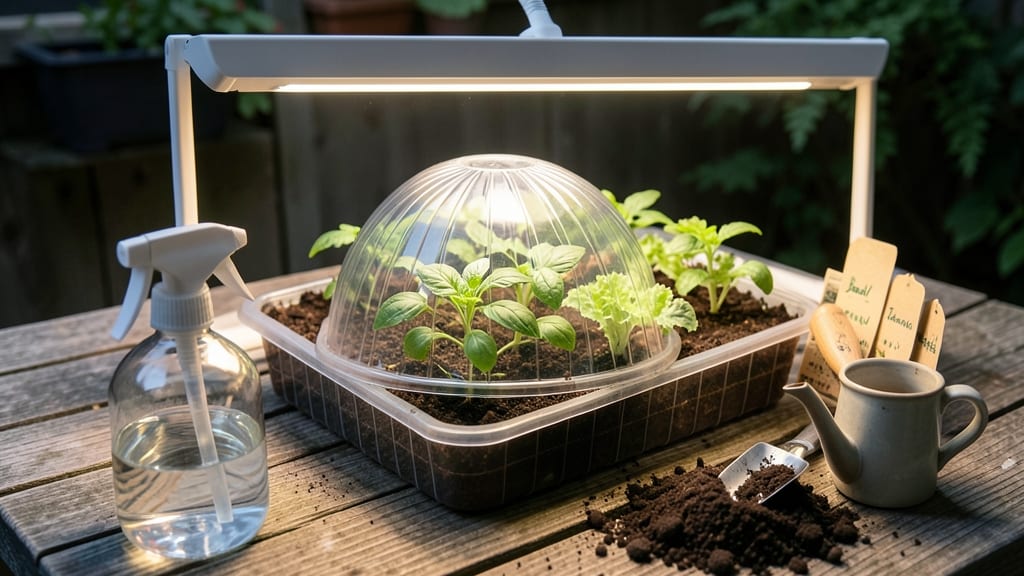
How to use seed starter cuts germination time in half—no more waiting weeks for tiny sprouts to peek through soil. 🌱 I’ve gone through dozens of seed-starting attempts, and the right mix of moisture, warmth, and light makes all the difference between a thriving tray of seedlings and a sad pile of damp seeds. The key is starting with a sterile, lightweight mix that holds moisture without compacting, paired with a clear lid or plastic wrap to trap humidity. Most seed packets include ideal planting depths—just follow those guidelines, and keep your trays in a warm spot (70-75°F) until sprouts appear. Overwatering is the #1 killer, so use a spray bottle instead of drowning the seeds. Once you see those first green leaves, move seedlings under grow lights or a south-facing window for 12-16 hours of light daily. You’ll notice sturdy stems and dark green leaves within 10-14 days, signaling it’s time to harden them off before transplanting. The payoff? Stronger plants that outperform store-bought seedlings every time. This method works for everything from tomatoes to herbs, and the same trays can be reused year after year with a good cleaning. No more wasted seed packets or weak starts—just reliable growth from day one.
📚 In This Guide
- What you need
- Instructions
- Tips and common mistakes
- Wrapping up and next steps
What you need
- ● Seed starter trays or containers – Choose biodegradable peat pots, coconut coir pods, or recycled egg cartons (6–12 units, depending on seed quantity).
- ● Seed starting mix – A lightweight, sterile potting soil (1–2 bags, 8–12 qt size) with perlite or vermiculite for drainage.
- ● Seeds – Fresh, high-quality seeds (check packet for planting depth and spacing).
- ● Watering can or spray bottle – A gentle misting tool to avoid disturbing seeds.
- ○ Clear plastic wrap or humidity dome – To retain moisture (optional but helpful for high-humidity crops like lettuce or herbs).
- ● Small hand trowel or spoon – For planting seeds (a butter knife works in a pinch!).
- ● Plant labels or popsicle sticks – To track seed varieties (write with a waterproof marker).
- ● Grow lights or sunny windowsill – 6–8 hours of light daily (a DIY LED bulb on a timer is budget-friendly!).
- ○ Heat mat (optional) – For slow-germinating seeds like peppers or tomatoes (70–85°F range).
- ● Compost or worm castings – A handful per tray boosts nutrients naturally.
Step-by-Step instructions for using seed starters
Here's how to turn those little seed-starting trays into a germination powerhouse—no waste, all growth.
🌱 Step 1: Prep Your Seed Starter Tray
Start by filling each cell of your seed starter tray with moistened seed-starting mix, leaving about ½ inch of space below the rim. Press gently to eliminate air pockets but don't compact the soil—you want it light enough for roots to push through easily. I like to use a spray bottle to moisten the mix evenly, avoiding clumps that could block drainage.
Here's the thing—don't skip the pre-moistening step. Dry soil repels water, and you'll end up with uneven moisture that either drowns some cells or leaves others bone-dry. Tap the tray lightly on the counter to settle the soil, then let it sit for 10 minutes so excess water drains away. You'll know it's ready when the surface feels damp but not soggy.
🌱 Step 2: Plant Seeds at the Right Depth
Check your seed packet for depth recommendations, but a good rule of thumb is planting seeds at a depth equal to 2-3 times their diameter. For tiny seeds like lettuce, that's just a light press into the surface, while larger seeds like beans need ½ inch of coverage. I use a toothpick to poke a small hole in each cell, drop in 1-2 seeds (just in case), then cover lightly with more mix.
Resist the urge to bury seeds too deep—this is where most germination failures happen. If you're unsure, err on the shallow side. After planting, give the tray another light mist with your spray bottle until the surface looks uniformly damp. This ensures good seed-to-soil contact, which is critical for consistent germination.
💧 Step 3: Create the Ideal Germination Environment
Place your seed starter tray in a warm location—70-80°F is perfect for most seeds. I keep mine on a seedling heat mat, which adds that extra warmth without extra effort. Cover the tray with a clear plastic dome or plastic wrap to trap humidity, but leave it slightly ajar if condensation forms on the inside. Too much moisture here leads to damping-off, a fungal disease that collapses seedlings overnight.
Check daily for moisture—you'll want the soil to stay consistently damp, not wet. If condensation forms on the inside of your cover, remove it for 30 minutes to let excess moisture escape. Most seeds will germinate within 5-14 days, depending on the variety. You'll know it's working when you see the first tiny green shoots poking through the soil.
☀️ Step 4: Transition to Light and Air
As soon as you see the first true leaves (not the initial seed leaves), remove the cover completely. This is the moment that matters—seedlings need light to grow strong, not just warmth to sprout. Move them to a bright location with 12-16 hours of light daily. A south-facing window works, but if your seedlings start stretching toward the light (a sign of legginess), supplement with a grow light placed 2-4 inches above the tray.
Rotate the tray a quarter turn daily so seedlings grow straight and don't lean toward the light source. You'll notice within a few days that the stems thicken and the leaves darken—this means your seedlings are photosynthesizing properly. Avoid overwatering now; let the top inch of soil dry out between waterings to prevent root rot.
⏰ Step 5: Harden Off and Transplant
About 2 weeks before your last frost date, start hardening off your seedlings. Move them outside to a sheltered, shaded spot for 1-2 hours the first day, then gradually increase their outdoor time by 1 hour daily. This acclimates them to wind, sun, and temperature fluctuations. You'll see their leaves toughen up and stems strengthen—these are good signs they're ready for the garden.
When transplanting, water the seedlings deeply the day before to reduce stress. Gently remove them from the seed starter tray, taking care not to disturb the root ball. Plant them at the same depth they were growing in the tray, and water thoroughly after transplanting. The key here is patience—rushing the process leads to transplant shock, which can set your seedlings back for weeks.
Tips & tricks for perfect seed starting
Common mistakes can turn your seed-starting dreams into a muddy mess—here's how to avoid them and grow like a pro.
Soil Prep Secret: The 10-minute drainage step in Step 1 is non-negotiable for preventing waterlogged cells. If your seed-starting mix feels like damp sand (not clumpy), you're golden. For faster prep, microwave your moistened mix for 30 seconds to warm it slightly—this helps eliminate air pockets while keeping the right moisture balance.
Depth Matters: In Step 2, when planting larger seeds like beans at ½-inch depth, use a pencil to create consistent holes—this prevents overcrowding and uneven germination. For tiny seeds, press them just below the surface instead of burying them; they need light to sprout. I've seen gardeners bury lettuce seeds ¼-inch deep and wonder why they didn't germinate!
Temperature Troubleshooting: The 70-80°F range in Step 3 is ideal, but if your home runs cooler, place the tray on top of your fridge (not inside) for gentle warmth. For seeds that need higher temps (like peppers), use a seedling heat mat set to 85°F. Watch for condensation—if you see heavy fogging inside your cover, remove it for that full 30 minutes to prevent damping-off.
Light Transition Hack: When moving to light in Step 4, start with 12 hours of light daily even if your natural daylight is shorter. Use a timer on your grow light to maintain consistency—seedlings remember their light cycles! If your seedlings stretch toward the light (called "legginess"), they're telling you they need more light or a closer light source.
Pro Tips for Use Seed Starter
- Common mistakes can turn your seed-starting dreams into a muddy mess—here's how to avoid them and grow like a pro.
- Soil Prep Secret: The 10-minute drainage step in Step 1 is non-negotiable for preventing waterlogged cells. If your s...
- Depth Matters: In Step 2, when planting larger seeds like beans at ½-inch depth, use a pencil to create consistent ho...
Frequently asked questions
Got questions about seed starters?
Here are answers to the most common ones—so you can grow confidently and efficiently!
What’s the best time to start seeds in a seed starter?
Timing depends on your climate and plant type. For cool-season veggies (like lettuce or spinach), start indoors 4–6 weeks before the last frost. Warm-season crops (tomatoes, peppers) need 6–8 weeks indoors before transplanting. Check your seed packets for specifics!
Can I reuse seed starter materials?
Zero-waste is the goal! Clean and sanitize trays, pots, or containers with a 1:9 bleach-water mix, rinse well, and reuse them for future batches. Even compostable materials (like egg cartons) can be reused 2–3 times if dried and sterilized.
Why aren’t my seeds germinating in the starter?
Check these common culprits: too cold (use a heat mat if needed), too wet or dry (keep soil moist but not soggy), or old seeds (test viability with a damp paper towel). Also, ensure seeds are properly buried—most need 2–3x their width of soil coverage.
Do I need fancy seed starter kits, or can I DIY?
No fancy kits required! Use household items like toilet paper rolls, plastic containers, or even old socks (for root protection). Just ensure they have drainage holes. DIY starters save money and reduce waste—win-win!
How do I harden off seedlings before transplanting?
Start 7–10 days before moving outdoors. Gradually expose seedlings to outdoor conditions: Day 1–3: 1–2 hours, Day 4–6: 4–6 hours, then full sun. Use shade cloth if temps exceed 80°F (27°C) to avoid shock.
Wrapping up and next steps
Mastering seed starters is your secret weapon for faster, healthier plants—and a greener yard! 🌱 By repurposing everyday items like egg cartons or toilet paper rolls, you’ll cut waste while giving your seeds the perfect head start.
Whether you’re a gardening newbie or a pro, these zero-waste techniques make growing easier and more sustainable.
Ready to level up your lawn game? Start small—try a single tray of seedlings this season, then expand as you gain confidence. Your future garden (and the planet!) will thank you. Happy planting! 🌿