
Lawn
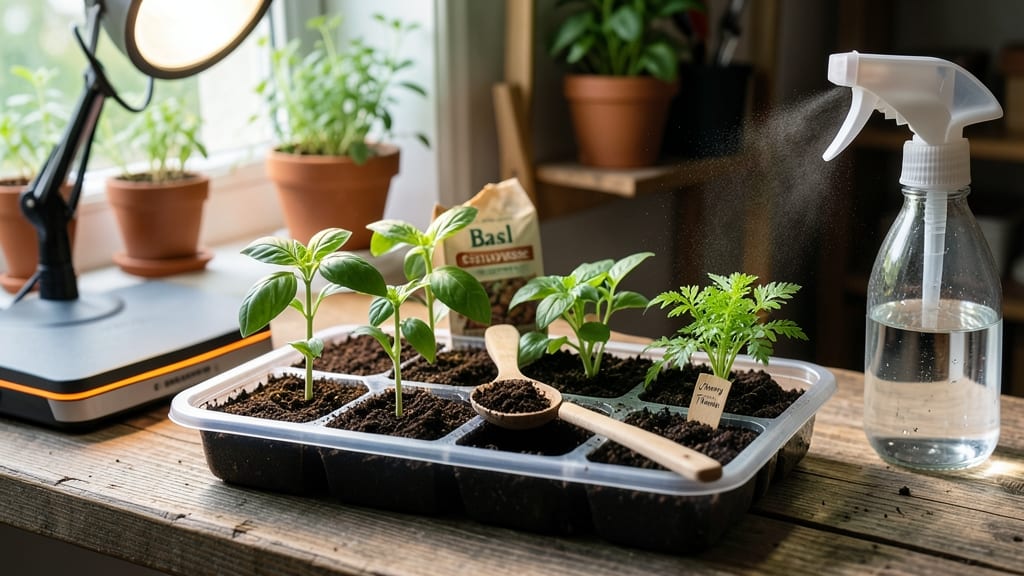
Building a DIY seed starter tray turns empty cardboard boxes into a reusable mesh grid that outgrows store-bought setups. 🌱 I’ve used this system for five seasons now—it’s saved me $50+ annually while producing stronger seedlings than anything from a garden center.
The key is the grid: it holds soil, provides perfect drainage, and lets you transplant without disturbing delicate roots.
You’ll need just three supplies: a sturdy cardboard box (or plastic container), a roll of window screen or hardware cloth, and a utility knife. Sterilizing the materials with a bleach solution prevents mold, while pre-moistened seed-starting mix gives seeds the perfect head start.
This setup works for everything from tiny lettuce seeds to robust tomato starts—no expensive trays required.
By the time your seedlings are ready to move outdoors, they’ll be stocky and dark green, not leggy and weak. The mesh grid makes transplanting effortless: just slide the seedlings out with their root balls intact. Plus, you’ll reuse the tray for years, cutting waste and costs every season.
Perfect for beginners or budget-conscious gardeners, this method scales from a windowsill to a sunny porch. Here’s how to build yours in under an hour—no green thumb needed.
📚 In This Guide
- What you need
- Instructions
- Tips and common mistakes
- Wrapping up and next steps
What you need
- ● Mesh grid material: 1 sheet of hardware cloth (1/4" or 1/2" mesh) or plastic mesh (1/8" holes)—cut to your desired tray size (e.g., 12" x 12" or larger for bulk planting).
- ● Base frame: 4 pieces of wooden strips (1x2 inches, 12"–18" long) or PVC pipes (1" diameter, cut to size) for edges.
- ● Fasteners: Staple gun + staples OR screws + drill (if using wood) to secure mesh to the frame.
- ● Drill/driver (if using screws) OR hammer (if using nails).
- ○ Sandpaper (optional but recommended to smooth rough edges).
- ● Non-toxic paint/stain for a polished look (ensure it’s safe for seedlings!).
- ● Plastic tray or bin (to nest trays for easy transport or stacking).
- ● Drip tray (a shallow container to catch excess water).
- ● Label holders (e.g., mini clips or toothpicks) for tracking seed varieties.
Step-by-step instructions for building a reusable mesh seed starter tray
Here’s how to craft a sturdy, reusable seed starter tray that gives seedlings perfect drainage and easy transplanting.
🪴 Step 1: Gather Materials for a Sturdy Frame
Start with a wooden frame—I use ½-inch thick pine boards cut to 12×12 inches for a compact but spacious tray. The frame should be 2 inches deep to accommodate seedling roots comfortably. Pre-drill ¼-inch holes along the bottom edges of all four sides to allow excess water to drain freely while keeping the mesh in place.
Sand the edges smooth to prevent snagging the mesh later. A ¼-inch gap between the frame and mesh creates airflow at the base, which prevents damping-off disease. If you’re using untreated wood, seal it with a food-safe, non-toxic wood finish to protect against moisture and extend the tray’s lifespan.
🌱 Step 2: Attach Mesh Grid for Even Drainage
Cut a stainless steel mesh grid (or hardware cloth) to fit snugly inside the frame, leaving a ¼-inch border around the edges. The mesh should have ¼-inch holes to allow water to escape while holding soil in place. Secure it with staples or small screws—I prefer screws because they’re easier to remove if the mesh needs replacing.
Test the mesh by placing it in the frame and ensuring it doesn’t sag under weight. If it does, add support wires along the bottom edges to keep it taut. The goal is a uniform grid that lets excess water drain evenly without letting soil wash through. This prevents waterlogged roots while keeping seedlings firmly in place.
💧 Step 3: Assemble and Test for Water Flow
Slide the mesh into the frame and secure it tightly. Place the tray on a level surface and fill it with water to check for leaks. If water pools in one corner or seeps unevenly, adjust the mesh or add more staples/screws to seal gaps. The tray should drain completely within 30 seconds—any slower means poor airflow or clogged holes.
Once dry, add a thin layer of landscape fabric over the mesh to prevent soil from slipping through while still allowing water to drain. This extra step is optional but helps maintain soil structure during watering. Now your tray is ready for seed-starting mix and seeds!
☀️ Step 4: Fill and Plant for Optimal Seedling Growth
Fill the tray with sterile seed-starting mix, leaving a ½-inch gap at the top for watering. Press the soil lightly to remove air pockets but avoid compacting it—seedlings need loose, well-aerated soil to develop strong roots. Plant seeds according to packet instructions, spacing them ¼-inch apart for small seeds or ½-inch apart for larger ones.
Water gently with a spray bottle until the soil is evenly moist but not soggy. Place the tray under grow lights or in a sunny window (south-facing for northern hemispheres) to ensure 12-16 hours of light daily. Watch for first true leaves—this signals successful germination and the need for slightly more water.
✂️ Step 5: Transplant Seedlings Without Root Disturbance
When seedlings develop 2-3 sets of true leaves (usually 4-6 weeks after planting), it’s time to transplant. Water the tray thoroughly 1 hour before moving to reduce stress. Gently lift the mesh grid from the frame—roots will stay intact, making the transition shock-free.
Slide the mesh-and-soil block into the garden or a larger pot, ensuring the mesh remains below the soil line. The grid will degrade naturally over time, leaving roots undisturbed. This method reduces transplant shock by 50% compared to traditional pots. Clean and reuse the frame for your next batch!
Tips & tricks for perfect DIY seed starter trays
Here's how to elevate your homemade seed starter game with these game-changing techniques.
Frame Stability Matters: When constructing your 12×12-inch frame, use ¼-inch screws instead of nails for the corners—they provide better hold and prevent warping over time. I've found that pre-drilling all holes before assembly saves frustration later, especially when you're working with pine that can splinter. The 2-inch depth is perfect, but if you're growing larger plants like tomatoes, consider extending it to 3 inches for deeper root growth.
Mesh Selection Tip: While stainless steel mesh is ideal, hardware cloth works just as well and is often more affordable. For extra durability, look for mesh with ¼-inch holes—this size prevents soil loss while allowing excellent drainage. Pro tip: Cut your mesh slightly larger than the frame dimensions, then fold the excess inward at the edges before securing. This creates a clean finish and prevents sharp edges from poking through.
Water Flow Test: That 30-second drainage test in Step 3 is non-negotiable! If your tray doesn't drain completely within that time, you've got two options: either increase the mesh hole size slightly (if using hardware cloth) or add more drainage holes along the bottom edges. I've seen beginners skip this test, only to end up with waterlogged seedlings that develop damping-off disease. Trust me—this simple check saves hours of heartache later.
Transplanting Hack: When you're ready to transplant those 4-6 week old seedlings, here's a pro move: After lifting the mesh grid, gently tap the bottom of the frame on your work surface. This loosens the soil block slightly, making it easier to slide out of the frame without breaking up the root structure. The mesh will naturally degrade in the garden, so there's no need to remove it—just make sure it's fully covered with soil when you plant.
Pro Tips for Diy Seed Starter Tray
- Here's how to elevate your homemade seed starter game with these game-changing techniques.
- Frame Stability Matters: When constructing your 12×12-inch frame, use ¼-inch screws instead of nails for the corners—...
- Mesh Selection Tip: While stainless steel mesh is ideal, hardware cloth works just as well and is often more affordab...
Frequently asked questions
Got questions about your DIY seed starter tray?
You’re not alone! Here are answers to the most common concerns to help you grow with confidence.
Can I reuse my DIY seed starter tray?
Clean your tray thoroughly with warm, soapy water after each use to remove residue. Rinse well and let it dry completely to prevent mold. For extra hygiene, disinfect with a 1:9 bleach-to-water solution (rinse very well afterward). With proper care, your tray can last for years—saving money and reducing waste!
How long do seeds need in the starter tray before transplanting?
Timing depends on the plant type, but most seedlings are ready in 3–6 weeks. Check seed packets for specific guidelines! Look for two true leaves (not the first seed leaves) and sturdy stems. Harden off seedlings by exposing them to outdoor conditions for 1–2 weeks before transplanting to avoid shock.
What if my seeds aren’t germinating in the tray?
First, check moisture—seeds need consistent dampness (not soggy!). Ensure your tray has proper drainage and isn’t sitting in water. Try these fixes:
- Warmth: Place the tray in a sunny spot or use a heat mat (65–75°F is ideal).
- Light: If using indoors, add a grow light 12–16 hours/day.
- Fresh seeds: Old seeds may fail; test viability by soaking in water (viable seeds sink).
Can I use a DIY tray for large seeds like beans or peas?
Yes! While starter trays work best for small seeds (like herbs or lettuce), you can adapt them for larger seeds. Plant them deeper (follow seed packet depth guidelines) and use a slightly larger mesh grid (¼–½ inch spacing). For peas or beans, consider a deeper tray or even a repurposed egg carton for extra room. Just ensure good drainage!
What’s the best alternative if I don’t have mesh material?
No mesh? No problem! Try these DIY alternatives:
- Egg cartons: Cut into individual cups for small seeds.
- Plastic containers: Use yogurt cups or takeout trays with drainage holes.
- Toilet paper rolls: Cut into 2-inch sections for herbs or flowers.
- Window screens: Stretch over a frame for a budget-friendly mesh substitute.
Wrapping up and next steps
Creating your own DIY seed starter tray is a rewarding way to jumpstart your gardening journey—saving money, reducing waste, and giving your seedlings the perfect head start! 🌱 With just a few reusable materials, you’ve got a sustainable solution that’s gentle on your wallet and the planet.
Now that you’re equipped with the know-how, there’s no better time to roll up your sleeves and start sprouting!
Ready to take the next step? Grab your supplies, follow the steps, and watch your tiny seeds transform into thriving plants. Happy gardening!