
Lawn
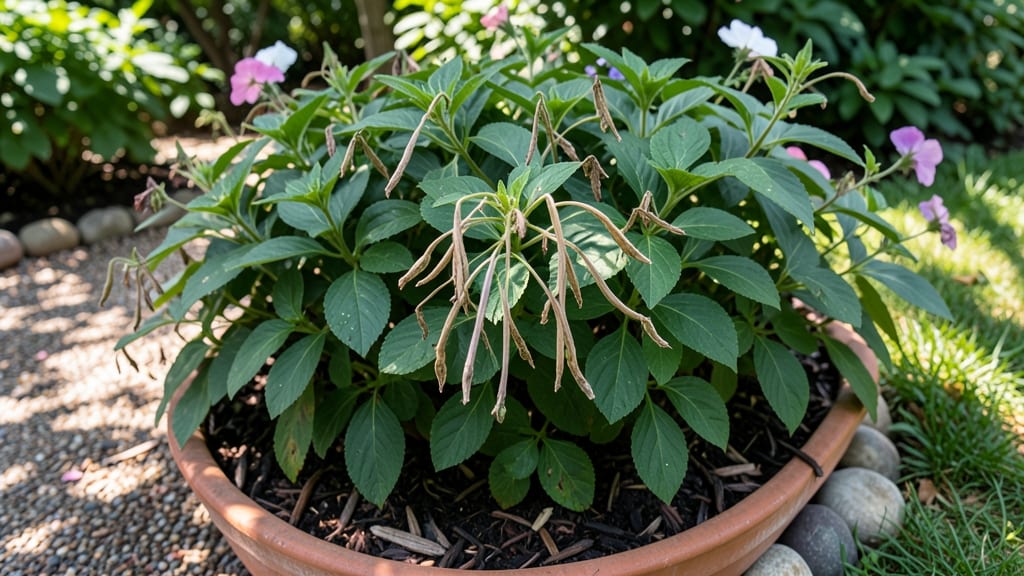
Harvesting impatiens seed pods at just the right moment means next year’s plants will thrive from day one. 🌱 These delicate pods transform from green to papery brown when ripe—wait too long and they’ll burst open, scattering sticky seeds everywhere.
The dry-and-save method preserves viability while keeping your workflow clean and efficient.
Start by collecting pods when they’ve turned tan and dry but before they split open, usually 4-6 weeks after flowering. A gentle shake test works: if seeds rattle inside, they’re ready.
Place pods in a paper bag (not plastic) to dry completely in a warm, dry spot for 7-10 days. This prevents mold and ensures seeds stay dormant until you’re ready to sow.
Once fully dry, crack open the pods to reveal tiny, glossy black seeds that stick to everything. Store them in an airtight envelope with a moisture absorber (like silica gel) in a cool, dark place.
Viable seeds last 1-2 years this way—perfect for starting seedlings indoors 8-10 weeks before your last frost or direct-sowing in warm climates.
For best results, sow seeds on the surface of moist seed-starting mix—they need light to germinate. Keep the soil consistently damp (not soggy) and expect sprouts in 10-21 days. If mold appears, improve airflow or use a fungicide spray to protect your precious seeds.
📚 In This Guide
- What you need
- Instructions
- Tips and common mistakes
- Wrapping up and next steps
What you need
- ● Mature impatiens seed pods: Collect fully dried pods (they’ll turn brown and papery). Aim for 50–100 pods for a small batch or 200+ for larger quantities.
- ● Paper bags or breathable envelopes: Use brown kraft paper bags (1–2 per batch) or seed-saving envelopes (10–20 for bulk storage). Avoid plastic—it traps moisture!
- ● Permanent marker: For labeling pods with the variety name and harvest date.
- ● Scissors or pruners: To gently snip pods from stems without damaging them.
- ● Drying surface: A flat, dry tray (like a baking sheet) or newspaper to lay pods out for 1–2 weeks.
- ● Silica gel packets: Place 1–2 in sealed containers to absorb excess moisture if storing long-term.
- ● Desiccant bags: For extra humidity control (great for humid climates).
- ● Magnifying glass: Helps spot tiny seeds inside pods before drying.
- ● Seed catalog or notebook: Track pod sources (e.g., "‘Super Elf’ Impatiens, 2024").
Step-by-Step guide to harvesting and preparing impatiens seed pods
Here’s how to transform those delicate seed pods into germination-ready treasures—no fancy tools needed.
🌿 Step 1: Identify and Harvest Mature Seed Pods
Wait until the pods turn from green to a dry, papery brown—this signals ripeness. Gently twist or pinch the pods to release seeds, but avoid crushing them. I like to do this on a clean sheet of white paper so I can spot any stray seeds later. Harvest on a dry day to prevent moisture from sticking to the pods.
If pods open naturally before you’re ready, place a paper bag over the plant and secure it loosely with a twist tie. This catches falling seeds without damaging the plant. Check daily until the pods are fully dry—usually 7-10 days after turning brown.
🌱 Step 2: Dry and Store Seeds Properly
Spread the harvested seeds on a paper towel in a single layer, ensuring they’re not touching. Place them in a warm, dry spot away from direct sunlight for 3-5 days. You’ll know they’re dry enough when they feel light and brittle—almost like tiny, crunchy beads.
Once dry, transfer seeds to a small envelope or airtight container labeled with the variety and harvest date. Store in a cool, dark place like a pantry or seed drawer. Impatiens seeds stay viable for 2-3 years if kept dry, but I’ve found they germinate best when used within the first year.
⏰ Step 3: Test Germination Readiness
Before sowing, test a few seeds by placing them between damp paper towels in a sealed plastic bag. Keep them in a warm spot (70-75°F) and check daily. You should see tiny sprouts in 7-14 days—this confirms your seeds are ready for planting.
If no sprouts appear after 2 weeks, the seeds may need stratification (a cold treatment). Place the sealed bag in the fridge for 2-4 weeks before re-testing. This mimics winter conditions and often triggers germination in stubborn seeds.
💧 Step 4: Sow Seeds for Optimal Germination
Fill small pots or seed trays with moistened seed-starting mix (avoid garden soil—it’s too dense). Scatter seeds lightly on the surface; impatiens are tiny, so don’t worry about depth. Press them gently into the soil with your finger or a spoon to ensure good contact.
Cover the pots with plastic wrap or a humidity dome to retain moisture, then place them in bright, indirect light (a sunny windowsill works). Keep the soil consistently moist but never soggy—impatiens seeds rot easily if overwatered. Germination typically takes 14-21 days at 70-75°F.
☀️ Step 5: Care for New Seedlings
Once sprouts emerge, remove the plastic cover immediately to prevent fungal growth. Thin seedlings to 2 inches apart if crowded, using small scissors to snip unwanted stems at soil level. This reduces competition and gives remaining plants room to grow.
Move seedlings to a south-facing window or under grow lights (14-16 hours/day) to prevent leggy growth. Harden off plants for 1 week before transplanting by gradually exposing them to outdoor conditions. Impatiens thrive in partial shade and moist, well-draining soil, making them perfect for shady garden spots.
Tips & tricks for perfect impatiens seed pod preparation
Transforming those delicate impatiens seed pods into viable seeds takes patience and precision—here's how to avoid common pitfalls and maximize your success.
Harvest Timing: In Step 1, when pods turn papery brown, harvest them immediately to prevent seeds from scattering. I've learned the hard way that waiting too long means lost seeds—check plants daily once pods start drying. The 7-10 day window after browning is critical for capturing maximum viability. For stubborn pods that resist opening, gently tap them against the paper surface to encourage seed release without damaging them.
Drying Technique: The 3-5 day drying period in Step 2 requires consistent conditions—avoid direct sunlight which can cause seeds to over-dry or crack. I place my paper towels on a mesh rack in a warm, shaded area near a vent. Test dryness by gently pressing a seed between your fingers; it should crumble slightly but not feel powdery. This texture ensures seeds won't mold when stored long-term.
Germination Testing: When testing seeds in Step 3, use a clear plastic bag so you can monitor progress without opening it. The 70-75°F temperature range is non-negotiable—any cooler and germination slows dramatically. I place my test bags near my kitchen window (south-facing) where the temperature stays consistent. If you're unsure about your home's warmth, use a seedling heat mat set to 75°F for more reliable results.
Lighting Strategy: For Step 4, bright indirect light is key—direct sunlight can scorch delicate seedlings. I use a combination of my south-facing window and a simple LED grow light on a timer for 14-16 hours/day. Position lights about 6 inches above seedlings and adjust as they grow. The goal is to mimic spring conditions without creating stress from intense heat.
Pro Tips for Impatiens Seed Pods
- Transforming those delicate impatiens seed pods into viable seeds takes patience and precision—here's how to avoid co...
- Harvest Timing: In Step 1, when pods turn papery brown, harvest them immediately to prevent seeds from scattering. I'...
- Drying Technique: The 3-5 day drying period in Step 2 requires consistent conditions—avoid direct sunlight which can ...
Frequently asked questions
Got questions about harvesting and saving impatiens seed pods? You’re not alone! Here are some of the most common queries—plus quick, actionable answers to keep your gardening game strong.
Why do impatiens seed pods turn brown and explode?
Those dramatic popping sounds? That’s nature’s way of dispersing seeds! Once the pods dry out and turn brown, they release seeds when touched or disturbed. Harvest them before they burst to avoid seed loss.
How long does it take for impatiens seed pods to dry?
Typically, pods dry in 2–4 weeks after flowering, depending on humidity and warmth. Place them in a paper bag with holes for airflow to speed up the process. Check weekly—they’re ready when they’re crispy and rattle when shaken.
Can I save impatiens seeds from store-bought flowers?
Yes! Many hybrid impatiens (like Impatiens walleriana) produce viable seeds. However, expect unpredictable traits—color or size may differ from the parent plant. For consistent results, opt for heirloom or open-pollinated varieties.
What’s the best way to store dried impatiens seed pods?
Store pods in a cool, dry place (like a seed envelope or airtight container) with a silica gel packet to absorb moisture. Label with the date—most stay viable for 1–2 years. Avoid refrigeration unless humidity is high in your area.
Why aren’t my impatiens producing seed pods?
Likely culprits: lack of pollinators (hand-pollinate with a paintbrush!) or poor growing conditions (low light, overcrowding, or nutrient deficiencies). Ensure plants get 6+ hours of sun and well-draining soil. Deadhead spent blooms to encourage new flowers.
Wrapping up and next steps
Mastering the dry-and-save method for impatiens seed pods is a rewarding way to ensure a vibrant garden next season! With just a few simple steps—harvesting, drying, and storing—you’ve unlocked the secret to germination-ready seeds that’ll bring your favorite blooms back year after year. 🌱
Now that you’re equipped with the know-how, why not take the next step? Try experimenting with different drying techniques or even share your newfound skills with fellow gardening enthusiasts. Happy growing—your future impatiens will thank you! 🌸