
Lawn
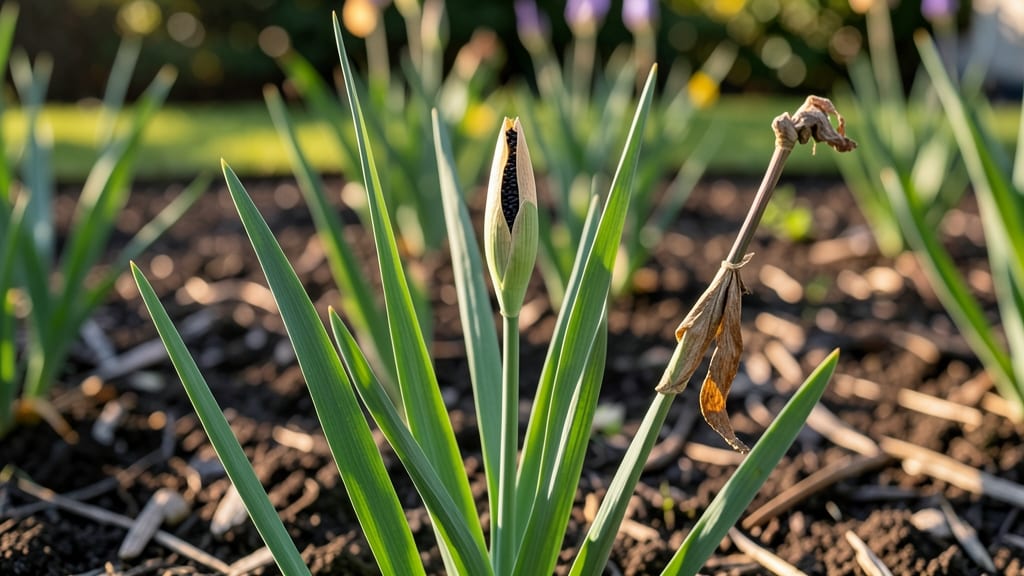
Harvesting the iris flower seed pod at the right moment means multiplying your garden's beauty for years to come. 🌿 The key to preserving those tiny seeds lies in a simple drying technique that prevents mold and maintains viability—something I learned after losing my first batch to damp storage.
Most gardeners overlook this step, assuming pods can dry naturally, but controlled drying makes all the difference.
Start by collecting mature pods when they turn brown and begin splitting open—usually late summer or early fall. Lay them in a single layer on a breathable surface like a mesh screen or paper towel, away from direct sunlight.
A cool, dry location (around 60-70°F) with good airflow is ideal; this mimics natural conditions and prevents spoilage. The entire process takes about 2-3 weeks, but patience here ensures better germination later.
Once fully dry, gently crush the pods to release seeds—each one a potential new iris plant. Store them in a sealed container with a silica gel packet or in the fridge to extend viability for up to 2 years.
When ready to plant, sow seeds in well-draining soil, barely covering them, as light aids germination. Most seeds sprout within 3-6 months, though some may take longer.
Common challenges include moldy pods (from high humidity) or low germination rates (from improper drying). To avoid these, monitor moisture levels and test a few seeds before bulk planting. With this method, you’ll transform a single iris into a thriving colony—without the cost of nursery plants.
📚 In This Guide
- What you need
- Instructions
- Tips and common mistakes
- Wrapping up and next steps
What you need
- ● Fresh iris seed pods: Harvested when fully mature (brown, papery, and slightly crispy). Aim for at least 10 pods for optimal results.
- ● Brown paper bags: 1 per pod (or a single large bag for multiple pods). Use unbleached, breathable paper to prevent moisture buildup.
- ● Rubber bands or twist ties: To secure the pod(s) inside the bag(s).
- ● Drying location: A cool, dry, well-ventilated space (e.g., a pantry, garage, or shed) with consistent temperatures (60–70°F) and low humidity.
- ● Small mesh bag or envelope: For long-term storage (e.g., organza or breathable fabric bags).
- ● Dehumidifier or silica gel packets: Place near the drying area to absorb excess moisture (especially useful in humid climates).
- ● Fan: A gentle breeze can speed up drying time without damaging the pods.
- ● Labeling supplies: Masking tape + marker to label pods with the harvest date and iris variety.
- ● Glass jar with lid: For short-term storage (if using silica gel).
Step-by-step instructions for drying iris flower seed pods
Preserving iris seed viability means capturing nature’s timing—here’s how to do it right.
🌱 Step 1: Harvest Mature Seed Pods at Peak Ripeness
Wait until iris seed pods turn a rich, papery brown and begin splitting open naturally. If you harvest too early, seeds won’t mature; too late, and they’ll scatter on the wind. I like to check pods weekly in late summer—when they’re fully brown but still intact, they’re ready. Use clean, sharp pruning shears to snip the entire pod from the stem, leaving a short stem attachment for handling.
Place harvested pods in a single layer on a breathable surface like a wire mesh tray or paper towels. Avoid stacking—this traps moisture and encourages mold. The goal is airflow, not crowding. If pods still feel damp to the touch, let them air-dry for an extra day before proceeding.
💧 Step 2: Dry Pods in a Controlled Environment
Set up a drying station in a cool, dry, shaded spot—think 60-70°F with low humidity. A basement or covered porch works well, but avoid direct sunlight, which can overheat and crack the pods. I prop open a window for airflow if indoor humidity is high. Place pods on the mesh tray and leave undisturbed for 4-6 weeks, flipping them weekly to ensure even drying.
You’ll know drying is complete when pods feel light as paper and rattle when shaken. If any seeds remain sticky or the pod feels pliable, extend drying time by another week. Never use heat sources like ovens or heaters—this can sterilize the seeds. Patience here ensures viability.
☀️ Step 3: Store Dried Pods for Long-Term Viability
Once fully dried, carefully open each pod to release seeds. Store seeds in paper envelopes (not plastic—it traps moisture) labeled with the iris variety and harvest date. Place envelopes in a cool, dark location, like a seed vault or refrigerator drawer, where temperatures stay 40-50°F. Seeds remain viable for 1-2 years under these conditions.
Real talk: Iris seeds are notoriously slow to germinate—sometimes 6-12 months—so don’t rush planting. Scratch-test a few seeds annually to confirm viability by pressing them into damp paper towels and checking for sprouts in 4-6 weeks. If none sprout, replace your seed stock.
⏰ Step 4: Prepare Seeds for Planting (When Ready)
When you’re ready to sow, soak dried seeds in lukewarm water for 24 hours to soften the tough outer coating. This mimics natural rain cycles and speeds up germination. After soaking, plant seeds ½ inch deep in well-draining soil, spacing them 6 inches apart. Keep soil consistently moist but never soggy—iris seeds rot easily if overwatered.
Here’s the thing—iris seeds need cold stratification to break dormancy. After planting, place containers outdoors in a protected spot (like a cold frame) for 2-3 months during winter. This mimics their natural growth cycle and ensures stronger seedlings. You’ll see tiny sprouts emerge in early spring—patience pays off.
Tips & tricks for perfect iris seed pod preservation
Mastering iris seed pod drying takes patience and attention to detail—but these insights will help you avoid common pitfalls and maximize seed viability.
Harvest Timing is Everything: The 4-6 week drying period starts with perfect harvest timing. Look for pods that are fully brown but just beginning to split—this indicates seeds are mature but haven't yet scattered. I've learned the hard way that harvesting too early means immature seeds, while waiting too long risks losing them to wind. Check your garden weekly in late summer for that perfect moment when pods feel dry to the touch but haven't opened completely.
Environmental Control Matters: Maintaining that 60-70°F range during drying is critical for viability. I've found that basements with open windows work best—just avoid direct sunlight which can overheat pods and crack them. If your home tends to be humid, consider placing a small fan nearby to improve airflow without disturbing the pods. The goal is to mimic nature's slow, steady drying process without introducing heat stress.
Storage Wisdom: Those paper envelopes aren't just for organization—they're crucial for moisture control. I've seen seeds lose viability when stored in plastic bags that trap humidity. Label each envelope with the iris variety and harvest date to track viability over time. Pro tip: Store envelopes in a sealed container with a small silica gel packet to absorb any residual moisture that might develop over the 1-2 year storage period.
Germination Testing: The 4-6 week scratch test is your quality control measure. I recommend testing a small batch of seeds annually to verify viability. Press seeds between damp paper towels and place in a warm spot—you should see sprouts within that timeframe. If germination rates drop below 50%, it's time to harvest fresh pods. This simple test gives you peace of mind before committing to planting larger batches.
Pro Tips for Iris Flower Seed Pod
- Mastering iris seed pod drying takes patience and attention to detail—but these insights will help you avoid common p...
- Harvest Timing is Everything: The 4-6 week drying period starts with perfect harvest timing. Look for pods that are f...
- Environmental Control Matters: Maintaining that 60-70°F range during drying is critical for viability. I've found tha...
Frequently asked questions
Got questions about harvesting and preserving iris flower seed pods? You’re in the right place! Here are some of the most common queries—plus straightforward answers to help you succeed.
How long does it take for iris seed pods to dry naturally?
With proper airflow, iris seed pods typically dry in 2–4 weeks after harvesting. Place them in a well-ventilated, shaded spot (like a mesh bag or paper bag) to speed up the process without risking mold. Avoid direct sun—it can crack the pods prematurely.
Can I speed up the drying process with a dehydrator?
Yes! Set your dehydrator to 95–105°F (35–40°C) and dry the pods for 6–12 hours, checking frequently. Gently open a pod to test for crispness—if it snaps easily, they’re ready. Just avoid high heat, which can damage seed viability.
What’s the best way to store dried iris seed pods?
Store pods in a cool, dry place (like a sealed glass jar or airtight container) with a silica gel packet to absorb moisture. Label with the date—viability lasts 1–2 years if stored properly. Freezing isn’t recommended, as humidity can reduce germination rates.
Why are my iris seed pods moldy or rotting?
Mold or rot usually means excess moisture or poor airflow. To fix it:
- Spread pods in a single layer on a screen or paper towel.
- Avoid stacking or sealing them in plastic.
- Move to a dry, shaded spot immediately.
Can I use iris seed pods from store-bought flowers?
Unfortunately, no. Store-bought iris flowers are often treated with preservatives or pesticides to extend shelf life, which can kill seeds or reduce germination. Always harvest pods from organic, untreated plants in your garden for the best results.
Wrapping up and next steps
Growing irises from seed pods is a rewarding way to expand your garden naturally! By mastering the drying technique—like ensuring proper airflow, humidity control, and gentle handling—you’ll keep those seeds viable for years. Whether you’re a seasoned gardener or just starting, patience and precision pay off with stunning blooms.
Ready to take the next step? Start small—try drying a few pods this season and observe their progress. Once you’re confident, experiment with storage methods or even share your tips with fellow plant lovers! 🌱✨