
Propagation
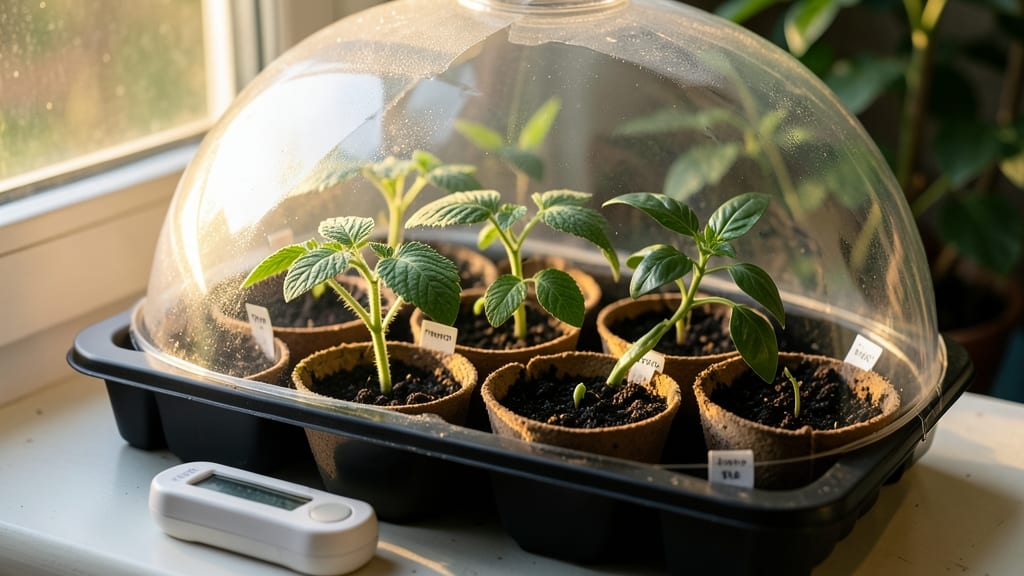
Precision planting starts with Johnny's seed-starting calculator—because timing your seeds wrong means wasted effort and empty garden beds. 🌱 I've used it for years to avoid the heartbreak of seedlings outgrowing their pots or bolting before they're ready for the ground.
The tool accounts for your zone, last frost date, and even how long specific varieties take to mature, so you never guess again.
Here's the game-changer: it gives you three critical dates—when to start indoors, when to transplant outside, and when to direct-sow. For example, in zone 6, my heirloom tomatoes need to begin indoors 10 weeks before last frost, while bush beans can wait until 2 weeks after.
The calculator handles all that math so you don’t have to.
You’ll end up with seedlings that hit the garden at the perfect size—stocky, dark-green, and ready to thrive—instead of leggy, overcrowded messes. The tool even adjusts for short-season zones or early starts, so you maximize your growing window no matter where you live.
Pro tip: bookmark the calculator and check it every year—your last frost date might shift slightly, and varieties behave differently in your microclimate. Once you master these deadlines, you’ll never second-guess your planting schedule again.
📚 In This Guide
- What you need
- Instructions
- Tips and common mistakes
- Wrapping up and next steps
What you need
- ● Seed Starting Trays or Pots: Cell trays (72, 128, or 200 cells) or biodegradable pots (2–4" diameter)
- ● Quantity: Enough to accommodate your chosen varieties (e.g., 1–2 trays per variety for small batches, 5+ for larger projects).
- ● Seed Starting Mix: Lightweight, sterile mix (e.g., blank">Johnny’s Ideal Seed Starting Mix or coconut coir + perlite blend).
- ● Quantity: ~1–2 cubic feet per tray (check product guidelines).
- ● Seeds: Choose varieties suited to your blank">USDA Hardiness Zone (Johnny’s calculator helps here!).
- ● Quantity: Follow seed packet recommendations (typically 1–3 seeds per cell/pot).
- ● Watering Can or Spray Bottle: Fine-mist nozzle for gentle watering (avoid oversaturating seeds).
- ● Grow Lights or Sunny Windowsill: LED grow lights (12–16 hours/day) or a south-facing window (60+°F consistency).
- ○ Heat Mat (Optional but Helpful): For cool-season crops (e.g., lettuce, peppers) to maintain 65–75°F soil temps.
- ● Humidity Dome or Plastic Wrap: Keeps moisture and warmth in until germination (remove after sprouts emerge).
- ● Labeling System: Toothpicks + markers or plant labels to track varieties.
- ● Fertilizer: Diluted fish emulsion or seed-starting fertilizer (half-strength, 2–3 weeks after germination).
- ● Fan: Small oscillating fan for seedling hardening (3–5 days before transplant).
- ● Thermometer/Hygrometer: Monitors soil/air temps and humidity for precision.
- ● Transplanting Tools: Small trowel or spoon for delicate seedling moves.
Instructions: how to use Johnny's seed starting calculator for perfect timing
Here's how I use this tool to plan foolproof seed-starting schedules that match my climate and plant needs.
🌱 Step 1: Input Your Planting Zone and Last Frost Date
Start by entering your USDA hardiness zone number—this tells the calculator your local frost risk. If you're unsure, I recommend checking the USDA interactive map or using your average last spring frost date as a backup. The calculator uses this to generate your planting window, which is the safe period between frost dates when seedlings can handle outdoor conditions.
For example, if you're in zone 5 with a last frost date of May 15, the calculator will show you when to start cool-season crops like broccoli versus warm-season plants like tomatoes. Don't skip this step—it's the foundation for everything else. If your zone isn't listed, use the nearest one with similar frost patterns.
☀️ Step 2: Select Your Plant Variety and Days to Maturity
Now choose the specific plant varieties you want to grow. Each has a different days to maturity range—this is how long it takes from seed to harvest. The calculator needs this to work backward from your ideal harvest date. For instance, if you want to harvest basil in July, but basil takes 60 days to mature, the calculator will tell you to start seeds by May 15.
I always double-check the seed packet for days-to-maturity estimates, as these can vary significantly between varieties. Pro tip: For long-season crops like tomatoes, use the early-maturing variety if you're in a short growing season. The calculator will flag if your selection is pushing the limits of your zone.
⏰ Step 3: Adjust for Indoor vs Outdoor Starting Conditions
The calculator accounts for whether you're starting seeds indoors under lights or directly outdoors. Indoor starts need an earlier timeline because seedlings require 14-16 hours of light daily and careful temperature control. Outdoor starts can go in the ground sooner, but only after soil temperatures reach 50-60°F for most vegetables.
Here's where it gets smart: The calculator shows you both the indoor start date (for transplanting later) and the direct sow date (for planting seeds straight into the garden). For example, in zone 7, you might start tomatoes indoors on March 1 but can direct-sow spinach as early as February 15. Pay attention to these dual timelines—they're tailored to your specific growing conditions.
🌿 Step 4: Generate and Review Your Customized Planting Schedule
Once you've entered all your details, the calculator spits out a personalized schedule with start dates, transplant dates, and harvest windows. This isn't just a list—it's a roadmap that accounts for your unique growing conditions. I always print this out and tape it to my seed-starting tray so I can check progress weekly.
Look for the hardening-off period (usually 7-14 days before transplant) and the ideal transplant window. These are critical for success. The calculator also highlights potential conflicts, like when two crops might compete for space in your garden. Use this to plan succession plantings or adjust your variety choices.
✂️ Step 5: Set Reminders and Track Progress
The calculator doesn't stop at dates—it helps you stay on track. I set calendar reminders for each key phase: seed starting, transplanting, and harvesting. For example, if the calculator says to start peppers on February 15, I'll mark that date and then set another reminder for March 1 (transplant date) and May 15 (harvest window).
Pro move: Use a garden journal to track actual germination dates versus the calculator's predictions. Over time, you'll notice patterns—like how your seedlings might germinate faster in a warm year or slower in a cool one. Adjust future schedules accordingly. The calculator gives you the baseline, but your local microclimate is the final authority.
Tips & tricks for perfect seed starting timing
These precision-focused insights will help you maximize the calculator's potential and avoid common seed-starting pitfalls.
Zone Accuracy Matters: When entering your USDA zone in Step 1, verify it matches your local frost patterns. I've seen gardeners in zone 5b accidentally use zone 6a data, which can throw off planting windows by up to 2 weeks. Cross-reference with your county extension office if unsure—this single input determines all subsequent dates. The calculator's planting window calculation relies on precise frost dates, so don't approximate.
Variety-Specific Nuances: In Step 2, pay special attention to the "days to maturity" range rather than the average. For example, if a tomato variety lists 70-85 days, the calculator will use the midpoint (77 days) unless you specify otherwise. I recommend selecting the shorter end of the range for first-time growers—it's better to harvest slightly earlier than push the limits of your growing season.
Lighting Strategy: The calculator's 14-16 hours of daily light recommendation in Step 3 assumes proper grow light setup. If using fluorescent lights, position them 2-4 inches above seedlings for optimal growth. I've found that LED grow lights can sometimes require slightly less time (12-14 hours) due to their full spectrum output—adjust based on your equipment's specifications. Always monitor seedling height; if they stretch toward light, they need more intensity or closer positioning.
Hardening-Off Visual Cues: When reviewing the 7-14 day hardening-off period in Step 4, watch for these signs: seedlings should develop a slightly thicker stem and darker green leaves. The leaves will also start to look more like mature plant foliage. I test readiness by placing seedlings outside for 1-2 hours and checking for wilting—if they recover within an hour, they're ready for full transplant.
Pro Tips for Johnnys Seed Starting Calculator
- These precision-focused insights will help you maximize the calculator's potential and avoid common seed-starting pit...
- Zone Accuracy Matters: When entering your USDA zone in Step 1, verify it matches your local frost patterns. I've seen...
- Variety-Specific Nuances: In Step 2, pay special attention to the "days to maturity" range rather than the average. F...
Frequently asked questions
Got questions about timing your seed starts like a pro?
Here are answers to the most common ones—so you can avoid last-minute planting panic and grow a thriving garden!
How accurate is the Johnny’s Seed Starting Calculator compared to manual calculations?
The calculator uses USDA Hardiness Zone data and Johnny’s proprietary seed-starting guidelines, which factor in days to maturity, last frost dates, and ideal transplant ages. It’s far more precise than eyeballing a chart—especially for unusual varieties or short-season zones. Just input your zone, and it crunches the numbers for you!
What if I miss the “Start Indoors” window—can I still save my seeds?
Don’t sweat it! Some seeds (like basil, beans, or cucumbers) tolerate direct sowing after the last frost. For others, like tomatoes or peppers, you can extend grow lights or use a heat mat to speed up germination. The calculator even flags “flexible” varieties—so check the notes for alternatives!
Does the calculator account for microclimates (e.g., urban heat islands or high-altitude gardens)?
The calculator uses zone-based averages, but you can adjust for local quirks! If your garden runs warmer or cooler than typical for your zone, tweak the “Days to Transplant” field by ±5–7 days. For high-altitude gardens, subtract 1–2 weeks from the recommended start date—cool temps slow germination.
Can I use this for heirloom or rare seeds not listed in the database?
If your seed packet lacks specifics, plug in the closest match (e.g., use “Cherry Tomato” for heirloom tomatoes with a similar days-to-maturity range). For super rare seeds, research the variety’s cold tolerance and growth rate—then input those details manually. Pro tip: Johnny’s customer service can help if you’re stuck!
My seeds sprouted too early—what do I do now?
Overcrowded seedlings? Thin aggressively (keep the strongest 2–3 per pot) or transplant to larger containers ASAP. If they’re leggy or weak, move them under grow lights (12–16 hrs/day) and fertilize lightly with diluted fish emulsion. The calculator’s “Transplant Window” shows when they’ll be ready—don’t rush!
| Quick Fix | When to Use |
|---|---|
| Adjust start date by +7–10 days | If your zone’s frost date is earlier than average |
| Use a heat mat (70–75°F) | For slow germinators (e.g., parsley, carrots) |
| Direct-sow hardy crops (lettuce, peas) | If indoor space is limited |
Wrapping up and next steps
Mastering seed starting deadlines with Johnny’s Seed Starting Calculator puts you in the driver’s seat for a thriving garden! 🌱 Whether you’re a seasoned gardener or just beginning, precision planning ensures your plants get the perfect head start—no more guesswork or last-minute scrambles.
Ready to take the next step? Download the calculator today, input your zone and varieties, and watch your garden dreams grow with confidence!