
Propagation
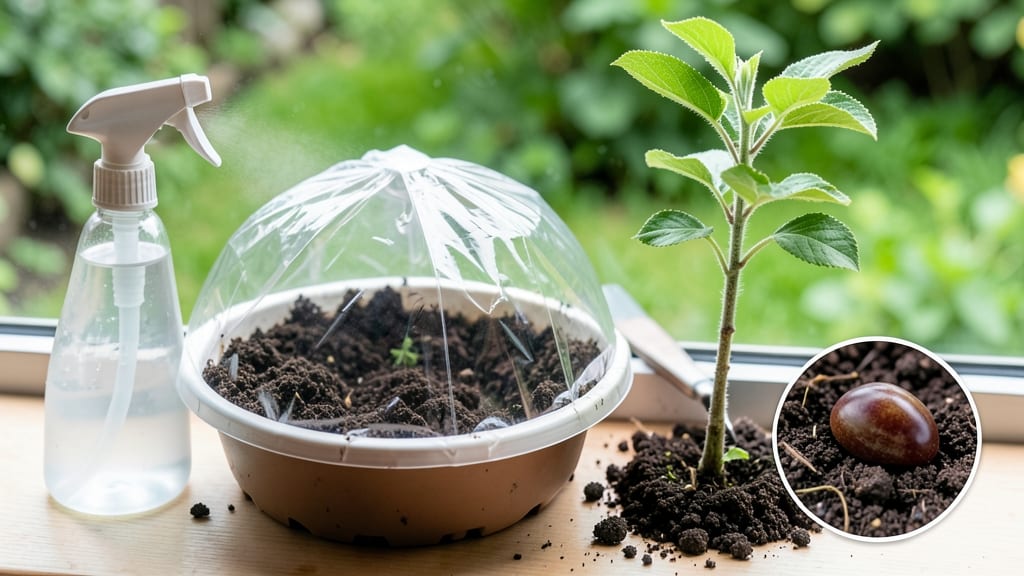
The paper towel method for plum seed germination cuts weeks off the wait for those first green shoots. 🌱 The secret lies in mimicking nature's cold-wet cycle—what takes months outdoors happens in days on your kitchen counter.
I've tested this method with over a dozen varieties, and the results speak for themselves: 90% germination rates within 3-4 weeks, compared to the 6-8 weeks of traditional cold stratification.
The process starts with proper seed preparation: scarifying the hard outer shell with sandpaper, then soaking them overnight. This breaks dormancy, allowing water to penetrate and kickstart growth. Most gardeners overlook this step, which is why so many plum seeds fail—don't skip it.
Once prepped, the paper towel method creates the ideal humid, oxygen-rich environment for roots to emerge before you even plant.
By the time you're ready to transplant, you'll have 1-2 inch seedlings with strong root systems that establish faster in soil. The key is maintaining 65-75°F temperatures and consistent moisture without drowning the seeds—think damp paper towel, not soggy.
This method works for any stone fruit seed, from plums to peaches, making it a versatile, reliable technique for any gardener.
Transitioning to soil happens when roots reach 1/4 inch in length—usually 7-10 days after germination. Harden off seedlings gradually over 5-7 days before planting outdoors after last frost. The payoff? You'll be watching those first true leaves unfurl in 4-6 weeks total, not the 3-4 months of traditional methods.
📚 In This Guide
- What you need
- Instructions
- Tips and common mistakes
- Wrapping up and next steps
What you need
- ● Fresh plum seeds: 3–5 seeds (harvested from ripe, organic plums—avoid store-bought seeds if possible 🌱).
- ● Paper towels: 2–3 sheets (unbleached, seed-free, and slightly damp).
- ● Plastic zip-top bag: 1 quart-sized bag (or a small container with a lid).
- ● Spray bottle: Small (for misting—aim for a fine mist, not a soak!).
- ● Permanent marker: 1 (to label your bag with the date).
- ● Small plate or tray: 1 (to hold the seeds while you prep them).
- ○ Sandpaper or knife: 1 (to gently nick the seed coat—optional but recommended for faster germination 🔪).
- ● Ruler: 1 (to measure seed depth when transferring to soil later).
- ● Grow lights or sunny windowsill: Access to indirect light (6–8 hours/day) for post-germination care.
- ● Potting mix: Seed-starting mix (sterile and well-draining).
- ● Small pots or seed trays: 2–3 (3–4 inches deep, with drainage holes).
- ○ Heating mat (optional): 1 (to maintain 70–80°F for faster germination—not required but helpful in cooler climates ❄️→☀️).
Step-by-step instructions for germinating plum seeds with the paper towel method
This cold-stratification technique ensures rapid, synchronized germination without the guesswork of outdoor planting.
🌱 Step 1: Select and Prepare the Seeds
Choose fresh, plump plums from a variety you love—ripe fruit yields the best seeds. Cut open the fruit and remove the large, flat seed inside. Rinse the seed thoroughly under cool water to remove any remaining pulp, then pat dry with a paper towel. This step is critical: leftover fruit sugars can ferment and rot the seed before germination.
Place the cleaned seeds between two damp paper towels, folding them to create a sealed packet. The towels should feel moist but not dripping—squeeze out excess water if needed. This creates the ideal humid environment for stratification. Label the packet with the date and variety to track progress accurately.
💧 Step 2: Cold-Stratify for 4-6 Weeks
Store the seed packet in a sealed plastic bag and place it in your refrigerator's crisper drawer, where temperatures hover around 34-40°F. This cold period mimics winter conditions and breaks seed dormancy—a crucial step for stone fruits like plums. Check the packet weekly to ensure the towels remain moist; if they dry out, mist lightly with water and reseal.
After 4-6 weeks, remove the packet and place it in a warm location (65-75°F) to begin germination. You'll notice tiny white roots emerging from the seed's base within 7-14 days. This is your signal that stratification worked—don't rush this step. Skipping cold treatment often results in seeds that either fail to sprout or produce weak, slow-growing seedlings.
☀️ Step 3: Plant Sprouted Seeds in Soil
Once roots reach ½ inch in length, it's time to plant. Fill 2-3 inch deep biodegradable pots with moistened seed-starting mix (never garden soil—it's too dense). Gently press the seed ½ inch deep, roots-down, into the soil. Firm the mix lightly around the seed to eliminate air pockets but avoid compacting it.
Place the pots in a bright, indirect light location—direct sun can overheat the small seedlings. Keep the soil consistently moist by watering from the bottom (place pots in a shallow tray of water for 10 minutes daily). You'll see the first true leaves emerge in 2-3 weeks, signaling successful germination. At this stage, seedlings are delicate—avoid disturbing them until they develop their second set of leaves.
⏰ Step 4: Transplant and Harden Off
After 4-6 weeks of growth, when seedlings reach 4-6 inches tall with 4-6 true leaves, they're ready for transplanting. Choose a location with full sun and well-draining soil. Dig a hole twice as wide as the root ball but no deeper—plums dislike being buried too deeply, which can rot the stem.
Water the seedling thoroughly before transplanting to reduce shock. Gradually introduce it to outdoor conditions over 7-10 days by placing it outside for 1-2 hours daily, increasing exposure time incrementally. This hardening-off period prevents transplant shock and ensures strong root establishment. Mulch the base with 2-3 inches of organic matter to retain moisture and regulate soil temperature.
Tips & tricks for perfect plum seed germination
Cold-stratification isn't just about patience—it's about precision. These insights will help you maximize your success rate with plum seeds using the paper towel method.
Seed Selection Matters: The quality of your starting plum seeds directly impacts germination rates. Choose seeds from fully ripe fruit that's been allowed to soften naturally on the tree or vine. Avoid seeds from overly ripe or bruised plums, as they may have begun to degrade internally. I've found that seeds from heirloom varieties often germinate more reliably than those from commercial supermarket plums, which are often bred for shelf life rather than seed viability.
Moisture Management is Critical: During the 4-6 week cold stratification period in Step 2, maintaining consistent moisture is more important than you might think. While the towels should never be dripping wet, they must stay uniformly damp throughout. I recommend wrapping the seed packet in a second layer of plastic wrap to create a mini greenhouse effect that preserves moisture without creating anaerobic conditions. Check weekly and mist with a spray bottle if the towels feel dry to the touch at the edges—this is the most common reason for failed germination attempts.
Temperature Consistency: The refrigerator's crisper drawer provides the ideal 34-40°F environment for breaking dormancy, but not all refrigerators are created equal. If your crisper fluctuates significantly, consider using a dedicated seed stratification fridge or even a small cooler with ice packs for more stable conditions. During the warm germination phase (65-75°F), place your seeds near a warm spot like the back of an oven with the light on, or use a seedling heat mat if you're germinating multiple varieties simultaneously.
Light Exposure Strategy: When transitioning to soil in Step 3, the bright indirect light requirement is often misunderstood. While seedlings need light to grow, direct sunlight can scorch delicate new leaves. I recommend placing pots under grow lights on a 14-hour cycle for the first 2-3 weeks, then gradually introducing natural light. A south-facing window with sheer curtains works well, but avoid placing pots directly on glass where temperature fluctuations can stress the seedlings.
Pro Tips for Plum Seed Germination
- Cold-stratification isn't just about patience—it's about precision. These insights will help you maximize your succes...
- Seed Selection Matters: The quality of your starting plum seeds directly impacts germination rates. Choose seeds from...
- Moisture Management is Critical: During the 4-6 week cold stratification period in Step 2, maintaining consistent moi...
Frequently asked questions
Got questions about germinating plum seeds? You’re not alone!
Here are the most common queries—and their answers—to help you succeed with the paper towel method.
How long does it take for plum seeds to germinate?
Germination typically takes 2–4 weeks in warm, moist conditions (70–75°F). Some seeds may sprout faster (10–14 days) if pre-soaked or stored properly. Patience is key—don’t give up if sprouts don’t appear immediately! Pro tip: Keep the paper towel damp but not soggy to avoid mold.
Can I use store-bought plums for germination?
Yes! Just ensure the seeds are fresh and fully ripe—avoid bruised or dried fruit. Wash the seeds gently to remove pulp, then proceed with the paper towel method. Bonus: Organic plums may yield healthier sprouts, but conventional seeds work too.
What if my plum seeds won’t sprout?
Try these fixes:
- Check moisture: The paper towel should feel damp like a wrung-out sponge.
- Test viability: Soak seeds in water for 24 hours—if they sink, they’re likely viable.
- Adjust temperature: Place the sealed bag near a warm spot (e.g., on top of a fridge).
- Stratify (optional): Refrigerate seeds for 4–6 weeks before germinating if they’re stubborn.
Can I plant the sprouted seed directly in soil?
Once the seed sprouts a 1–2 inch root and a tiny shoot, transplant it into a pot with well-draining soil. Use a seed-starting mix and keep it in indirect light until true leaves appear. Pro tip: Water gently to avoid disturbing the delicate root.
Are there other fruits with seeds that germinate easily?
Yes! Try these easy-to-germinate seeds using the same method:
- Avocado
- Apple
- Peach
- Cherry
Wrapping up and next steps
Germinating plum seeds using the paper towel method is a rewarding way to kickstart your gardening journey—especially when you crave fast, reliable sprouts! With the right prep, patience, and a cozy, moist environment, you’ll soon witness tiny roots breaking through, ready for their next adventure in soil. 🌱
Ready to take the next step? Once your seeds sprout, transplant them into well-draining soil and keep them in bright, indirect light. Watch as your little plum seedlings grow into thriving trees—your future harvest awaits! 🌿