
Lawn
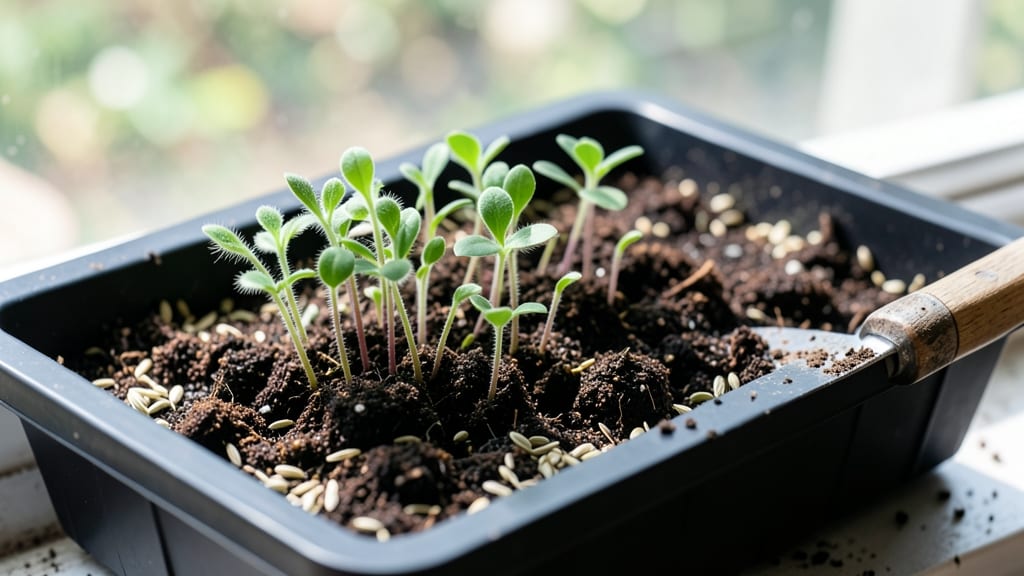
Fast germination starts with the right setup—dill seed sprouts appear in just 5-7 days when you nail the basics. 🌱 I’ve learned that patience pays off, but only if you keep soil warm, moisture consistent, and seeds shallow. The key?
A tiny bit of sunlight and a damp paper towel trick to jumpstart growth before transplanting. You’ll need a shallow tray, high-quality seed-starting mix, and a spray bottle to keep things moist without drowning the seeds.
I swear by a 70°F environment (a sunny windowsill or seedling heat mat does the trick) to speed up those first green shoots. Too cold, and they’ll sulk for weeks—too hot, and they’ll rot before they even think about sprouting.
Once those tiny leaves punch through the soil, you’ll know you’re on track. Within 10-14 days, you’ll have sturdy seedlings ready for transplanting, and the fragrant foliage will be yours to harvest. The best part? You’ll never buy dill again—just replant those scraps for a continuous supply.
Troubleshooting slow starts? Check your soil moisture, seed depth (too deep = no sprouts), and light exposure. Mold? That’s usually overwatering—let the soil dry slightly between waterings. With these tweaks, you’ll go from seed to harvest faster than you’d expect.
📚 In This Guide
- What you need
- Instructions
- Tips and common mistakes
- Wrapping up and next steps
What you need
- ● Dill seeds (organic, non-GMO preferred): 1–2 tablespoons (about 15–30g). Look for Anethum graveolens seeds—avoid pre-treated or coated seeds.
- ● Sprouting container: A wide, shallow dish (8–10 inches in diameter) with drainage holes or a dedicated sprouting jar (16–24 oz capacity). Mason jars with fine mesh screens work great!
- ● Cheesecloth or sprouting lid: A breathable cover to keep seeds contained while allowing airflow.
- ● Water: Filtered or tap water (chlorine-free). Use room-temperature water for best results.
- ● Colander or strainer: For rinsing sprouts (if not using a jar with a built-in lid).
- ● Paper towels or sprouting trays: 2–3 sheets (unbleached, food-grade). Fold into a pad to hold seeds during germination.
- ○ Spray bottle: For gentle watering (optional but handy for precision).
- ○ Small fan or ventilation source: Improves airflow during the 2–3 day germination phase (optional but speeds up growth).
- ● Grow light (LED or fluorescent): If sprouting indoors with limited natural light (12–16 hours/day).
- ● Humidity dome or plastic wrap: Keeps seeds moist during germination (remove after 2 days).
- ● Label or marker: To track planting dates (helpful for harvesting fresh sprouts weekly!).
How to grow dill seed sprouts in 5 days or less
Here's how to get fresh dill sprouts on your plate faster than store-bought—no soil, no mess, just pure flavor.
🌱 Step 1: Soak Seeds Overnight for Maximum Germination
Place 1 tablespoon of dill seeds in a clean quart-sized jar. Cover with room-temperature water (about 2 inches deep) and let them soak for 12 hours. The seeds will plump up noticeably—this softens their tough outer shell and kickstarts germination. I like to use a jar with a lid but leave it loose so seeds don't float away.
After soaking, drain the water through a fine-mesh strainer and rinse the seeds gently with fresh water. This removes any debris and prevents mold. If you see any seeds floating, they're old or damaged—discard them. Only use the seeds that sink to the bottom of the jar.
💧 Step 2: Set Up Your Sprouting Station
Line a shallow tray (like a 9x13-inch baking dish) with a clean kitchen towel or sprouting mesh screen. Spread the drained seeds evenly across the towel—about ½ inch apart. They should form a single layer; if they clump, they'll rot before sprouting. Fold the towel over the seeds to create a dark, moist environment.
Place the tray in a warm, dark spot (like a cabinet or closet) where the temperature stays between 65-75°F. Check the seeds after 12 hours. They should feel damp but not soggy—if they're dry, mist them lightly with water. This initial darkness helps roots develop before the sprouts get light exposure.
☀️ Step 3: Move to Light and Rinse Daily
After 24 hours, transfer the tray to a bright, indirect light source (like a sunny windowsill). Rinse the seeds gently with cool water using a spray bottle—this removes any mold spores and keeps them fresh. Tilt the tray slightly so excess water drains away completely. You'll see tiny white roots emerging within 24-48 hours of the rinse.
From now on, rinse the sprouts twice daily with cool water and drain well. Use a spray bottle for gentle rinsing—forceful water can damage the delicate sprouts. After each rinse, return them to their tray and cover with the towel. You'll notice the sprouts "unfold" like tiny green umbrellas within 3-5 days.
⏰ Step 4: Harvest at Peak Freshness
Dill sprouts are ready to harvest when they reach 1-2 inches tall and the first true leaves appear (not just the seed leaves). This usually happens within 5-7 days of starting. Cut them just above the roots with clean scissors. You'll get about ½ cup of fresh sprouts from your initial tablespoon of seeds.
Store harvested sprouts in a damp paper towel inside a sealed container in the fridge. They'll stay fresh for 5-7 days. For zero-waste harvesting, simply rinse the roots again and return them to the tray. They'll regrow for 2-3 more harvests before you need to start fresh seeds.
🌿 Step 5: Troubleshoot Common Issues
If your sprouts develop black or slimy spots, they're moldy—rinse immediately and discard any affected sprouts. This usually happens from overwatering or poor drainage. Always drain excess water completely after rinsing. For yellowing leaves, your sprouts need more light. Move them to a sunnier spot or under a grow light for 12-14 hours daily.
Leggy sprouts (long, thin stems) mean they're stretching for light. Reduce the distance between the tray and light source to 4-6 inches. If sprouts taste bitter, they've been exposed to too much light too soon—keep them in indirect light until fully grown. With these adjustments, you'll get crisp, flavorful dill sprouts every time.
Tips & tricks for perfect dill sprouts
Here's what I learned after growing dill sprouts for years—these tricks make all the difference between good and great results.
Soak Like a Pro: The 12-hour soak is non-negotiable for dill seeds—they need this time to soften their tough outer shells. I've tried shorter soaks and ended up with patchy germination. Use room-temperature water (not cold from the fridge) to avoid shocking the seeds. After draining, give them a quick shake in the strainer to separate any floating seeds—those won't sprout well.
Light Management is Everything: During the first 24 hours in darkness, you're building roots. Then comes the light phase—this is where most people mess up. Use indirect light (like a north-facing window) during the first 24-48 hours of growth. Too much direct light too soon causes leggy sprouts. I keep mine about 12 inches from a bright window until they've developed their first true leaves.
Rinse Technique Matters: Those twice-daily rinses with cool water are crucial for preventing mold and keeping sprouts fresh. I use a fine-mesh spray bottle to avoid dislodging seeds—gentle pressure is key. After rinsing, I tilt the tray on its side for 5 minutes to let all water drain completely. Any standing water leads to mold within 24 hours.
Harvest Timing Secret: The 1-2 inch height guideline is perfect, but here's what nobody tells you—harvest just as the first true leaves appear (not the tiny seed leaves). This gives you maximum flavor and texture. I use clean kitchen scissors and cut just above the roots. For zero-waste growing, I've found you can get 2-3 more harvests from the same roots by rinsing and returning them to the tray immediately after each harvest.
Pro Tips for Dill Seed Sprouts
- Here's what I learned after growing dill sprouts for years—these tricks make all the difference between good and grea...
- Soak Like a Pro: The 12-hour soak is non-negotiable for dill seeds—they need this time to soften their tough outer sh...
- Light Management is Everything: During the first 24 hours in darkness, you're building roots. Then comes the light ph...
Frequently asked questions
Got questions about growing dill seed sprouts?
You’re not alone! Here are answers to the most common queries to help you sprout like a pro—no guesswork required.
How long does it take for dill seeds to sprout?
Dill seeds typically sprout within 5–14 days, depending on temperature and moisture. For fastest results, keep them in a warm (70–75°F), humid environment. If you don’t see sprouts in 2 weeks, try soaking seeds overnight in warm water to kickstart germination. Patience is key—some seeds take longer!
Why aren’t my dill seeds sprouting?
Common culprits include old seeds (use fresh seeds for best results), cold temperatures (dill prefers warmth), or dry conditions. Double-check your setup: seeds should stay consistently moist (not soggy) and in a dark, warm spot until they sprout. If needed, rinse seeds 1–2 times daily to prevent mold.
Can I grow dill sprouts indoors without sunlight?
Dill sprouts thrive in low light as long as they’re kept moist. Use a seedling tray with a lid or a damp paper towel in a sealed container. Place it near a bright window or under a grow light for 6–8 hours daily. Once sprouted, move them to indirect light to prevent legginess.
How do I harvest dill sprouts without killing the plant?
Harvest dill sprouts by snipping just above the soil line with clean scissors. Leave at least 1–2 inches of growth to encourage regrowth. Rinse gently under cool water, pat dry, and store in an airtight container in the fridge for up to 5–7 days. For longer storage, try freezing or drying!
What can I do with leftover dill seeds after sprouting?
Don’t toss them! Use leftover seeds for compost, homemade dill oil (steep seeds in oil for flavor), or even birdseed. If seeds are still viable, replant them in soil for a full dill plant. Just avoid composting if seeds might sprout—opt for a hot compost pile to kill them.
Wrapping up and next steps
Growing dill seed sprouts is a rewarding way to enjoy fresh, nutrient-packed greens with minimal effort—and zero waste! 🌱 Whether you're a seasoned gardener or just starting out, these fast-germinating sprouts prove that homegrown goodness is always within reach.
With the right setup and a little patience, you’ll soon be harvesting vibrant, flavorful sprouts to elevate your meals.
Ready to take the next step? Start small—try a batch of dill seed sprouts this week, and soon you’ll be experimenting with other sprouts or even sharing your newfound skills with friends. Happy growing! 🌿