
Lawn
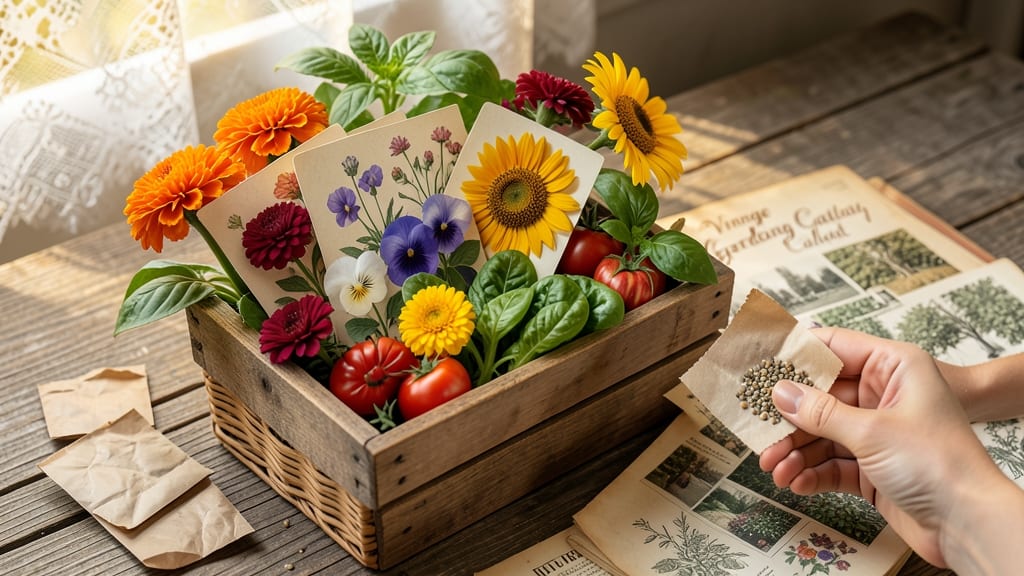
My collection of pretty seed packets used to be a chaotic pile—until I turned them into garden decor that actually inspires planting. 🌸 Those charming labels aren’t just for growing; they’re the first step in creating a garden that feels as beautiful as the flowers it will produce.
Start by organizing packets by color or theme—think pastel for cottage gardens or bold stripes for modern plots. Display them in shadow boxes, vintage frames, or even repurposed cigar boxes for instant rustic charm. A single packet becomes a conversation starter when framed like artwork.
When planning your garden, let the packets guide your layout. Group complementary flowers together and use the labels to map out your beds before you even dig. The result? A cohesive, dreamy garden that looks as intentional as it feels joyful to grow.
This works for any space—balcony, greenhouse, or backyard. The key is making seed packets part of your garden’s story, not just its supplies. Let’s turn those labels into inspiration!
📚 In This Guide
- What you need
- Instructions
- Tips and common mistakes
- Wrapping up and next steps
What you need
- ● Seed packets: Plain, kraft paper, or recycled packets (10–20, depending on quantity).
- ● Design supplies: Watercolor paints or acrylic paints (small bottles or sets).
- ● Fine-tip markers or calligraphy pens (black, brown, or metallic).
- ○ Stencils or tracing paper (optional for intricate designs).
- ● Adhesives: Glue sticks, double-sided tape, or a glue pen for lightweight embellishments.
- ● Decorative elements: Washi tape (floral, botanical, or patterned).
- ● Dried flowers, pressed leaves, or lace scraps.
- ● Twine or ribbon (for hanging or sealing).
- ● Tools: Scissors or a craft knife (for precise cuts).
- ● Ruler and pencil (for measuring and sketching).
- ● Brushes (for paint application).
- ● Gold/silver leaf or foil for a luxe finish.
- ● Clear sealant spray to protect designs.
- ● Custom seed packet envelopes (for a premium feel).
- ● Stamps or embossing tools for texture.
- ● Chalkboard markers (for reusable, erasable labels).
How to design charming seed packet labels for your garden
Turn ordinary seed packets into garden conversation starters with these creative, easy techniques.
🎨 Step 1: Gather Your Design Supplies
Start with the basics: a printer, cardstock (or heavyweight paper), and clear packaging tape. I like to use 8.5x11-inch cardstock because it's sturdy enough to protect seeds while still looking elegant. You'll also need a ruler, pencil, and scissors—precision matters when cutting around seed shapes. For a personal touch, gather decorative elements like pressed flowers, lace trim, or vintage buttons to glue onto the fronts.
Don't overlook the importance of waterproofing. If you're using paper, seal the packets with a thin layer of Mod Podge or clear acrylic sealer to protect against moisture. I've learned the hard way that soggy labels ruin the whole aesthetic. Test your materials first by taping a sample packet and leaving it outside overnight—if it holds up, you're good to go.
✂️ Step 2: Create Custom Shapes and Templates
Skip the generic rectangles and design labels shaped like flowers, leaves, or even tiny houses. Use a computer program like Canva or Word to draft your shapes, then print them onto cardstock. For a rustic look, trace around cookie cutters with a pencil before cutting. I prefer freehand cutting for a more organic feel—just take your time and use sharp scissors.
Include essential information like seed variety, planting instructions, and harvest time on the back of each label. Keep the font large enough to read easily from a distance—you don't want gardeners squinting at your handiwork. For a cohesive look, use the same font and color scheme across all packets. This creates visual harmony that makes your garden look intentional and well-cared-for.
🌱 Step 3: Assemble and Personalize Each Packet
Place your seeds into small, clear plastic bags or envelopes before sealing them into the custom-shaped labels. I like to use 1-inch square envelopes for tiny seeds and 2-inch rectangles for larger ones. Seal the edges with clear tape to keep everything secure. For an extra-special touch, add a handwritten note about the plant's history or a fun fact about its uses.
Here's where it gets fun—personalize each packet with unique details. If you're growing heirloom tomatoes, include a vintage-style illustration. For flowers, add a sketch of what the blooms will look like. I've even included QR codes linking to care guides for tech-savvy gardeners. The key is balance: keep the design pretty but practical so gardeners can actually use the information.
🪴 Step 4: Display and Use Your Handmade Packets
Once your packets are dry and sealed, arrange them on a shelf or in a shadow box for a charming garden centerpiece. I like to group them by color or plant type for visual appeal. When it's time to plant, simply tuck the packet into the soil with the seed or plant it directly in the ground. This keeps everything organized and makes your garden look like a curated work of art.
Don't forget to photograph your labeled seeds and share them online—other gardeners will love the creativity! I've seen these packets become popular gifts and even sold at local farmers markets. The best part? Each one tells a story about your garden journey, making your space feel more personal and inviting. Real talk: your neighbors will start asking where you got them.
Tips & tricks for pretty seed packets
These creative touches will transform your seed packets from functional to fabulous—without adding stress.
Material Selection: For extra durability, choose 120 lb. cardstock instead of standard 8.5x11-inch sheets. It's thicker, holds up better to moisture, and gives a more premium feel. I've found that kraft paper adds a rustic charm while still being sturdy enough for outdoor use. Test your chosen material first by taping a sample and leaving it outside for 24 hours—this prevents soggy surprises later.
Design Consistency: In Step 2, when creating your templates, maintain a 1/2-inch border around all designs to ensure you have space for essential information. Use a pencil to lightly sketch your shapes before cutting—this helps you visualize how text will fit. For a cohesive look across all packets, create a simple color scheme using 2-3 colors max and stick with the same font family throughout. This creates visual harmony that makes your garden look intentional.
Personalization Pro Tip: In Step 3, take your personalization to the next level by including a tiny QR code linking to your garden blog or a care guide for each plant. You can generate these for free using online tools like QR Code Generator. For a handmade touch, write planting dates in waterproof ink pen on the back of each packet—this doubles as a planting reminder when you're ready to start your garden.
Display Ideas: For Step 4, consider creating a shadow box display with clear acrylic dividers to separate different seed types. Arrange your packets by color or plant family for visual appeal. You can also create a mini garden map on the back of your display box, showing where each plant will go in your garden layout. This makes your seed packets both functional and decorative year-round.
Pro Tips for Pretty Seed Packets
- These creative touches will transform your seed packets from functional to fabulous—without adding stress.
- Material Selection: For extra durability, choose 120 lb. cardstock instead of standard 8.5x11-inch sheets. It's thick...
- Design Consistency: In Step 2, when creating your templates, maintain a 1/2-inch border around all designs to ensure ...
Frequently asked questions
Got questions about pretty seed packets? You’re not alone!
Here are some of the most common ones—plus quick answers to help you make the most of your charming garden labels.
Can I reuse or repurpose pretty seed packets after planting?
Once you’ve planted your seeds, get creative with your packets. Use them as mini plant markers by tucking them into the soil, or frame them for a rustic garden journal. Some gardeners even turn them into seed storage tags for next year’s harvest. Just remove the seeds first!
How long do pretty seed packets last before they expire?
Most seed packets list an expiration date (usually 1–5 years from production), but many seeds stay viable longer if stored properly in a cool, dry place. Test old seeds by planting a few—if they sprout, they’re still good! Pro tip: Write the purchase date on your packet with a marker to track freshness.
Are pretty seed packets more expensive than regular ones?
Sometimes, yes—but not always! Many seed companies (like Baker Creek Heirloom Seeds or Seed Savers Exchange) offer beautifully designed packets at standard prices. For budget-friendly options, check local farmers’ markets or Etsy for bulk discounts. Bonus: The aesthetic payoff makes them worth it for garden decor!
What’s the best way to store unused pretty seed packets?
Store them in a cool, dark, and dry spot—like a sealed container or airtight jar—to preserve freshness. Avoid humidity (like basements) or direct sunlight, which can degrade the paper and seeds. Pro tip: Place a silica gel packet in your storage container to absorb moisture.
Why won’t my seeds from a pretty packet germinate?
Even pretty packets can have dormant or old seeds. First, check the packet for planting depth/temperature needs. If issues persist, try soaking seeds overnight in warm water or using a seed starter kit. Remember: Some heirloom varieties need scarification (lightly sanding the seed coat) to break dormancy.
Can I print my own pretty seed packet designs?
Yes! Use free templates from sites like Canva or Etsy to design custom labels. Print on waterproof cardstock and laminate for durability. Extra tip: Add QR codes linking to your garden blog or planting tips for a tech-savvy twist!
Wrapping up and next steps
Pretty seed packets aren’t just about aesthetics—they’re a gateway to transforming your garden into a vibrant, Instagram-worthy space! From whimsical designs to eco-friendly materials, these charming labels make gardening feel like a creative adventure.
Whether you’re a seasoned green thumb or a beginner, let your garden’s potential bloom with every seed you plant.
Ready to elevate your gardening game? Start small—pick one packet this weekend! Sketch your dream garden layout, grab those pretty seeds, and watch your outdoor oasis come to life. Happy planting! 🌱✨