
Lawn
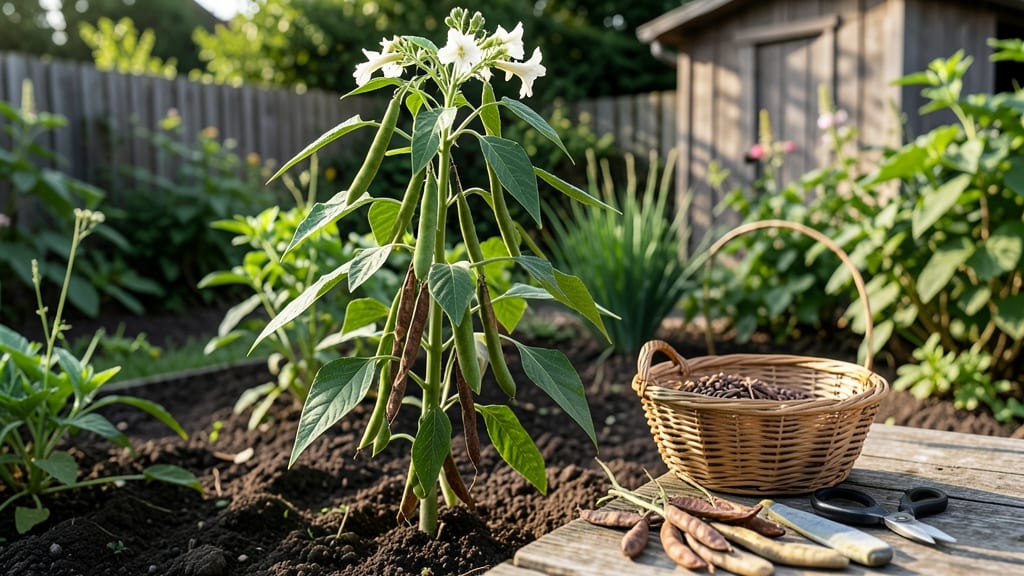
Growing sesame seed pods that stay put until harvest is the secret to viable seeds—and it starts with the right approach. 🌱 I’ve spent years perfecting this after my first crop shattered all over the yard, leaving me with nothing but frustration. The key?
Understanding how pods develop and when to act before they twist free. Sesame thrives in warm, dry climates with well-draining soil, but even in ideal conditions, pods shatter easily. They form 60-70 days after planting, turning from green to golden-brown when ready.
Hand-picking at the right stage—before they split open—is your best bet for saving seeds, especially in small-scale gardens where machines aren’t an option. Once harvested, drying pods on a screen in direct sunlight for 3-5 days preserves quality. Store them in airtight containers away from moisture to prevent mold.
The payoff? Fresh, high-quality seeds for next season’s planting, plus the satisfaction of a job well done. For those in cooler regions, extend the growing season with row covers or start seeds indoors. The effort pays off with higher yields and fewer losses—no more empty-handed harvests!
📚 In This Guide
- What you need
- Instructions
- Tips and common mistakes
- Wrapping up and next steps
What you need
- ● Sesame seeds: 1–2 lbs of high-quality, organic sesame seeds (ensure they’re untreated and viable). Look for varieties like Bunsi or Til for best results.
- ● Growing medium: Potting mix: 10–12 quarts of well-draining, sterile potting soil (mix with perlite or vermiculite for aeration).
- ○ Optional: Coco coir or hydroponic clay pebbles for soilless growing.
- ● Containers: 5–10 5–7 inch diameter pots (or a raised bed if growing outdoors). Ensure pots have drainage holes!
- ● Watering can or spray bottle: With a fine mist nozzle for gentle hydration.
- ● Fertilizer: Balanced liquid fertilizer: 16-20-20 or 10-10-10 (dilute to half-strength to avoid burning delicate seedlings).
- ○ Optional: Compost tea or worm castings for organic enrichment.
- ● Grow lights or sunny window: A full-spectrum LED grow light (12–16 hours/day) or a south-facing window with 6+ hours of direct sunlight.
- ● Pruning shears: Small, sharp pair for trimming pods (sterilize with rubbing alcohol).
- ○ Harvesting tools: Glove (optional, to avoid skin irritation from sesame pods).
- ● Paper bags or breathable mesh bags for drying seeds.
- ● Temperature: Ideal range of 70–85°F (21–29°C). Use a heat mat if below 60°F (15°C) for germination.
- ● Humidity: Maintain 50–70% humidity (use a humidity tray or misting bottle if indoor).
- ● Space: Sesame plants need 12–18 inches of vertical space (they grow tall!). Stake or trellis if growing indoors.
- ● Patience: Sesame pods take 70–90 days to mature—plan ahead!
- ● 🌱 Pre-soak seeds: Soak sesame seeds in warm water for 4–6 hours before planting to speed up germination.
- ● 🔄 Rotate pots: Give containers a quarter-turn daily to ensure even sunlight exposure.
- ● ✨ Pollination hack: Gently shake plants or use a soft paintbrush to transfer pollen if growing indoors (sesame is self-pollinating but benefits from a nudge!).
Step-by-step guide to cultivating sesame seed pods for reliable harvests
Here's how I grow sesame plants that produce abundant, twist-free pods every season—no tricky harvesting required.
🌱 Step 1: Select and Prepare the Right Variety
Choose a sesame variety suited to your climate, like 'Burma' for warm regions or 'Black Sesame' for cooler areas. I always opt for certified organic seeds to avoid genetic modifications that can affect pod development. Sesame thrives in full sun and well-draining soil with a pH between 6.0-7.5.
Start seeds indoors 8-10 weeks before your last frost date. Use small pots or seed trays filled with a light seed-starting mix. Plant seeds ½ inch deep and keep the soil consistently moist but never soggy. Sesame seeds germinate best at 75-85°F, so a seedling heat mat helps speed up the process.
☀️ Step 2: Transplant Seedlings and Maintain Optimal Growing Conditions
Once seedlings have 2-3 true leaves and are 3-4 inches tall, transplant them outdoors after hardening off for 7-10 days. Space plants 12-18 inches apart in rows 24 inches apart to allow for proper air circulation and pod development.
Sesame plants need at least 6 hours of direct sunlight daily and consistent moisture, especially during flowering. Water deeply at the base of the plant 2-3 times per week, ensuring the soil remains evenly moist but not waterlogged. Overwatering can lead to fungal diseases that weaken the plant and reduce seed viability.
🌿 Step 3: Monitor Growth and Support Plants for Healthy Pod Development
As sesame plants grow, they develop long, slender stems that can become top-heavy as pods form. I use small stakes or cages to support the plants and prevent them from bending or breaking. This ensures the pods develop evenly and remain accessible for harvesting.
Watch for signs of stress, such as yellowing leaves or stunted growth, which can indicate nutrient deficiencies or pests. Apply a balanced 10-10-10 fertilizer every 4-6 weeks to promote healthy growth. Sesame plants are relatively low-maintenance but benefit from occasional checks for aphids or spider mites, which can damage leaves and reduce seed quality.
⏰ Step 4: Time Harvesting for Maximum Seed Viability
The key to twist-free sesame pods is harvesting at the right stage. Pods are ready when they turn from green to a light brown color and begin to dry out slightly. This typically occurs 90-120 days after planting, depending on the variety and climate. Harvest pods in the morning when they are firm and dry to the touch.
Gently twist the pods from the stem to avoid damaging the plant or causing the pods to split open prematurely. Spread the harvested pods on a clean, dry surface in a well-ventilated area to dry completely. Once fully dry, the pods will open naturally, releasing the seeds. Store the seeds in an airtight container in a cool, dry place to preserve their viability for up to a year.
🌱 Step 5: Prepare for the Next Season and Troubleshoot Common Issues
After harvesting, allow the plants to dry completely in the garden before pulling them up. This prevents the spread of diseases and pests to next year's crop. Compost the dried plant material to enrich the soil naturally. I also rotate crops annually to maintain soil health and prevent nutrient depletion.
If you encounter issues like poor germination or low seed yield, check your soil pH and adjust if necessary. Sesame plants are sensitive to acidic soil, so adding lime can help if the pH drops below 6.0. Additionally, ensure adequate spacing and support to avoid overcrowding, which can lead to weaker plants and reduced pod production.
Tips & tricks for perfect sesame seed pod cultivation
Common pitfalls—and how to sidestep every one—when growing sesame plants that yield twist-free pods every season.
Seed Starting Secret: The 8-10 week indoor starting window is non-negotiable for most climates, but here's the thing: if you're in a warm region like Zone 9 or 10, you can push this to 6-8 weeks. The key is maintaining that 75-85°F soil temperature—use a heat mat if your home stays cooler. I've seen germination rates drop by 30% when seeds start below 70°F, so don't skip this step.
Transplant Timing: When hardening off those 3-4 inch seedlings for the 7-10 day period in Step 2, I've found that starting with just 2 hours of exposure on day one prevents shock. Gradually increase by 1-2 hours daily until they're ready for full sun. The critical mistake I see is rushing this—plants that go from indoor pots to full sun too quickly develop sunburned leaves that never recover.
Support System: Those slender sesame stems might look delicate, but they become surprisingly top-heavy once pods form. I recommend using 5-foot tall bamboo stakes placed at planting time rather than trying to add support later. The stakes should be 1 inch in diameter to provide stability without piercing the stems. This prevents the classic "leaning tower of Pisa" effect that makes harvesting nearly impossible.
Harvesting Cues: The 90-120 day window is your target, but here's what nobody tells you—morning is the absolute best time to harvest. Pods are firmest then, and the light brown color is most distinct against the green stems. I carry a small magnifying glass to check for subtle color changes on the pod seams. Harvesting too early means you'll get twisted pods that won't open properly, while waiting too long risks seeds falling to the ground.
Pro Tips for Sesame Seed Pod
- Common pitfalls—and how to sidestep every one—when growing sesame plants that yield twist-free pods every season.
- Seed Starting Secret: The 8-10 week indoor starting window is non-negotiable for most climates, but here's the thing:...
- Transplant Timing: When hardening off those 3-4 inch seedlings for the 7-10 day period in Step 2, I've found that sta...
Frequently asked questions
How long does it take for sesame seed pods to mature?
Sesame plants typically take 90–120 days to mature, depending on the variety and growing conditions. Look for pods that turn tan or brown and split open naturally—this signals peak ripeness. Harvest before they shatter on their own to avoid seed loss!
Can I grow sesame seed pods indoors?
Yes, but with big limitations! Sesame thrives in warm climates (70–85°F) and needs 6–8 hours of sunlight daily. Use a south-facing window or grow lights, but expect smaller yields than outdoor plants. A container at least 12 inches deep works best.
What’s the best temperature for sesame seed pods to grow?
Sesame plants hate cold—they won’t germinate below 60°F and struggle in temps under 50°F. Ideal growing temps are 75–85°F during the day and 60–70°F at night. If you’re in a cooler zone, start seeds indoors 4–6 weeks before the last frost and transplant after soil warms.
Why are my sesame seed pods twisting or curling?
Twisting pods usually mean stress—check for:
- Underwatering (soil should stay consistently moist, not soggy).
- Nutrient deficiency (add a balanced fertilizer like 10-10-10 at planting).
- Pests (aphids or spider mites can distort pods—spray with neem oil if needed).
- Overcrowding (thin seedlings to 12–18 inches apart for airflow).
If pods twist late in growth, they may still produce seeds—just harvest carefully!
What’s the easiest way to harvest sesame seeds without losing them?
Wait until 70–80% of pods are dry and brown, then:
- Cut stems with scissors or pruners, leaving 2–3 inches above the base.
- Bundle stems and hang them upside down in a dry, shaded area for 3–5 days to finish drying.
- Rub pods between your hands or use a clean cloth to release seeds.
- Winnow seeds by tossing them in the air—seeds will float away from chaff!
Store seeds in a cool, dark place (like a jar) for up to 1 year.
Wrapping up and next steps
Growing sesame seed pods is a rewarding journey that brings nutrient-rich rewards right to your doorstep—no twisty surprises needed! 🌱 Whether you're a seasoned gardener or just starting, these resilient plants thrive with minimal fuss, offering year-round harvests when nurtured properly.
Now that you’re armed with the right knowledge, why not take the next step?
- Start small: Plant a few pods in containers or a sunny patch of your garden this week!
- Experiment: Try different soil mixes or spacing to see what works best for your climate.
- Share the harvest: Once you master it, treat friends to homemade sesame treats or sell extras at local markets!
Your green thumb is about to get even greener—let’s grow those pods! 🌟