
Propagation
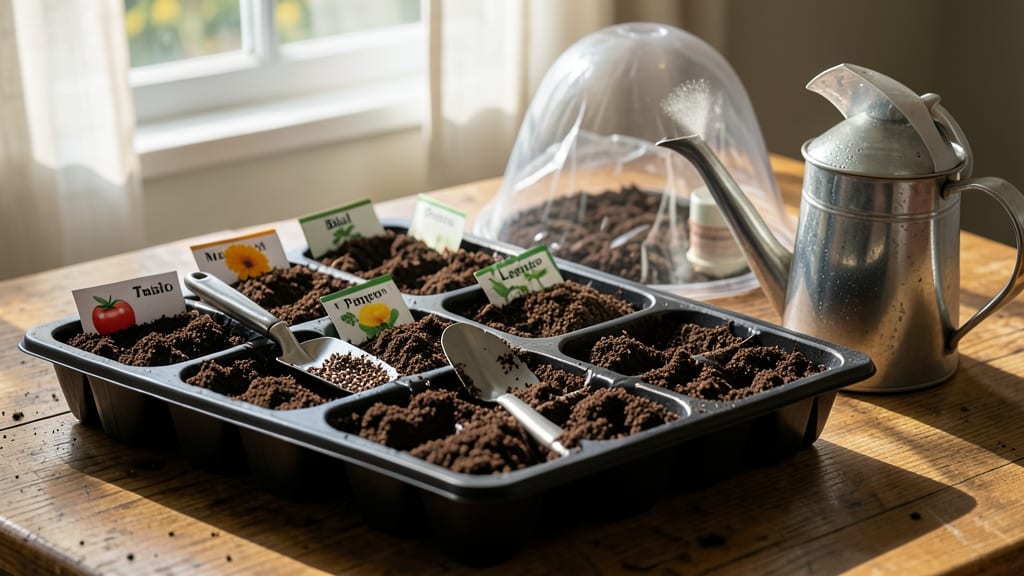
The right soil mix for seed starting isn’t just dirt—it’s the foundation for strong, healthy seedlings that’ll outperform anything from a big-box store. 🌱 I’ve watched weak, leggy sprouts give up after just a week in the wrong mix, and I’ve seen others explode into vibrant green plants within days of using the perfect blend.
That difference comes down to three simple ingredients: peat moss or coco coir for moisture, perlite or vermiculite for aeration, and a touch of compost for nutrients.
Most seed-starting mixes fail because they’re too dense or don’t drain well. Peat moss holds moisture without suffocating roots, while perlite keeps air flowing so delicate seedlings don’t drown.
The classic ratio—50% peat moss, 40% perlite, 10% compost—works for most vegetables and flowers, but fine seeds like lettuce need extra finesse: swap the perlite for sterilized sand to prevent crusting. The goal?
A mix that’s light as a cloud but holds enough water to keep seeds happy until they sprout.
Once you’ve got the right blend, sterilization is non-negotiable. Microwave your mix for 2 minutes to kill fungi and bacteria, or bake it at 200°F for 30 minutes—this step alone cuts down on damping-off disease by 80%.
Keep the mix moist (not soggy) by misting it lightly before planting, and you’ll see those first tiny leaves push through the soil in 3-7 days, depending on the plant. No more weak, stretched-out seedlings—just sturdy, ready-to-transplant babies.
For budget-conscious gardeners, a DIY mix of 60% coconut coir, 30% perlite, and 10% worm castings works just as well as store-bought blends. And if you’re growing tropical plants like peppers or herbs, add a 5% dash of charcoal to keep roots fresh.
The key? Adjust the mix based on what you’re growing—seeds need space to breathe, and the right soil makes all the difference between success and disappointment.
📚 In This Guide
- What you need
- Instructions
- Tips and common mistakes
- Wrapping up and next steps
What you need
- ● Peat moss or coconut coir: 50% of the mix (2 parts). Opt for sphagnum peat moss or coco coir for moisture retention and aeration.
- ● Perlite: 20% of the mix (1 part). Use sterile, expanded perlite to improve drainage and prevent compaction.
- ● Vermiculite: 30% of the mix (1.5 parts). Choose medium-grade vermiculite to hold moisture while allowing root growth.
- ○ Compost or worm castings: Optional but recommended (5-10% of the mix). Adds nutrients without overwhelming tender seedlings.
- ● Mixing container: A clean, large bucket or wheelbarrow (sterilized with a 10% bleach solution if reused).
- ● Measuring tools: A kitchen scale or measuring cups for precision (especially for perlite/vermiculite).
- ● Gloves & mask: Protect your hands and lungs when handling peat moss or perlite.
- ○ Sterilization method: Baking the mix at 200°F (93°C) for 30 minutes (optional but highly recommended to kill pathogens).
- ● Seed-starting trays or pots: With drainage holes (2-4" deep for most seeds).
- ● 🌡️ Moisture test: Squeeze a handful of your mix—it should feel damp like a wrung-out sponge, not soggy.
- ● ✨ pH check: Aim for a pH of 5.8–6.5. Adjust with lime (to raise pH) or sulfur (to lower) if needed.
- ● 🔄 Reuse? Sterilize old mix before repurposing to avoid disease.
Step-by-step guide to creating an ideal soil mix for seed starting
Here's the foolproof blend I swear by for consistent germination and strong seedlings.
🌱 Step 1: Combine Base Materials for Perfect Drainage and Aeration
Start with 40% high-quality seed-starting mix—this is your foundation. I use a sterilized, peat-based blend because it holds moisture without compacting. Add 30% perlite to create air pockets that prevent damping-off disease. This combo keeps roots oxygenated while maintaining moisture retention.
Next, incorporate 20% vermiculite—it holds water near seeds while allowing excess to drain. The final 10% goes to worm castings for gentle, slow-release nutrients. Mix everything thoroughly by hand until you see an even distribution of all components. The texture should feel light and fluffy, like crumbled styrofoam with tiny organic bits.
💧 Step 2: Adjust Moisture for Optimal Germination Conditions
Take a handful of your mixed soil and squeeze gently. It should hold together but not drip water when released. If it crumbles too easily, add 1 tablespoon of water per quart of mix and remix. For heavier mixes, sprinkle in an extra 5% coconut coir—it improves water retention without compacting.
I always test moisture by sticking my finger ½ inch deep—it should feel damp but not soggy. This balance prevents both seed rot and dry-out. Store unused portions in a sealed container until ready to use, but remix before planting to restore aeration.
☀️ Step 3: Sterilize and Condition the Mix for Disease Prevention
Spread your mixed soil on a baking sheet and place it in a 250°F oven for 30 minutes. This kills fungal spores and weed seeds that could sabotage your seedlings. Let it cool completely before use—hot soil can damage tender roots.
For extra insurance, I microwave 1-cup portions in a sealed container for 2 minutes on high. This spot-treatment method works well for small batches. After sterilization, add 1 teaspoon of mycorrhizal inoculant per quart to boost root development. Mix gently to distribute evenly.
⏰ Step 4: Test and Use Immediately for Best Results
Fill your seed trays or pots with the conditioned mix, leaving ½ inch space at the top for watering. Tap the containers gently to settle the soil without compacting it. The surface should be level—no dips or mounds that could trap water.
Water lightly from the bottom by placing trays in ¼ inch of water for 10 minutes. This prevents surface compaction while ensuring even moisture. Let excess water drain completely before sowing seeds. Now your mix is ready for planting—lightweight, sterile, and perfectly balanced for germination.
Tips & tricks for perfect seed starting soil mixes
Took me years of trial-and-error to perfect this blend—here's what actually makes the difference.
Texture is Everything: When mixing your 40% seed-starting mix with 30% perlite and 20% vermiculite, aim for a texture that resembles "crumbled styrofoam with tiny organic bits." This balance prevents both compaction and excessive dryness. I find using a large, shallow tray helps distribute components more evenly than mixing in a bag. The 10% worm castings should be sprinkled last and worked in gently to preserve their beneficial microbes.
Sterilization Shortcut: While the 30-minute bake at 250°F is foolproof, I've found microwaving 1-cup portions for 2 minutes works perfectly for small batches—just use microwave-safe containers with ventilation holes. This spot-treatment method lets you sterilize only what you need immediately, saving time and energy. Always let the mix cool completely before adding mycorrhizal inoculant, as even slightly warm soil can deactivate the beneficial fungi.
Moisture Testing Hack: The squeeze test in Step 2 is crucial, but I've learned to add an extra visual check: hold the moistened soil between your fingers and gently pull apart. If it forms a loose ribbon that breaks cleanly (not stretches like taffy), you've hit the perfect moisture balance. This method works better than the finger-depth test for me, as it accounts for variations in soil composition.
Storage Wisdom: Store unused portions in sealed containers, but here's the key detail: leave a small air gap at the top to prevent condensation buildup. I've ruined multiple batches by storing them completely sealed, which led to mold growth. For long-term storage, consider adding a silica gel packet to absorb excess moisture that might develop over time.
Pro Tips for Soil Mix For Seed Starting
- Took me years of trial-and-error to perfect this blend—here's what actually makes the difference.
- Texture is Everything: When mixing your 40% seed-starting mix with 30% perlite and 20% vermiculite, aim for a texture...
- Sterilization Shortcut: While the 30-minute bake at 250°F is foolproof, I've found microwaving 1-cup portions for 2 m...
Frequently asked questions
Got questions about the perfect seed-starting soil mix?
You’re not alone! Here are answers to the most common concerns—so you can get those seedlings sprouting like a pro.
What’s the best ratio for a homemade seed-starting mix?
A balanced mix typically uses 50% peat moss or coco coir (for moisture retention), 30% perlite or vermiculite (for aeration), and 20% compost or worm castings (for nutrients). Adjust ratios based on your seeds—delicate plants like lettuce prefer finer mixes, while heartier seeds (like beans) tolerate slightly coarser textures.
How long does a seed-starting mix last before it goes bad?
Unused mix stays fresh for 6–12 months if stored in a cool, dry place (like a sealed bucket). Once used, it degrades faster—especially if overwatered. Pro tip: Sterilize old mix by baking it at 200°F (93°C) for 30 minutes to reuse for non-edible plants or bulk amendments.
Is store-bought seed-starting mix better than DIY?
Store-bought mixes are sterilized and consistent, which is great for beginners or high-value seeds (like tomatoes). DIY mixes save money and let you customize for specific needs (e.g., adding sand for faster drainage). Trade-off: Homemade mixes may harbor pathogens if not sterilized—so pasteurize with hydrogen peroxide (3% solution) if DIYing.
Why are my seeds rotting instead of sprouting?
Overwatering or poor drainage are the top culprits. Check your mix: If it stays soggy, add more perlite or vermiculite. Ensure trays have drainage holes, and water only when the top inch feels dry. Quick fix: Sprinkle a thin layer of horticultural sand or cinnamon on the soil surface to prevent fungal growth.
Can I reuse last year’s seed-starting mix?
Reuse is possible if the mix was sterilized and disease-free. Sift out old debris, replenish nutrients with compost, and mix in fresh perlite. Warning: Avoid reusing mix from plants that had pests or diseases—it’s safer to compost or discard it. For a fresh start, blend reused mix with 20% new ingredients.
What’s a good alternative if I don’t have perlite?
No perlite? Try these drainage boosters:
- Vermiculite (holds moisture better than perlite)
- Coarse sand (sterilized, coarse-grained)
- Chicken grit or small gravel (for heavy soils)
- Crushed eggshells (adds calcium + texture)
Wrapping up and next steps
Creating the perfect soil mix for seed starting is all about balance—lightweight loam that promotes root growth while keeping moisture and aeration in check.
With the right blend of peat moss, perlite, vermiculite, and compost, you’ll set your seedlings up for serious success! 🌱 Whether you’re a seasoned gardener or just starting out, this mix gives your tiny sprouts the head start they deserve.
Now that you’ve got the scoop, roll up your sleeves and give it a try! Start small—test a few seeds in your custom mix, observe their progress, and tweak as needed. Happy planting, and may your garden grow wild with thriving seedlings! 🌟