
Propagation
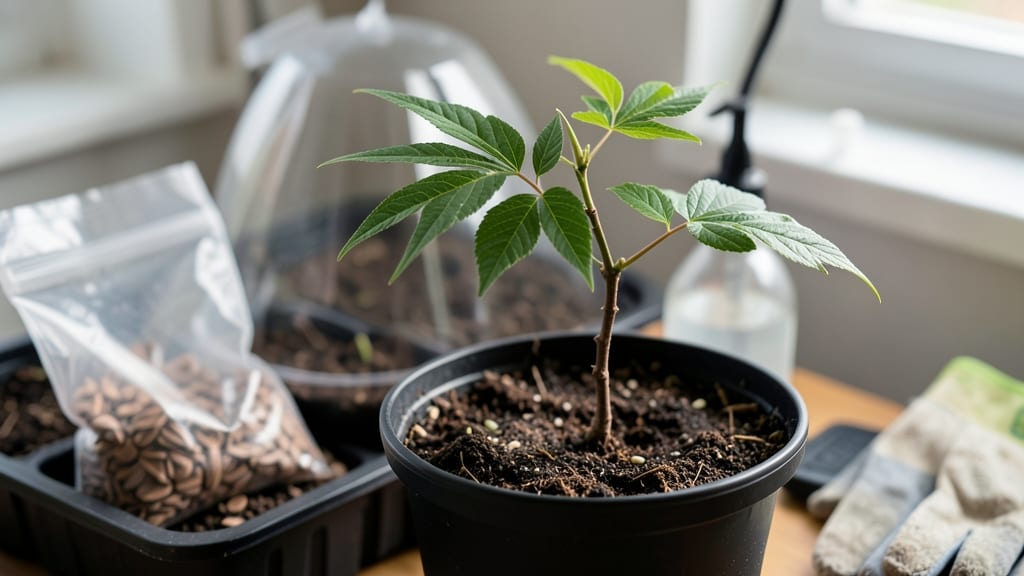
The secret to reliable wisteria seed germination starts with a soak-and-chill trick that breaks their stubborn dormancy. 🌱 I’ve struggled with wisteria seeds for years—until I discovered this method that finally coaxes them to sprout within 4-6 weeks instead of months (or never). The key? Mimicking nature’s winter-to-spring transition in your own setup.
You’ll need just three supplies: wisteria seeds, a damp paper towel or seed-starting mix, and a sealed plastic bag for cold stratification. No fancy equipment—just patience and the right conditions.
The process mimics how seeds would naturally soften in winter rains before spring warmth triggers growth. Most gardeners overlook this step, which is why so many seeds fail.
What you’ll end up with are strong, uniform seedlings ready for transplanting, not the weak, uneven sprouts that often result from skipping stratification. The roots develop deeper and faster, giving your wisteria a head start that makes all the difference in establishing a healthy vine.
This method works for both fresh and stored seeds, though fresh seeds germinate slightly faster.
Even in Zone 5 climates where winters are harsh, this technique adapts—just extend the chilling period by 2-3 weeks. The payoff? A wisteria that grows twice as fast and flowers sooner than seeds germinated the traditional way. Let’s get those seeds sprouting right.
📚 In This Guide
- What you need
- Instructions
- Tips and common mistakes
- Wrapping up and next steps
What you need
- ● Wisteria seeds: Fresh, viable seeds (harvested from mature pods or purchased from a reputable supplier). Aim for at least 10–20 seeds to account for germination variability.
- ● Large bowl or container: Deep enough to fully submerge seeds (e.g., a 2–3 quart glass or ceramic bowl).
- ● Water: Room-temperature distilled or dechlorinated water (chlorine can inhibit germination). Use 1–2 cups per 10 seeds.
- ● Plastic wrap or breathable lid: To cover the bowl and retain moisture (e.g., cling film, a damp paper towel, or a seedling tray lid).
- ● Refrigerator: A standard fridge with a temperature range of 35–45°F (2–7°C) for the chilling phase.
- ● Fine-mesh strainer or colander: For rinsing seeds gently after soaking.
- ● Small pots or seed trays: 3–4 inch diameter with drainage holes (e.g., peat pots, plastic cell packs, or biodegradable containers). Use 1 pot per seed for direct sowing.
- ● Well-draining potting mix: A blend of 50% peat moss or coco coir, 30% perlite or vermiculite, and 20% sand (sterilized). Avoid heavy garden soil.
- ● Spray bottle: For misting soil without disturbing seeds.
- ○ Heat mat (optional): A 70–75°F (21–24°C) mat to accelerate germination after chilling (e.g., 12"x24" heating pad).
- ● Grow lights or sunny windowsill: A south-facing window or LED grow lights (12–16 hours/day) for seedlings.
- ● Seed scarification tool: Sandpaper (medium-grit, 100–120) or a knife to lightly nick seeds if they’re hard-coated.
- ● Fungicide: A mild solution (e.g., 1 tsp hydrogen peroxide per cup of water) to prevent mold during germination.
- ● Humidity dome: A clear plastic cover for pots to retain moisture while seedlings establish.
- ● Growth regulator: A rooting hormone (e.g., dip seeds in it before planting for faster growth).
- ● Journal or labels: To track seed varieties, planting dates, and germination progress.
Step-by-Step instructions for wisteria seed germination
Here's my battle-tested method for breaking wisteria's stubborn dormancy—so you don't waste months waiting for sprouts.
🌱 Step 1: Harvest and Clean the Seeds
Collect mature wisteria pods when they turn brown and split open naturally. Remove the seeds immediately—they lose viability quickly once exposed to air. Rinse them thoroughly under cool water to remove any remaining pulp, then spread them on a paper towel to dry for 24 hours at room temperature. This prevents mold while preparing them for stratification.
I always sort the seeds by size, discarding any that look shriveled or damaged. The largest, plumpest seeds have the highest germination potential. Store them in a sealed container with a damp paper towel until you're ready to begin the soak-and-chill process—this keeps them hydrated without rotting.
💧 Step 2: Soak Seeds for 24 Hours
Fill a clean glass jar with lukewarm water (not hot) and add the seeds. They need 24 hours of continuous soaking to soften the hard outer coat. Stir them gently every few hours to prevent them from sticking together. You'll see tiny cracks appear in some seeds after 12 hours—that's your first sign they're breaking dormancy.
Don't skip this step. Wisteria seeds have an impermeable seed coat that blocks water absorption. Without soaking, germination could take 6-12 months instead of weeks. After soaking, drain the water completely and let the seeds air-dry for 1 hour on a paper towel. This prevents rot during the cold stratification phase.
❄️ Step 3: Cold Stratify for 6-8 Weeks
Place the damp seeds in a sealed plastic bag with a small amount of moist peat moss or sphagnum moss (just enough to keep them hydrated). Store the bag in your refrigerator's vegetable crisper where temperatures stay 35-40°F. Check them weekly—if the moss dries out, mist it lightly with water and reseal the bag.
This cold treatment mimics winter conditions, tricking the seeds into thinking they've experienced natural dormancy. After 6-8 weeks, remove the bag and let it sit at room temperature for 24 hours before planting. You'll notice some seeds may sprout during stratification—that's normal, but handle them gently to avoid damaging the tiny roots.
🌿 Step 4: Plant Stratified Seeds
Fill small pots (2-3 inches deep) with a sterile seed-starting mix and plant the seeds ½ inch deep, spacing them 1 inch apart. Press the soil lightly around each seed to ensure good contact. Water gently with a spray bottle until the soil is evenly moist but not soggy. Place the pots in a warm location (around 70°F) with bright, indirect light—direct sun can dry them out too quickly.
Cover the pots with clear plastic wrap to retain humidity, but remove it daily for 10 minutes to prevent mold. Germination typically occurs within 2-4 weeks, though some stubborn seeds may take up to 8 weeks. Once sprouts appear, remove the plastic completely and move them to a south-facing window or under grow lights for 12-14 hours daily.
☀️ Step 5: Transplant Seedlings
When seedlings develop 2-3 sets of true leaves (not just the initial seed leaves), they're ready to transplant. Harden them off by placing them outside in partial shade for 1-2 hours the first day, gradually increasing exposure over 10-14 days. Choose a location with full sun and well-draining soil—wisteria roots need space to establish.
Dig a hole twice as wide as the root ball but only as deep as the container. Plant the seedlings 12-18 inches apart to allow for future growth. Water deeply after planting to settle the soil and encourage root expansion. Mulch around the base with 2-3 inches of organic mulch to retain moisture and regulate soil temperature—this is critical for young wisteria, which are prone to drying out.
Tips & tricks for wisteria seed germination success
Wisteria's stubborn nature means small details make all the difference between months of waiting and reliable sprouts in weeks.
Stratification Setup: For the 6-8 week cold treatment in Step 3, use a small plastic container with a tight seal to prevent condensation buildup inside the bag. I place a damp paper towel at the bottom before adding the seeds and moss—this creates a more stable moisture environment than relying solely on the moss. The goal is consistent 35-40°F temperatures without soggy conditions that could rot seeds. Check weekly by gently squeezing the bag; if water drips out, it's too moist.
Soaking Visual Cues: During the 24-hour soak in Step 2, look for tiny white cracks forming on some seeds after 12 hours—this confirms the hard outer shell is softening. If you see mold developing (fuzzy growth), immediately rinse seeds with cool water and air-dry for 1 hour before proceeding. The water should remain lukewarm throughout; hot water can cook the delicate embryos inside.
Lighting Strategy: For Step 4's warm location (70°F), I recommend using a simple LED grow light on a timer for 12-14 hours daily rather than relying on window light alone. Wisteria seedlings need consistent light to prevent leggy growth. Position lights 6-12 inches above pots and adjust height as seedlings grow—too close causes overheating, too far results in weak stems.
Transplanting Timing: When hardening off seedlings in Step 5, start with just 1-2 hours in partial shade on the first day. Gradually increase exposure over 10-14 days while monitoring for wilting. Young wisteria leaves are particularly sensitive to transplant shock—if you notice curling or yellowing, return them to indoor conditions for 2-3 days before trying again.
Pro Tips for Wisteria Seed Germination
- Wisteria's stubborn nature means small details make all the difference between months of waiting and reliable sprouts...
- Stratification Setup: For the 6-8 week cold treatment in Step 3, use a small plastic container with a tight seal to p...
- Soaking Visual Cues: During the 24-hour soak in Step 2, look for tiny white cracks forming on some seeds after 12 hou...
Frequently asked questions
Got questions about wisteria seed germination?
You’re not alone! Here are answers to the most common queries—from timing to troubleshooting—to help you succeed with your soak-and-chill method.
How long should I soak wisteria seeds before planting?
Soak wisteria seeds for 24–48 hours in warm water to soften the hard outer shell. This mimics natural weathering and kickstarts germination. After soaking, place them in the fridge for 30–60 days to break dormancy. Pro tip: Change the water daily to prevent mold!
Why aren’t my wisteria seeds sprouting after the cold treatment?
Patience is key—wisteria seeds can take 6–12 months to germinate! If they’re still dormant after 3 months, try stratifying longer (up to 6 months) or scarifying (lightly nicking the seed coat) to speed things up. Poor moisture or temperature (below 40°F or above 80°F) can also stall growth.
Can I grow wisteria from seeds I find on the ground?
Yes, but freshness matters! Seeds lose viability quickly—aim for freshly fallen seeds (within 1–2 weeks). If they’re dried out or moldy, they may not germinate. For best results, collect seeds in late fall when pods naturally open.
Is there a faster way to germinate wisteria seeds?
While the soak-and-chill method is the most reliable, some gardeners use sand stratification (mixing seeds with damp sand in a pot) or gibberellic acid (a germination hormone) for quicker results. However, these methods require more effort and may not work for all varieties.
What do I do if mold grows during soaking?
Mold is a red flag! Immediately rinse seeds in hydrogen peroxide (3%) for 5 minutes to kill spores, then resoak in fresh water. If mold persists, discard the seeds and start fresh. To prevent mold, use filtered water and avoid overcrowding in containers.
Can I plant wisteria seeds directly outside?
Direct outdoor planting is not recommended for wisteria seeds—they need controlled conditions for germination. Start them indoors in pots with well-draining soil, then transplant seedlings after 2–3 years (they’re slow-growing!). Harden off seedlings gradually before moving them outside.
Wrapping up and next steps
Germinating wisteria seeds with the soak-and-chill method is a rewarding way to kickstart your plant’s journey—just remember, patience and consistency are your best allies! 🌱 With the right prep, a cool stratification period, and gentle care, you’ll soon see those first sprouts peeking through.
Once your seedlings are thriving, it’s time to transplant them into pots or your garden bed, giving them space to grow into stunning, fragrant vines.
Ready to take the next step? Start small—plant a few seeds, experiment with timing, and enjoy the process! Whether you’re a seasoned gardener or a curious beginner, every sprout is a victory worth celebrating. Happy growing! 🌿