
Lawn
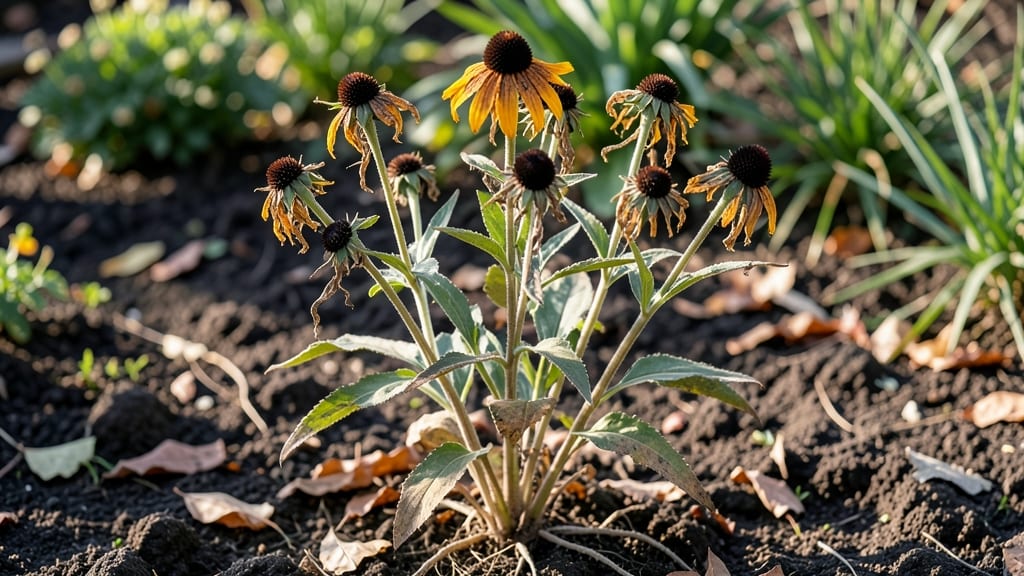
Black-eyed Susan seed heads hold the key to next year's golden blooms—if you harvest them right. 🌻 I learned the hard way that waiting too long means empty seed pods, while harvesting too early gives you nothing to store.
The secret lies in timing: those papery brown seed heads are ready when they split open on their own, usually by late summer or early fall.
Gathering viable seeds is simpler than it sounds. Just snip the dried seed heads with clean scissors and shake them over a bowl or paper to collect the tiny, dark seeds inside. A good batch yields about 500 seeds per head—enough to fill a small garden with cheerful yellow blooms.
Store them in an envelope or jar in a cool, dry place until spring planting.
When spring arrives, scatter those seeds directly into prepared garden beds or pots. Press them lightly into the soil and keep it moist until germination, which typically takes 10-14 days. The seedlings are tough and resilient, often popping up even without perfect conditions—just give them full sun and well-drained soil.
Pro tip: If you miss the natural drying window, you can still salvage seeds by hanging the heads upside down in a paper bag until they release. This method works surprisingly well, even for late-season blooms.
With proper storage, these seeds stay viable for up to two years, giving you a free pass to expand your garden without buying new plants.
📚 In This Guide
- What you need
- Instructions
- Tips and common mistakes
- Wrapping up and next steps
What you need
- ● Mature black-eyed Susan seed heads – Harvest when fully brown and dry (typically late summer to early fall). Aim for 5-10 healthy heads depending on your needs.
- ● Paper bags (brown kraft or breathable) – 1 per seed head (or a single large bag for bulk storage). Poke small holes in the bottom for airflow.
- ● Scissors or pruning shears – For cleanly snipping seed heads from stems.
- ● Drying location – A well-ventilated, dry spot (e.g., garage, shed, or indoor shelf away from direct sunlight).
- ○ Optional but helpful: Labeling tags – To mark seed varieties and harvest dates.
- ● Desiccant packets – Place 1-2 in storage bags to absorb excess moisture.
- ● Air-tight containers (glass jars or resealable bags) – For long-term seed storage (after drying).
- ● Fine mesh sieve or sifter – For separating seeds from chaff after drying.
- ● Patience! Drying takes 2-4 weeks depending on humidity.
- ● Avoid harvesting seeds if rain is forecasted for 24+ hours.
- ● Ensure seed heads are completely dry before storage (test by gently crushing a seed—if it’s hard, it’s ready!).
How to dry black eyed Susan seed heads for next year's garden
Here's the simple method I use to save seeds that stay fresh and ready to plant for seasons to come.
🌿 Step 1: Harvest Mature Seed Heads at Peak Ripeness
Wait until the seed heads turn a deep brown color and the back of the flower cone begins to split open slightly—this means the seeds are fully mature. I like to harvest on a dry morning after the dew has evaporated, as moisture can encourage mold during drying.
Gently cut the seed heads with clean scissors, leaving about 2 inches of stem attached. This extra stem helps support the heads during the drying process. Place them in a single layer on a clean, dry surface like a baking sheet or cardboard tray. Avoid overcrowding—they need good airflow to dry properly.
🪴 Step 2: Dry Seed Heads Indoors for 2-3 Weeks
Find a warm, dry spot indoors with good air circulation, like a sunny windowsill or a well-ventilated room. I like to place them near a fan on low setting to keep the air moving gently—this prevents mold and speeds up drying without damaging the seeds.
Check the seed heads every few days. They're ready when the stems snap easily when bent (not when dry but when slightly brittle). If you see any signs of mold or softness, move them to a drier location immediately. Properly dried seed heads will feel light and papery to the touch.
✂️ Step 3: Remove Seeds from Dried Heads
Once fully dry, gently rub the seed heads between your hands or use a fork to scrape out the seeds. I like to do this over a large piece of paper or a tray to catch any stray seeds. The seeds should easily separate from the dried flower parts—if they're still clinging tightly, the heads weren't dry enough.
Remove any debris or chaff by sifting the seeds through a fine mesh screen or by gently blowing on them. Store the clean seeds in a labeled paper envelope or small glass jar. I always write the date on the envelope so I know how old they are when I plant them next year.
💧 Step 4: Store Seeds in a Cool, Dry Place
Keep the dried seeds in a cool, dry location like a pantry or seed storage box. A small amount of silica gel or a packet of rice in the storage container helps absorb any lingering moisture. The seeds should remain viable for 1-2 years if stored properly.
Before planting next season, do a quick viability test by placing a few seeds between damp paper towels in a sealed bag. Check for sprouts in 5-7 days—if they germinate, your seeds are still good to use. This simple test saves you from planting old seeds that might not sprout well.
⏰ Step 5: Plant Viable Seeds in Early Spring
Sow seeds directly in the garden in early spring, about ¼ inch deep, once the soil temperature reaches 60°F. Black Eyed Susans are tough plants and handle transplanting well, so you don't need to start them indoors unless you're in a very short growing season.
Keep the soil evenly moist until germination, which typically occurs in 10-14 days. Thin seedlings to 12-18 inches apart once they have a few true leaves. The plants will reward you with vibrant blooms all summer long, just like the ones you saved seeds from!
Tips & tricks for perfect black eyed Susan seed preservation
Here's what I've learned after saving seeds for years—these little tricks make all the difference between seeds that sprout and ones that don't.
Harvest Timing: The deep brown color with slightly splitting cones is your golden window—harvest too early and seeds won't mature; too late and they'll scatter. I've learned to check my plants daily during peak season (late summer to early fall) to catch that perfect moment. The 2-inch stem is crucial too—it supports the heads during drying and prevents breakage.
Drying Strategy: That 2-3 week drying period in Step 2 is non-negotiable, but here's the secret: position your seed heads about 6 inches from the fan to create gentle airflow. Too close and you risk damaging delicate seeds; too far and drying slows dramatically. I place a small bowl of rice near my drying tray to absorb any stray moisture that might encourage mold.
Seed Removal: When you're ready to extract seeds in Step 3, I recommend using a clean, dry paintbrush to gently coax stubborn seeds out of tight flower heads. This prevents seed damage that can happen with vigorous rubbing. The seeds should separate effortlessly—if they don't, your drying time wasn't quite long enough.
Storage Wisdom: For maximum viability, I double up on moisture control by placing a small packet of silica gel inside my seed storage envelopes along with the rice packet. This creates an extra moisture barrier that keeps seeds fresh for that full 1-2 year window. Always label with the year—trust me, you won't remember which batch is which after winter!
Pro Tips for Black Eyed Susan Seed Heads
- Here's what I've learned after saving seeds for years—these little tricks make all the difference between seeds that ...
- Harvest Timing: The deep brown color with slightly splitting cones is your golden window—harvest too early and seeds ...
- Drying Strategy: That 2-3 week drying period in Step 2 is non-negotiable, but here's the secret: position your seed h...
Frequently asked questions
Got questions about preserving black-eyed Susan seed heads? You’re not alone! Here are some of the most common queries—and the answers you need to keep those seeds viable for next season.
When is the best time to harvest black-eyed Susan seed heads?
Harvest seed heads when they turn light brown and begin to split open naturally—usually late summer to early fall (August–October, depending on your climate). Wait until the pods are dry but haven’t scattered seeds yet. Pro tip: A gentle shake test works: if seeds rattle inside, they’re ready!
How long do dried black-eyed Susan seed heads stay viable?
Properly dried and stored seeds can remain viable for 1–3 years in cool, dry conditions. Store them in a paper envelope or airtight container in a dark, cool place (like a fridge or basement). Humidity is the enemy—moisture speeds up deterioration.
Can I replant black-eyed Susan seeds directly from dried seed heads?
Once the seed heads are fully dry, simply crush the pods with your fingers or a mortar and pestle to release the seeds. Scatter them on prepared soil (lightly raked) in spring or early fall. For best results, press them 1/4 inch deep and keep the soil moist until germination (2–4 weeks).
What if my black-eyed Susan seed heads won’t dry?
If seed heads stay green or moldy, they’re not fully mature or are exposed to too much moisture. Try these fixes:
- Move indoors: Hang bundles upside down in a dry, well-ventilated spot (like a garage or shed).
- Speed up drying: Place them in a paper bag with a silica gel packet (or uncooked rice) to absorb excess moisture.
- Check humidity: High humidity? Use a dehumidifier or fan to circulate air.
Are there alternatives if I can’t find black-eyed Susan seeds?
Yes! If you’re struggling with seed viability, consider these low-maintenance alternatives for similar golden blooms:
- Coneflower (Echinacea) – Drought-tolerant and pollinator-friendly.
- Blanket Flower (Gaillardia) – Thrives in poor soil and blooms late summer.
- Mexican Sunflower (Tithonia) – Bold, long-lasting flowers with minimal care.
- Store-bought seeds: Check local nurseries or online retailers for Rudbeckia hirta varieties.
Why are my black-eyed Susan seedlings dying after germination?
Seedlings often struggle with overwatering, poor drainage, or pests. Fix it by:
- Watering only when the top inch of soil is dry (avoid soggy soil).
- Ensuring pots/containers have drainage holes.
- Thinning seedlings to 12–18 inches apart to reduce competition.
- Watching for slugs/snails—use organic barriers like crushed eggshells.
Wrapping up and next steps
Mastering the art of drying black-eyed Susan seed heads ensures a steady supply of vibrant blooms year after year—no green thumb required! 🌻 With the right techniques, you’ll transform last season’s spent flowers into next year’s garden superstars.
Whether you’re a seasoned gardener or just starting out, every dried seed head is a promise of future beauty.
Ready to take the next step? Start small: Pick a few seed heads this fall, experiment with drying methods, and watch your garden thrive. Happy harvesting—and may your garden always be bursting with color! 🌿