
Lawn
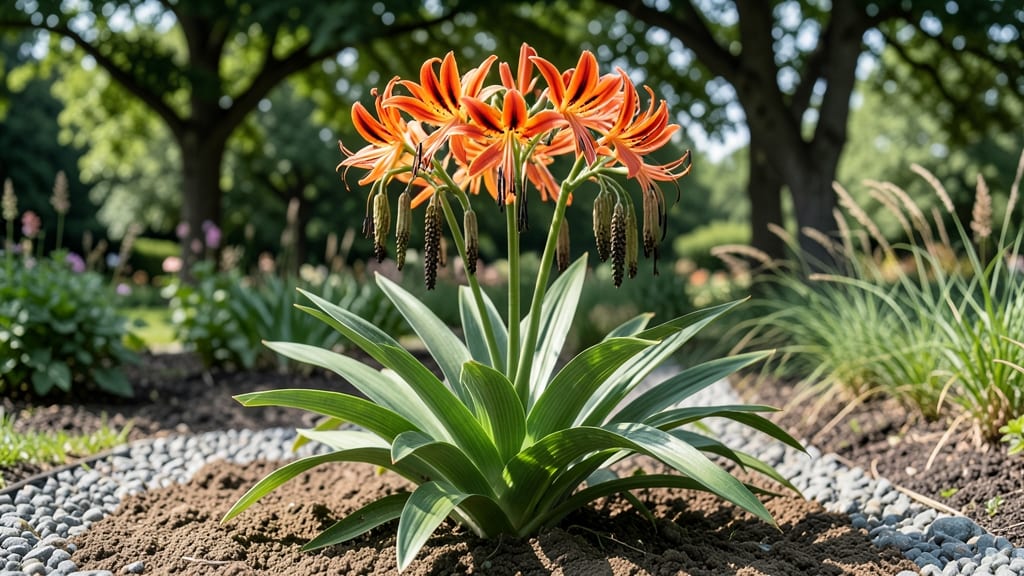
Those dramatic blackberry lily seed pods are nature’s way of saying, "Save me for next year!" 🌱 I’ve cracked the code on harvesting, drying, and popping them without losing a single seed—plus, I’ll show you how to turn them into next season’s bold orange blooms with minimal fuss.
The best time to collect pods is late fall, when they’ve turned papery brown but haven’t burst open yet. A gentle twist or tap usually releases the seeds, but if they’re stubborn, a quick soak in warm water loosens their grip.
Store them in a dry envelope until planting in early spring—just scratch the outer shell and press them lightly into soil. You’ll watch those seeds sprout within 2-4 weeks if kept warm and moist, with seedlings that grow into hardy perennials. The key?
Well-draining soil and full sun—these plants reward patience with 3-foot-tall spikes of fiery flowers that deer and rabbits ignore. No compost waste, no store-bought plants, just zero-waste gardening that multiplies your impact. Here’s how to make it work without the guesswork!
📚 In This Guide
- What you need
- Instructions
- Tips and common mistakes
- Wrapping up and next steps
What you need
- ● Mature blackberry lily seed pods: 5–10 fully dried pods (harvested after they’ve split open naturally or turned brown and papery).
- ● Paper towels or seed-saving paper: 2–3 sheets (for drying or storing seeds).
- ● Small envelope or airtight container: 1–2 (for seed storage; labeled with the date and plant name!).
- ● Fine-tip tweezers or toothpicks: 1 pair (to gently extract seeds from pods).
- ● Scissors or pruning shears: 1 pair (for trimming pods if needed).
- ● Magnifying glass: 1 (to inspect seeds for viability or pests).
- ● Seed tray or shallow dish: 1 (for drying seeds if humidity is high).
- ● Rubbing alcohol (70% isopropyl): Small bottle (for sterilizing tools if reusing them).
- ● Humidity pack (silica gel): 1 (to absorb moisture in storage containers).
- ● Notebook or seed-tracking app: 1 (to log seed sources, dates, and germination notes).
- ● A safe, dry workspace (avoid damp areas to prevent mold).
- ● Patience! Blackberry lily seeds need time to dry properly—rushing can reduce viability.
- ● Access to mature plants: Either your own garden or permission to forage from a local, pesticide-free source.
Step-by-step instructions for harvesting and saving blackberry lily seeds
Here's how to rescue those striking blackberry lily seeds before the pods dry out completely.
🌱 Step 1: Identify and Harvest Mature Seed Pods
Blackberry lily seed pods turn from green to a deep, papery brown when ready for harvest. Look for pods that have split open at the seams—this signals the seeds inside are fully mature. I like to harvest them in the morning after dew has dried, as the pods hold seeds best when slightly crisp.
Gently twist the pod open with your fingers or use clean scissors to snip along the seam. Avoid squeezing too hard, or you'll crush the seeds inside. Place each opened pod in a paper bag or envelope to catch any seeds that might fall out during transport. The goal is to collect seeds before they scatter naturally.
💧 Step 2: Extract Seeds from the Pods
Once you're home, lay each pod on a clean, dry surface like a cutting board or sheet of paper. The seeds will be embedded in a white, cottony material—this is the pod's natural seed coat. Use a small knife or your fingernail to gently scrape out the seeds, being careful not to damage them. I find a pair of tweezers helpful for picking up the tiny, glossy black seeds without losing any.
If the seeds stick to the pod's fibers, lightly mist the pod with water and wait a few minutes—the moisture helps release them. Never soak the seeds, as excess water can cause them to rot. Spread the extracted seeds on a paper towel to dry for 24 hours in a warm, dry place away from direct sunlight.
✂️ Step 3: Clean and Store Seeds for Long-Term Viability
After drying, transfer the seeds to a small envelope or airtight container. Label it with the date and variety if known—blackberry lily seeds can remain viable for 1-2 years when stored properly. I like to include a tiny note about the growing conditions where the plant thrived, like "partial shade, moist soil," to remind me later.
Store the seeds in a cool, dark place like a refrigerator drawer or seed vault. The key is keeping them dry and protected from light, which can degrade their quality over time. If you notice any seeds developing mold or an off smell, discard them immediately—they won't germinate.
☀️ Step 4: Prepare Seeds for Planting (Optional)
Blackberry lily seeds don't require stratification or scarification, making them one of the easiest to grow from seed. Simply plant them ¼ inch deep in well-draining soil during spring or early summer. I like to sow them in small pots first, as they can be slow to establish. Keep the soil lightly moist until germination, which typically takes 2-4 weeks.
Once seedlings appear, thin them to the strongest 2-3 plants per pot to avoid overcrowding. Blackberry lilies are hardy and will reward you with striking foliage and flowers the following season. If you're impatient, you can also propagate them from bulbils that form along the rhizomes—just dig up the plant in fall and separate the bulbils for next year.
Tips & tricks for perfect blackberry lily seed pod handling
Between us, these little tricks will save you from seed-saving frustrations—and keep your blackberry lily harvest thriving for years.
Timing Secret: Harvest those seed pods in the morning when they're still slightly crisp from overnight dew. The pods hold seeds best at this time, and the cooler temperatures prevent premature drying. If you wait until afternoon, the pods may already be too dry, making seeds harder to extract cleanly.
Extraction Technique: For stubborn seeds stuck in the cottony pod fibers, try this: place the pod in a small bowl and gently tap the sides with a spoon. The vibration helps dislodge seeds without damaging them. I've found this works better than misting when dealing with particularly fibrous pods—just be patient and work in small batches.
Drying Wisdom: That 24-hour drying period is non-negotiable for seed viability. Spread seeds on a paper towel in a warm spot (like on top of your fridge), but avoid direct sunlight which can overheat them. If your kitchen is particularly humid, you might need to extend drying to 36 hours—just check daily for any signs of mold or stickiness.
Storage Strategy: When labeling your seed envelope, include not just the date but also the specific location where you collected the pods. I've learned this the hard way—blackberry lilies grown in full sun produce slightly different plants than those from shady spots. This helps you recreate ideal growing conditions later.
Pro Tips for Blackberry Lily Seed Pods
- Between us, these little tricks will save you from seed-saving frustrations—and keep your blackberry lily harvest thr...
- Timing Secret: Harvest those seed pods in the morning when they're still slightly crisp from overnight dew. The pods ...
- Extraction Technique: For stubborn seeds stuck in the cottony pod fibers, try this: place the pod in a small bowl and...
Frequently asked questions
Got questions about harvesting and saving blackberry lily seed pods? You’re not alone—these striking plants can be tricky to work with! Here are the most common queries from gardeners just like you, along with quick, actionable answers to keep your zero-waste seed-saving game strong.
When is the best time to harvest blackberry lily seed pods?
Harvest seed pods when they turn papery brown and split open naturally—usually late summer to early fall (August–October, depending on your climate). Avoid harvesting too early (green pods) or too late (scattered seeds on the ground). Pro tip: Check pods daily for optimal timing!
How long do blackberry lily seed pods take to dry indoors?
Spread pods in a single layer on a mesh screen or paper towel in a warm, dry, well-ventilated spot (like a sunny windowsill). They typically dry in 3–7 days. If humidity is high, add a fan or silica gel packets to speed up the process. Warning: Avoid direct heat—it can crack the pods!
What do I do if my blackberry lily seed pods won’t open on their own?
If pods stay closed, gently squeeze them between your fingers or use a paper towel to rub them—this mimics natural wind dispersal. For stubborn pods, place them in a paper bag and shake lightly. Alternative: Pop them open with a sterilized knife (cut along the seam) if seeds are needed urgently.
Can I save seeds from blackberry lilies grown in containers?
Yes! Container-grown blackberry lilies produce viable seeds, but ensure the pot is at least 12 inches deep for healthy pod development. Use well-draining soil and fertilize lightly with balanced 10-10-10 during the growing season. Bonus: Containers make seed pod harvesting mess-free!
What’s the best way to store blackberry lily seeds long-term?
Once seeds are dry, store them in a cool (35–40°F), dark, airtight container (like a glass jar with a lid). Label with the harvest date—seeds remain viable for 1–2 years. For extra protection, add a desiccant packet to prevent moisture buildup. Fun fact: Seeds germinate best when sown fresh!
Wrapping up and next steps
Saving blackberry lily seed pods is a rewarding way to embrace zero-waste gardening and share nature’s beauty with others! 🌱 These striking pods aren’t just decorative—they’re a gateway to growing more of these bold, drought-tolerant plants for years to come.
Whether you’re a seasoned gardener or just starting out, every popped pod is a step toward a more sustainable (and stunning) outdoor space.
Ready to dive in? Start small—collect a few pods this season, experiment with drying techniques, and watch your confidence (and seed collection) grow! Share your progress with fellow plant lovers, and soon you’ll be the go-to expert for blackberry lily magic. Happy pod-popping! ✨