
Lawn
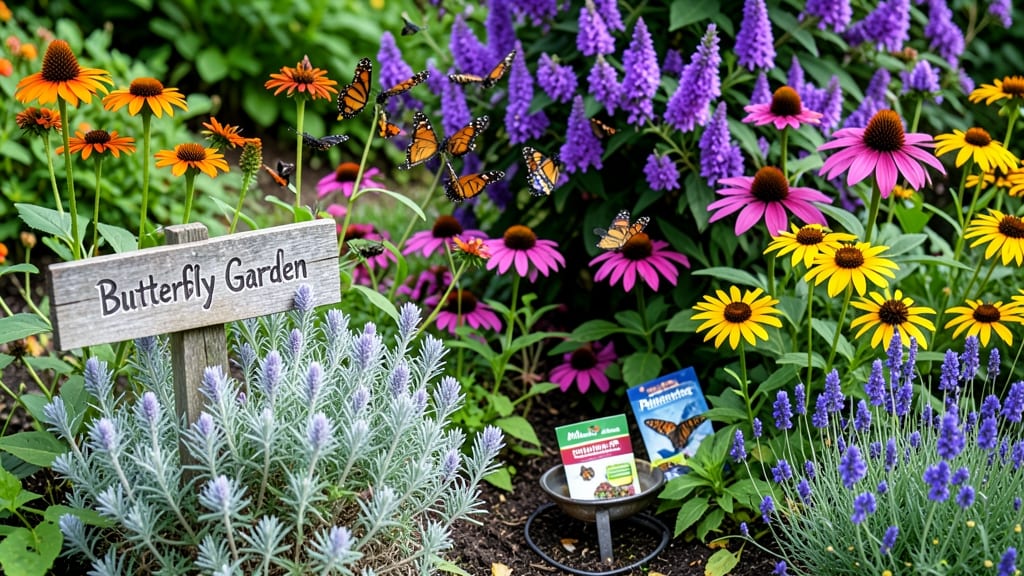
A butterfly garden seed mix turns your yard into a fluttering paradise where monarchs, swallowtails, and skippers sip nectar from blooms you planted yourself. 🌸 I’ve watched my own patch transform from a quiet corner to a buzzing hub—last summer, I counted 12 different species in just two hours.
These specialized blends pack sun-loving perennials, annuals, and milkweed (the caterpillar magnet) into one easy package, designed to bloom from early spring through frost. The real magic happens when you layer in native plants that butterflies rely on.
Pair your mix with coneflowers, bee balm, and goldenrod—they’re the all-you-can-eat buffet for pollinators. Even a small 4’x4’ bed becomes a stopover for migrating monarchs if you plant milkweed (their only host plant) alongside nectar-rich flowers. The payoff? A garden that thrives with nature, not against it.
By late June, you’ll see tiny eggs on milkweed leaves, then caterpillars munching away—proof your garden is doing its part. The blooms stay vibrant longer, too, because butterflies pollinate better than bees in some cases. Just avoid pesticides, and you’ll have a year-round show, not just summer flurries.
Works in full sun or partial shade, urban yards or rural fields. Start small—even a window box with milkweed and cosmos will draw visitors. Here’s how to make it happen without the guesswork.
📚 In This Guide
- What you need
- Instructions
- Tips and common mistakes
- Wrapping up and next steps
What you need
- ● Butterfly Garden Seed Mix: 1–2 lbs (or 1–2 packets) of pre-mixed butterfly-friendly seeds (e.g., milkweed, coneflower, black-eyed Susan, or butterfly weed).
- ● Tip: Look for native varieties to maximize local pollinator appeal! 🌿
- ● Garden Soil: 1–2 cubic yards (for a 10'x10' area) or enough to fill your planting space to a depth of 6–12 inches.
- ● Compost or Organic Matter: 1–2 bags (for enriching soil and improving drainage).
- ● Watering Can or Hose: With a gentle spray nozzle for even watering.
- ● Garden Gloves (1 pair) – To protect your hands while digging and planting.
- ● Hand Trowel or Transplant Spade – For breaking up soil and planting seeds.
- ● Rake – To level the soil before planting.
- ○ Measuring Tape or Ruler – To mark planting rows or spacing (optional but helpful!).
- ● Sunlight: A location with 6+ hours of direct sunlight daily (most butterflies thrive in full sun!).
- ● Water Access: A nearby water source for regular (but not soggy) hydration.
- ● Patience: Seeds may take 2–4 weeks to germinate, depending on conditions.
- ● Mulch (straw or shredded leaves) – To retain moisture and suppress weeds.
- ● Butterfly Puddling Station – A shallow dish with wet sand or mud (butterflies love it!).
- ● Plant Labels – To track seed varieties and blooming times.
- ● Pest Control: Neem oil or companion plants (like marigolds) to deter unwanted visitors.
How to create a thriving butterfly garden from seed
Here’s how I transform a patch of earth into a fluttering haven—no green thumb required.
🌱 Step 1: Choose the Right Location and Soil
Select a sunny spot that gets at least 6 hours of direct sunlight daily. Butterflies need warmth to thrive, and most nectar plants demand full sun to bloom properly. I always test the soil first—dig a small hole and squeeze a handful. If it crumbles easily, you’re good. If it stays clumped, amend with compost or aged manure to improve drainage and fertility.
Butterflies also rely on muddy patches for puddling—where they sip minerals from damp soil. Leave a small, bare area or add a shallow dish of water with sand for them to visit. This simple addition can double the number of species you attract.
☀️ Step 2: Prepare the Soil and Plant Seeds
Loosen the top 6 inches of soil with a garden fork or tiller to break up compaction. This ensures roots can spread easily and water penetrates deeply. For clay-heavy soil, mix in sand or perlite to improve aeration. I like to rake the surface smooth afterward—this creates a fine seedbed that mimics the conditions wildflowers naturally grow in.
Scatter seeds thinly according to the packet instructions, then lightly cover with ¼ to ½ inch of soil (never bury them too deep—most butterfly-friendly seeds need light to germinate). Gently water the area until the soil is moist but not soggy. Overwatering at this stage can wash seeds away or cause them to rot.
💧 Step 3: Water and Maintain Moisture
Keep the soil consistently moist for the first 2-3 weeks after planting, which is when most seeds germinate. Water deeply once or twice daily if the weather is hot and dry, but avoid creating puddles. I use a soaker hose or drip irrigation to deliver water slowly at the base of plants—this prevents fungal diseases that thrive in damp foliage.
Once seedlings appear, reduce watering to 2-3 times per week, allowing the top inch of soil to dry between sessions. This encourages strong root development. Mulch around plants with straw or shredded leaves to retain moisture and suppress weeds—this saves time and keeps the garden looking tidy.
✂️ Step 4: Thin Seedlings and Encourage Blooms
When seedlings reach 2-3 inches tall, thin them to stand 6-12 inches apart, depending on the mature plant size. This prevents overcrowding and ensures each plant gets enough sunlight and nutrients. I always pull weeds as I thin—this keeps the garden competitive and reduces stress on young plants.
To maximize butterfly visits, focus on continuous blooming. Deadhead spent flowers regularly to encourage new growth, and avoid using pesticides—even natural ones can harm pollinators. If you notice leaves yellowing or plants wilting, check the soil moisture and adjust watering accordingly.
🪴 Step 5: Add Host Plants for Caterpillars
Butterflies need both nectar (for adults) and host plants (for caterpillars). After your main flowers establish, add native milkweed, parsley, or dill—these are caterpillar favorites. Plant them in clusters to make them easier for butterflies to find. I often dedicate a small corner of the garden just for host plants, ensuring a steady food source for future generations.
Watch for signs of caterpillars, like chewed leaves or silk webbing. While it may seem destructive, this is a natural part of the butterfly life cycle. If you’re concerned, handpick caterpillars and relocate them to another area—just avoid crushing them, as even a broken egg sac can still hatch.
Tips & tricks for perfect butterfly garden seed mix
Creating a thriving butterfly haven doesn't require a botanist's expertise—just a few strategic moves that make all the difference in attracting winged visitors.
Sunlight Strategy: The 6 hours of daily sunlight mentioned in Step 1 is non-negotiable for most butterfly-friendly plants. If your garden gets partial shade, consider planting sun-loving varieties like black-eyed Susans or coneflowers in the sunniest spots while adding shade-tolerant options like asters or goldenrod to less sunny areas. Position your garden where it gets morning sun and afternoon shade if possible—this mimics natural forest edges where butterflies thrive.
Soil Prep Secret: When amending clay-heavy soil with sand or perlite in Step 2, I recommend mixing in a handful of composted leaf mold as well—it improves water retention while maintaining aeration. For sandy soils, add a thin layer of compost on top before planting to help retain moisture. The goal is to create a soil texture that mimics what wildflowers grow in naturally: loose, crumbly, and rich in organic matter.
Watering Wisdom: During the critical 2-3 week germination period in Step 3, I've found that morning watering works best—it gives seeds time to absorb moisture before the heat of the day. Use a gentle spray nozzle on your hose to avoid disturbing seeds, and always water at the soil level rather than overhead. This prevents fungal diseases that can wipe out seedlings before they even sprout.
Continuous Bloom Hack: To achieve that continuous blooming mentioned in Step 4, I plant a mix of early, mid, and late-season flowers. For example, pair purple coneflower (which blooms mid-season) with black-eyed Susan (early) and goldenrod (late). This ensures your garden provides nectar from spring through fall, giving butterflies a reason to keep coming back throughout the entire growing season.
Pro Tips for Butterfly Garden Seed Mix
- Creating a thriving butterfly haven doesn't require a botanist's expertise—just a few strategic moves that make all the difference in attracting winged visitors.
- Sunlight Strategy: The 6 hours of daily sunlight mentioned in Step 1 is non-negotiable for most butterfly-friendly plants.
- Soil Prep Secret: When amending clay-heavy soil with sand or perlite in Step 2, I recommend mixing in a handful of composted leaf mold as well—it improves water retention while maintaining aeration.
Frequently asked questions
When is the best time to plant a butterfly garden seed mix?
The ideal time to plant your butterfly garden seed mix is in early spring (after the last frost) or late summer (6-8 weeks before the first frost). This timing ensures blooms appear when butterflies are most active. For warm-climate regions, fall planting can also work—just water deeply until germination occurs.
How long does it take for the seeds to germinate?
Germination time varies by seed type, but most butterfly garden mixes sprout within 7–21 days. Keep the soil consistently moist (not soggy) and in a sunny spot. If germination takes longer, check seed viability—some seeds may need light to sprout (try pressing them lightly into the soil).
Do I need to fertilize my butterfly garden?
Butterfly-friendly plants often thrive in low-nutrient soil, so over-fertilizing can deter pollinators. Use a light, balanced organic fertilizer (like 5-5-5) once at planting, then avoid heavy feeding. Mulch with straw or leaves to retain moisture and suppress weeds—nature’s way of keeping things simple!
What should I do if pests or diseases appear?
Butterfly gardens are resilient! For pests like aphids or caterpillars, introduce beneficial insects (ladybugs, lacewings) or spray with soapy water. Fungal issues (e.g., powdery mildew) can be prevented by spacing plants for airflow and watering at the base. Remove affected leaves promptly to protect your blooms.
Can I grow a butterfly garden in containers or small spaces?
Choose compact varieties like milkweed, butterfly bush, or cosmos for pots (at least 12" deep). Use well-draining soil and place containers in full sun. Group plants in clusters to mimic a natural meadow—even a balcony can become a butterfly buffet with the right mix!
Wrapping up and next steps
Creating a butterfly garden seed mix is a rewarding way to support pollinators while adding vibrant beauty to your outdoor space! 🌸 With the right seeds, sunlight, and care, you’ll soon see your garden buzzing with butterflies and other beneficial insects.
Whether you’re a seasoned gardener or just starting, every small effort makes a big difference for these delicate creatures.
Ready to take the next step? Start by choosing your seeds, prepping your soil, and planting with confidence. Watch as your garden transforms into a thriving haven—one flutter at a time! 🦋