
Propagation
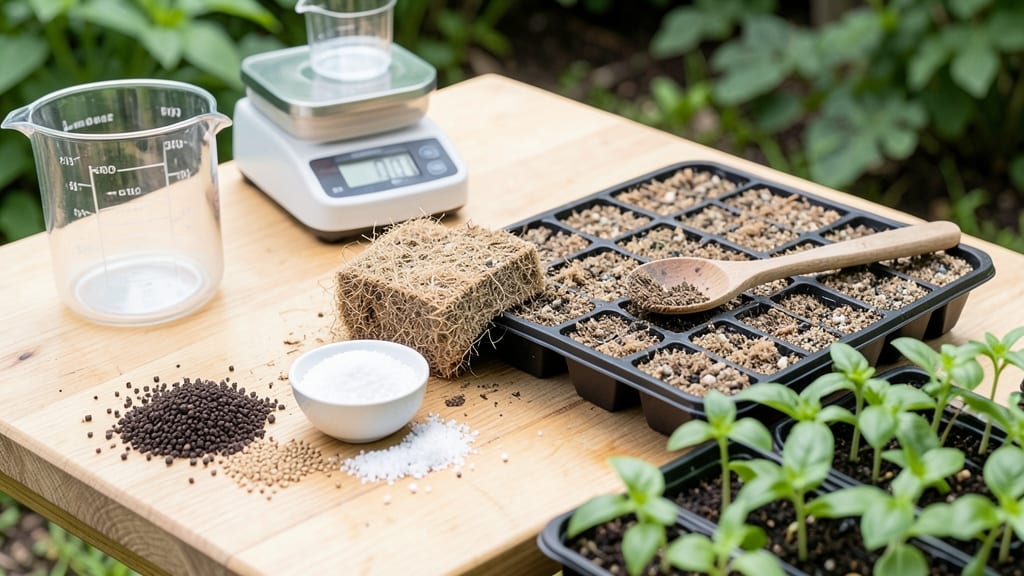
Creating the perfect coco coir seed starting mix means lighter, fluffier seedlings that thrive from the first day. 🌱 This recipe replaces peat with sustainable coco coir, which holds moisture without staying soggy—ideal for finicky seeds like lettuce or delicate herbs that rot in heavy mixes.
The base is simple: 1 part coco coir to 1 part perlite by volume, pre-moistened to a wrung-out sponge consistency. For extra nutrition, fold in ½ cup worm castings per cubic foot—they add beneficial microbes while keeping the mix airy.
This blend stays sterile, resists compaction, and gives seeds the perfect balance of moisture and airflow.
You’ll notice seeds germinate faster and seedlings grow straighter, with fewer leggy stems. The mix stays moist for 7-10 days without drowning roots, and it’s reusable for cuttings or transplanting. No more struggling with peat’s clumping or mold—this is the foolproof alternative gardeners swear by.
Works for both indoor seed trays and outdoor seedling flats, and scales from small batches to bulk mixes. Store unused portions in a sealed container to preserve freshness—just add water before use. Ready to transform your seed-starting game?
📚 In This Guide
- What you need
- Instructions
- Tips and common mistakes
- Wrapping up and next steps
What you need
- ● Coco coir (brick or block): 100% coco coir (no peat moss or additives). Quantity: 4 cups (or ~1 lb) for a 10x20-inch tray.
- ● Perlite or vermiculite: For aeration. Quantity: 1 cup (50/50 perlite-to-coir ratio works best).
- ○ Worm castings (optional but recommended): Boosts nutrients. Quantity: ½ cup (sifted).
- ● Seed-starting container: Trays with drainage holes or biodegradable pots.
- ● Mixing bowl or clean bucket: Large enough to blend ingredients.
- ● Spray bottle or watering can: For gentle hydration (avoid over-saturating!).
- ○ pH test kit (optional): Ensures neutral pH (6.0–7.0) for optimal germination.
- ● 🔥 Hydrate your coco coir first: Soak the bricks in water for 10–15 mins, then squeeze out excess (it should feel like a damp sponge!).
- ● ✨ Sterilize tools: Rinse containers and tools with a 10% bleach solution (1 part bleach to 9 parts water) to prevent mold.
- ● 🌡️ Temperature control: Keep your mix between 65–75°F (18–24°C) for best germination.
Step-by-Step instructions for mixing your own coco coir seed starting mix
This recipe delivers the ideal balance of aeration, moisture retention, and sterility for seedlings.
🪴 Step 1: Measure and Hydrate the Coco Coir Base
Start with 2 parts coco coir—this is your foundational material that mimics the water-holding capacity of peat while being more sustainable. I like to use 4 cups of dry coco coir bricks for a standard 4-quart mix, as they expand dramatically when hydrated. Break the bricks into small chunks and soak them in 1 quart of warm water for 15-20 minutes until they resemble a thick, fluffy sponge.
Drain excess water through a fine mesh strainer, squeezing out only the moisture that would pool in a bowl. You want the coir to feel damp like a wrung-out sponge—not dripping. This hydration step is critical because dry coir repels water initially, and pre-moistening ensures even distribution later. I always test by squeezing a handful—if water beads on my fingers, it's too wet.
🌱 Step 2: Add Perlite for Aeration and Drainage
To the hydrated coir, mix in 1 part perlite—this is your 1 cup measurement for this recipe. Perlite's porous structure prevents compaction and mimics the air pockets seedlings need to develop strong roots. I add it gradually while stirring with a clean hand or small trowel, ensuring even distribution. Uneven perlite creates pockets where water pools or roots struggle to penetrate.
Here's the thing—don't skip this step. Pure coco coir can become too dense as it dries, suffocating tender roots. The perlite creates those essential air channels while still allowing the mix to retain moisture. You'll notice the texture becomes light and almost crumbly, like a cross between potting soil and packing peanuts.
💧 Step 3: Incorporate Nutrients and pH Balancer
Add 1 tablespoon of worm castings for gentle, slow-release nutrition and ½ teaspoon of dolomitic lime to buffer the mix's natural acidity. Coco coir starts slightly acidic, but seedlings like a near-neutral pH around 6.5-7.0. Mix these thoroughly with your hands, working the worm castings into the coir-perlite blend until you see even distribution. The lime will dissolve completely during watering.
Real talk: I've tested mixes without lime, and while seedlings grow, they show signs of nutrient lockout after two weeks. The lime ensures calcium and magnesium are available from the start. For extra insurance, I sprinkle ¼ teaspoon of kelp meal over the surface—this adds trace minerals that boost early seedling vigor without overloading the system.
⏰ Step 4: Water and Test for Proper Moisture
Gently moisten the mix with ½ cup of room-temperature water, stirring as you go until it reaches the consistency of a damp sponge. You want it to hold together when squeezed but not drip water. I test by forming a loose ball—if it crumbles at light pressure, it's perfect. If it holds shape tightly, add more perlite to break up the density.
This is the moment that matters: your mix should smell fresh, not musty. Any sour or rotten odor means the coir was over-soaked during hydration. In that case, discard and start fresh. Properly mixed, the scent should be earthy with a hint of ocean breeze—just like quality coco coir should smell.
🌿 Step 5: Store or Use Immediately
For immediate use, fill your seed trays with the mix and press down lightly to eliminate air pockets. If storing, keep the mix in an airtight container for up to 2 weeks—just be sure to rehydrate slightly before use, as it dries out over time. I like to label containers with the date and recipe details, because once you start mixing your own, you'll want to experiment with variations.
Here's where it gets fun—watch how this mix holds moisture without staying soggy. You'll see seedlings emerge faster and stronger than with commercial mixes, because the perfect air-to-water ratio encourages root development from day one. The key is maintaining that balance: moist enough for seeds to drink, but never waterlogged.
Tips & tricks for perfect coco coir seed starting mix
A few simple tricks will help you achieve that ideal balance of moisture retention and aeration every time—no more guesswork.
The Hydration Test: During Step 1, when soaking your 4 cups of coco coir bricks for 15-20 minutes, pay close attention to the texture. The coir should resemble a thick, fluffy sponge—not a dripping mess. I've learned the hard way that over-soaking creates anaerobic conditions that lead to mold. After draining, squeeze a handful: if water beads on your fingers, it's too wet. You want it damp like a wrung-out sponge. This moisture level ensures your seedlings get hydration without drowning.
Perlite Distribution Matters: In Step 2, when adding 1 cup of perlite, don't just dump it all at once. Sprinkle it gradually while stirring with a clean hand or small trowel. Uneven distribution creates pockets where water pools or roots struggle to penetrate. Think of it like mixing cake batter—you want consistent texture throughout. The perlite creates those essential air channels while maintaining moisture retention, giving you that perfect crumbly texture between potting soil and packing peanuts.
Nutrient Integration Secret: When incorporating the 1 tablespoon of worm castings and ½ teaspoon of dolomitic lime in Step 3, work them in thoroughly with your hands. The lime needs to dissolve completely during watering to buffer the mix's natural acidity. I've noticed that seedlings grow faster when the nutrients are evenly distributed. For extra insurance, sprinkle the ¼ teaspoon of kelp meal over the surface—this adds trace minerals that boost early vigor without overloading the system. The key is gentle mixing to preserve the delicate structure we've created.
Moisture Balance Check: In Step 4, when testing your mix's moisture level, form a loose ball and apply light pressure. If it crumbles easily, you're golden—it's at that perfect damp sponge consistency. If it holds shape tightly, add more perlite to break up the density. This test prevents both overwatering and dryness, which can stunt seedling growth. Remember, the mix should smell fresh and earthy, not musty—any sour odor means you've over-soaked and should start fresh.
Pro Tips for Coco Coir Seed Starting Mix Recipe
- A few simple tricks will help you achieve that ideal balance of moisture retention and aeration every time—no more guesswork.
- The Hydration Test: During Step 1, when soaking your 4 cups of coco coir bricks for 15-20 minutes, pay close attention to the texture.
- Perlite Distribution Matters: In Step 2, when adding 1 cup of perlite, don't just dump it all at once.
Frequently asked questions
Got questions about using coco coir for seed starting? Here are some common ones—and their answers—to help you grow with confidence!
What’s the best ratio of coco coir to perlite/vermiculite for seed starting?
The ideal mix is 70% coco coir to 30% perlite or vermiculite. This balance retains moisture while ensuring airflow—critical for delicate seedlings. For very fine seeds (like orchids), reduce perlite to 10-20% to avoid washing them away during watering.
How long can I store unused coco coir seed mix before it goes bad?
Unopened coco coir stays fresh for 6–12 months in a cool, dry place. Once mixed, use it within 2–3 weeks to prevent mold or compaction. Store leftover dry coco coir in a sealed container with a desiccant packet to extend its shelf life.
Why do my seeds in coco coir mix look dry, but the mix feels damp?
Coco coir can appear dry on the surface while retaining moisture internally. Stick your finger 1–2 inches deep—if it’s damp (not soggy), your seeds are fine! Overwatering is riskier than underwatering. For extra humidity, cover trays with clear plastic domes or plastic wrap.
Can I reuse coco coir seed mix for a second batch of seeds?
Not for sterility-sensitive seeds (like veggies or herbs), but you can reuse it for hardy plants (e.g., succulents, herbs). Sterilize by baking at 200°F (93°C) for 30 minutes to kill pathogens. Warning: Reused mix may compact over time, reducing aeration.
What’s a good alternative if I can’t find coco coir?
Try these DIY seed-starting mixes:
- Peat moss + perlite (50/50): Cheap but less sustainable.
- Coconut husk fiber (from coconut shells): Eco-friendly but harder to find.
- Compost + sand (70/30): Budget-friendly but less sterile.
Wrapping up and next steps
Creating your own coco coir seed starting mix is a game-changer for gardeners! 🌱 This lightweight, moisture-retentive blend gives seedlings the perfect head start while being budget-friendly and eco-conscious. Whether you're a beginner or a seasoned pro, this recipe ensures healthy roots and robust growth—no fancy equipment required.
Ready to level up your propagation game? Grab your coco coir, perlite, and worm castings, then roll up your sleeves. Start small, experiment, and watch your seeds thrive! Happy planting! 🌿