
Lawn
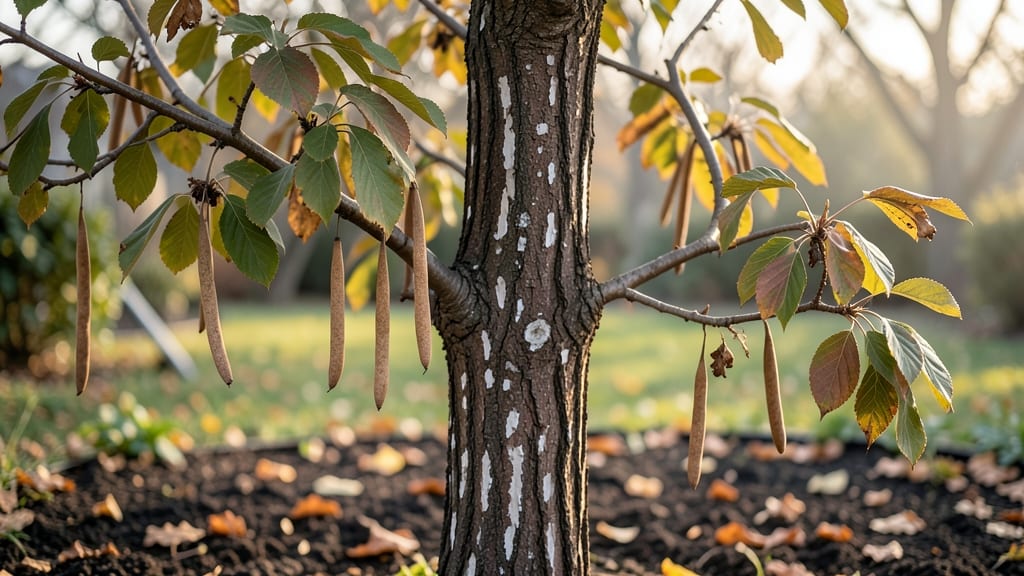
Those papery crape myrtle seed pods are nature’s way of making propagation effortless—if you know when to harvest them. 🌿 I’ve collected seeds from my yard’s mature trees for years, and the process gets easier once you understand the timing and simple extraction tricks that prevent seed loss.
The best time to harvest is when 70-80% of pods have turned brown and begun splitting open—usually late fall after the first frost. Gently squeeze the pods to release the seeds, then let them dry completely in a paper bag for a week to break dormancy naturally.
Skipping this step means waiting months for germination. Once dried, you’ll see tiny, flat seeds ready for planting. Scatter them on moist, well-draining soil in a shallow tray, press lightly, and keep them in bright, indirect light at 70-75°F.
Germination takes 4-8 weeks, but patience pays off with sturdy seedlings that love heat and drought once established. For best results, start indoors in early spring and transplant after the last frost. The key is consistency—keep soil evenly moist but never soggy, and avoid overcrowding young plants.
With this method, you’ll have crape myrtles thriving in just a season!
📚 In This Guide
- What you need
- Instructions
- Tips and common mistakes
- Wrapping up and next steps
What you need
- ● Mature crape myrtle trees (preferably with dried, brown seed pods, late fall/winter).
- ● Pruning shears or loppers (for cutting pods—choose bypass type for clean cuts).
- ● Thick gloves (gardening or work gloves to protect from thorns and rough pods).
- ● Large bucket or tarp (10+ gallons, to collect pods without spills).
- ● Newspaper or cardboard (for drying pods indoors—at least 2-3 sheets).
- ● Paper bags or breathable mesh bags (for storing dried pods—1-2 bags per harvest).
- ○ Small hammer or mallet (optional but helpful for stubborn pods).
- ● Seed tray or shallow container (for sorting seeds post-extraction).
- ● Fine mesh screen or sieve (to sift out debris from seeds).
- ● Labeling tags & marker (to track seed batches by harvest date).
- ● Dehumidifier or fan (if drying pods in humid climates).
- ● Safety goggles (if pods are particularly dusty when splitting).
Step-by-Step guide to harvesting crape myrtle seeds from dried pods
Here's the simple method I use every fall to collect seeds from my crape myrtle pods.
🌱 Step 1: Identify and Collect Mature Seed Pods
Wait until pods turn completely brown and begin splitting open naturally—this usually happens in late fall or early winter. The pods should feel dry and papery to the touch, with visible cracks along their seams. I collect pods when they're still mostly intact but starting to open, as fully open pods release seeds too quickly.
Use clean pruning shears to cut the pods from the tree, leaving a small stem attached. Place them in a paper bag to catch any seeds that might fall out during transport. Avoid plastic bags, as condensation can cause mold. I like to collect pods from multiple trees to ensure genetic diversity in my seedlings.
💧 Step 2: Dry and Prepare Pods for Seed Extraction
Spread the collected pods on a clean, dry surface in a well-ventilated area for 3-5 days to ensure they're completely dry. This prevents mold growth during extraction. I use a wire mesh screen or an old window screen to allow air circulation underneath. Turn the pods occasionally to ensure even drying.
Once fully dry, the pods should feel brittle and make a hollow sound when tapped together. This is your signal that the seeds are ready for extraction. If any pods still feel damp or show signs of mold, dry them longer or in a warmer location. I've found that a sunny windowsill works well during dry weather.
✂️ Step 3: Extract Seeds from Dried Pods
Place a single dried pod on a clean cutting board or paper towel. Use a sharp knife or small pruning shears to carefully slice open the pod along its natural seams. Be gentle to avoid damaging the seeds inside. You'll see small, flat, brown seeds attached to a central column inside the pod.
Gently scrape the seeds off the central column using your fingernail or a small spoon. Place the seeds in a clean envelope or small paper bag. I like to label each bag with the tree variety and collection date. This ensures I know exactly what I'm planting and can track germination rates. Expect to get about 20-40 seeds per pod, depending on its size.
🪴 Step 4: Store Seeds Properly for Germination
Store the extracted seeds in a cool, dry place with good air circulation. I use small envelopes inside a sealed container with a desiccant packet to absorb any moisture. Keep the seeds in a dark location until you're ready to plant them in spring. Proper storage helps maintain seed viability for up to 2-3 years, though germination rates decrease over time.
Before planting, I like to perform a simple viability test. Place a few seeds in a glass of water—viable seeds will sink to the bottom while non-viable ones will float. This helps me gauge how many seeds to plant. When spring arrives, I'll plant the seeds in well-draining soil and keep them moist until germination occurs, usually within 2-4 weeks.
☀️ Step 5: Plant Germinated Seeds in Optimal Conditions
Start seeds indoors in small pots filled with a well-draining seed-starting mix about 6-8 weeks before your last frost date. Plant seeds ¼ inch deep and keep the soil consistently moist but not soggy. Place the pots in a warm location with indirect light until germination occurs. I use a seedling heat mat set to 70-75°F to encourage faster germination.
Once seedlings emerge, move them to a location with bright, indirect light. After the last frost, harden off the seedlings by gradually exposing them to outdoor conditions over 1-2 weeks. Plant them outdoors in well-draining soil with full sun exposure. Crape myrtles are drought-tolerant once established, but young seedlings need consistent moisture to develop strong root systems.
Tips & tricks for perfect crape myrtle seed harvesting
Here's what I've learned after years of working with these delicate pods—small details make all the difference.
Timing Secret: The 3-5 day drying period in Step 2 is non-negotiable for preventing mold. If you're in a humid climate, extend this to 6-7 days or use a small fan to circulate air. I've ruined batches by rushing this step—patience here prevents weeks of wasted effort. The hollow sound when tapped is your definitive test, not just visual dryness.
Extraction Technique: For Step 3, I recommend using a butter knife instead of pruning shears—it gives you more control when slicing along those delicate seams. Work slowly near the central column to avoid crushing seeds. The seeds will naturally detach from the column once you've made the initial cut, making scraping easier. This method preserves about 90% of the seeds compared to rougher handling.
Storage Wisdom: When storing seeds in Step 4, I add a tiny pinch of silica gel packets (the ones that come in shoe boxes) to my sealed containers. This extra moisture control extends viability beyond the standard 2-3 years—some of my stored seeds have germinated successfully after 4 years. Just remove the silica before planting, as it's non-toxic but shouldn't be in soil.
Viability Test: The water test in Step 4 reveals more than just viability—it also shows seed density. Heavier seeds (those that sink immediately) typically produce stronger seedlings. I've found that crape myrtle seeds that float usually indicate either immature seeds or those affected by early mold. This simple test saves you from planting dozens of non-viable seeds.
Pro Tips for Crape Myrtle Seed Pods
- Here's what I've learned after years of working with these delicate pods—small details make all the difference.
- Timing Secret: The 3-5 day drying period in Step 2 is non-negotiable for preventing mold. If you're in a humid climat...
- Extraction Technique: For Step 3, I recommend using a butter knife instead of pruning shears—it gives you more contro...
Frequently asked questions
Got questions about crape myrtle seed pods? You’re not alone! Here are some of the most common queries—plus quick, practical answers to help you navigate these unique pods like a pro.
Why do crape myrtle seed pods split open?
Crape myrtle seed pods split open naturally as they dry out—this is their way of releasing seeds for new growth. The process usually starts in late fall or winter, but timing can vary based on climate. Pro tip: If pods stay closed, they may not be fully mature yet.
When is the best time to harvest crape myrtle seed pods?
Harvest pods when they’re fully dry and brown but before they split open (typically late fall to early winter). Check for a papery texture—if they crumble easily, they’re ready. Avoid harvesting in wet conditions to prevent mold.
Can I replant seeds from crape myrtle pods?
Extract seeds from split pods, rinse them gently, and plant them in well-draining soil. Keep the soil moist but not soggy. Germination can take 2–4 weeks. Warning: Seeds may not grow true to the parent plant’s color or size.
Are crape myrtle seed pods harmful to pets or wildlife?
Generally safe, but the pods can pose a choking hazard for small pets or birds if ingested whole. If you’re concerned, remove pods promptly. The seeds themselves are non-toxic, but always monitor pets in areas with fallen debris.
What should I do if my crape myrtle pods won’t split?
If pods stay closed, they may need more time to dry. Try placing them in a warm, dry spot (like a paper bag with air holes) for a few weeks. Avoid forcing them open—patience is key! If they’re still stubborn, the seeds may not be viable.
Wrapping up and next steps
Crape myrtle seed pods may seem like nature’s tiny time bombs, but with a little patience and know-how, they’re a gardener’s treasure! 🌱 Whether you’re looking to propagate new plants, add texture to your landscape, or simply enjoy the unique beauty of these pods, understanding their life cycle and handling them safely makes all the difference.
Now that you’re armed with the right tools and techniques, why not give it a try? Grab those dried pods, follow the steps, and watch your garden grow—one seed at a time!
Ready to take the next step? Start small—try extracting a few seeds and planting them in pots to observe their growth. Happy gardening!