
Lawn
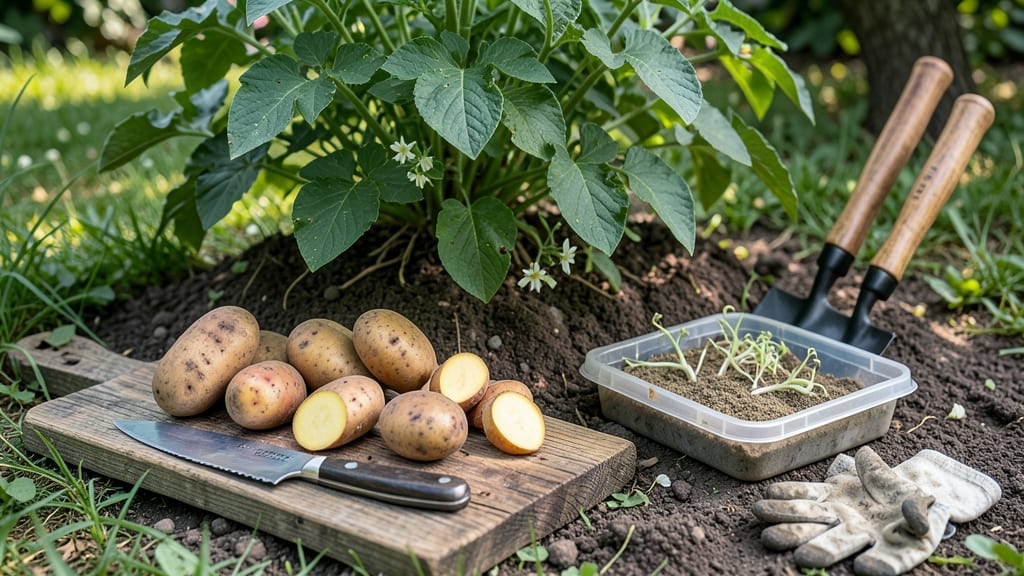
Cutting seed potatoes before planting turns one small tuber into a whole patch of plants—doubling your harvest with just a sharp knife and a little patience. ✂️ I used to waste perfectly good seed potatoes by planting them whole, but cutting them right gives me 2-3 times more plants from the same bag.
The secret isn’t just slicing randomly—it’s about size, healing time, and knowing where to cut so every piece has a fighting chance. You’ll need just three things: seed potatoes (certified disease-free), a clean, sharp knife (or pruners), and a dry, dark place to let them heal.
Most people rush this step, but letting the cuts dry for 1-2 days prevents rot and gives sprouts a head start. I’ve learned the hard way—skipping this step means soggy, mushy potatoes that never grow. What you end up with is uniform, healthy plants ready to thrive in your garden.
The right cuts mean faster establishment, stronger roots, and earlier harvests—no more waiting weeks for whole tubers to sprout. Plus, you can space them perfectly in your beds, no crowding. Here’s where most gardeners mess up: cutting too close to the eyes or using dull tools.
A 1-inch gap between cuts and eyes ensures each piece grows, and a sharp knife keeps things clean. Store them in a cool, dry spot until planting day—your future harvest depends on it!
📚 In This Guide
- What you need
- Instructions
- Tips and common mistakes
- Wrapping up and next steps
What you need
- ● Seed potatoes: Certified disease-free, medium to large-sized potatoes (about 2–4 oz each, or roughly the size of a golf ball). Aim for 5–10 potatoes per 10-foot row, depending on your variety.
- ● Sharp knife or pruning shears: A clean, sterilized knife (or garden shears) with a serrated or razor-sharp edge to make precise cuts. Avoid dull tools—they crush the potato instead of slicing cleanly.
- ● Disinfectant (rubbing alcohol or bleach solution): 70% isopropyl alcohol or a 1:10 bleach-to-water mix to sterilize your knife between cuts and prevent disease spread.
- ● Cutting surface: A clean, flat board or tray (like a plastic cutting board) to protect your countertop and keep the workspace tidy.
- ● Paper towels or newspaper: To dry the cut surfaces before planting and reduce moisture loss.
- ● Garden soil or potting mix: Well-draining, fertile soil with a pH of 5.0–7.0. For container gardening, use a lightweight mix (e.g., 60% peat moss, 30% perlite, 10% compost).
- ● Containers or garden bed: For in-ground planting: Loose, weed-free soil with at least 12–18 inches of depth.
- ● For containers: Pots at least 10–12 inches deep with drainage holes (e.g., 5-gallon buckets or fabric grow bags).
- ● Watering can or hose with a gentle spray nozzle: For hydrating cut potatoes and watering after planting.
- ● Hydrogen peroxide (3% solution): For an extra boost of sterilization—soak cut potatoes in a 1:10 dilution for 5 minutes before planting to deter rot.
- ● Garden twine or plant markers: To label varieties if you’re planting multiple types.
- ● Compost or organic fertilizer: Mix into soil at planting time for a nutrient boost (e.g., balanced 10-10-10 or worm castings).
- ● Plastic wrap or breathable cloth: To cover cut potatoes for 1–2 days before planting and encourage faster sprouting.
Step-by-Step guide to cutting seed potatoes for planting
Here's how to prep your seed potatoes for maximum yield—no guesswork, just proven techniques.
🪴 Step 1: Select and Prep Your Seed Potatoes
Choose firm, disease-free seed potatoes with at least two healthy eyes (the little dimples where sprouts form). Avoid any with green spots (toxic solanine) or soft areas. I like to work with medium-sized potatoes—they're easier to cut and handle than giant ones. Place them in a cool, dark spot for 2-4 weeks before cutting to encourage strong sprout growth.
This pre-sprouting step makes a huge difference. You'll see thick, white sprouts emerging—these are your future plants. If you start with unsprouted potatoes, you'll get uneven growth and weaker yields. Once sprouts reach 1-2 inches, it's time to cut.
✂️ Step 2: Cut Potatoes Properly for Planting
Use a clean, sharp knife to slice each potato into pieces, ensuring each piece has at least one strong sprout and one eye. I cut just below the sprout base so the new plant has energy to grow. Keep pieces 2-3 inches wide—smaller pieces dry out faster, while larger ones take longer to sprout.
Here's the thing—size matters. Each cutting should weigh about 1-2 ounces. If a piece feels too light, it won't establish roots well. Let the cut surfaces dry for 1-2 hours before planting. This prevents rot and gives you a clear visual of where the sprouts are headed.
💧 Step 3: Prepare Cuttings for Planting
While the cut potatoes dry, prepare your planting area. Work in well-draining soil with a pH of 5.0-6.5—potatoes hate soggy roots. I mix in a 2-inch layer of compost to give them a nutrient boost. If planting in containers, use pots at least 12 inches deep with drainage holes.
Real talk: Don't plant immediately after cutting. Give the cut surfaces another 24 hours to callus over. This extra step prevents rot when you plant. You'll know they're ready when the cut edges look slightly dry to the touch and the sprouts are firm.
🌱 Step 4: Plant Cuttings at the Right Depth
Plant each cutting with the sprouts facing up and the cut side down. Bury them 4 inches deep in the soil. If you're planting in rows, space them 12 inches apart to give plants room to grow. I like to plant in small hills—this helps prevent soil-borne diseases and makes harvesting easier later.
Water gently right after planting to settle the soil around the cuttings. You'll see new growth in 2-3 weeks if conditions are right. Keep the soil evenly moist but not soggy—potatoes hate wet feet. Mulch with 2-3 inches of straw to retain moisture and suppress weeds.
☀️ Step 5: Monitor and Maintain Through Growth
As the plants grow, gently hill soil around the stems every 2-3 weeks to encourage tuber formation. You'll want 8-10 inches of soil piled around the base by harvest time. This protects new potatoes from light exposure, which turns them green and bitter.
Watch for yellowing leaves—this usually means too much water or not enough sun. Potatoes need full sun (6-8 hours daily) and consistent moisture. If your plants get leggy or weak, they need more sunlight. You'll know they're ready to harvest when the flowers appear and the foliage starts yellowing.
Tips & tricks for perfect seed potato prep
These simple tricks will help you maximize your potato yield while avoiding common pitfalls that waste time and effort.
Sprout Size Matters: When you're ready to cut in Step 1, focus on those 1-2 inch sprouts—they're your ticket to strong plants. I've learned the hard way that smaller sprouts often don't have enough energy to establish roots. If you're working with potatoes that have uneven sprouts, cut the larger ones into separate pieces with their own sprouts rather than combining them.
The Cutting Technique: In Step 2, make your cuts just below the sprout base—this ensures the new plant has access to the potato's energy reserves. I always use a clean, sharp knife and wipe it between cuts to prevent spreading any potential diseases. For extra safety, dip your knife in rubbing alcohol between potatoes. Aim for 2-3 inch wide pieces—this gives you the perfect balance between surface area for roots and potato mass for energy.
Drying is Non-Negotiable: After cutting, let those surfaces dry for the full 1-2 hours specified in Step 2. This isn't just about preventing rot—it's about creating a protective barrier. I've seen cut potatoes develop rot within hours if planted too soon. For best results, spread them out on a clean towel in a shaded area. You'll know they're ready when the cut edges look slightly papery to the touch.
Planting Timing: Don't rush the 24-hour callusing period in Step 3. This extra day might seem like a waste of time, but it's what prevents rot in the soil. I've found that planting immediately after cutting often leads to soft, mushy potatoes that never properly establish. If you're short on time, at least let them dry completely before planting—this gives you some protection against rot.
Pro Tips for Cutting Seed Potatoes Before Planting
- These simple tricks will help you maximize your potato yield while avoiding common pitfalls that waste time and effort.
- Sprout Size Matters: When you're ready to cut in Step 1, focus on those 1-2 inch sprouts—they're your ticket to stron...
- The Cutting Technique: In Step 2, make your cuts just below the sprout base—this ensures the new plant has access to ...
Frequently asked questions
Got questions about cutting seed potatoes? You’re not alone!
Here are some of the most common queries—plus clear, no-nonsense answers to help you plant like a pro.
Why should I cut seed potatoes at all?
Cutting seed potatoes speeds up germination and maximizes yield. A single potato can produce multiple plants, saving space and resources. Plus, smaller pieces sprout faster and grow into healthier tubers. Just ensure each piece has at least one or two "eyes" (buds) to guarantee growth!
How soon before planting should I cut seed potatoes?
Cut your potatoes 1–2 weeks before planting and let them heal and sprout in a cool, dark place (like a basement or garage). This gives the cut surfaces time to callous over, reducing rot risk. Pro tip: Avoid cutting too early—wet or fresh cuts won’t survive in the soil!
What’s the best way to cut seed potatoes for planting?
Use a clean, sharp knife to slice potatoes into 1.5–2 oz pieces, each with 1–2 eyes. Let them dry for 24–48 hours in a warm, dry spot to form a protective layer. Bonus: Store them in a cardboard box (not plastic) to keep them humid but well-ventilated.
Can I plant whole seed potatoes instead of cutting them?
If you prefer, plant whole potatoes—just space them 12–15 inches apart to avoid overcrowding. However, cutting them lets you double or triple your yield from the same seed stock. For small gardens, cutting is a game-changer!
What should I do if my cut potatoes rot before planting?
Rot usually happens from too much moisture or improper drying. If this occurs, toss the affected pieces and try again with fresh cuts. To prevent rot: 1) Use sterilized tools, 2) Let cuts dry completely, and 3) Plant in well-draining soil. Quick fix: Sprinkle cinnamon (a natural antifungal) on cuts before drying!
Does the temperature affect how I cut or plant seed potatoes?
Yes! In warmer climates, plant cut potatoes deeper (4–6 inches) to protect sprouts. In cooler areas, shallower planting (2–3 inches) works better. Wait until soil temps hit 45°F+—frost can kill fresh cuts. Cold-weather hack: Use black plastic mulch to warm the soil faster!
Wrapping up and next steps
Cutting seed potatoes before planting isn’t just a trick—it’s a game-changer for maximizing your harvest! By mastering the right size, spacing, and timing, you’ll enjoy healthier plants, more tubers, and a bountiful yield.
Whether you’re a seasoned gardener or just starting out, this method makes growing potatoes easier and more rewarding.
Ready to put your new skills to the test? Grab your seed potatoes, sharpen your knife, and get planting—your future harvest will thank you! 🌱 For even better results, experiment with varieties and keep a gardening journal to track what works best in your climate. Happy growing!