
Lawn
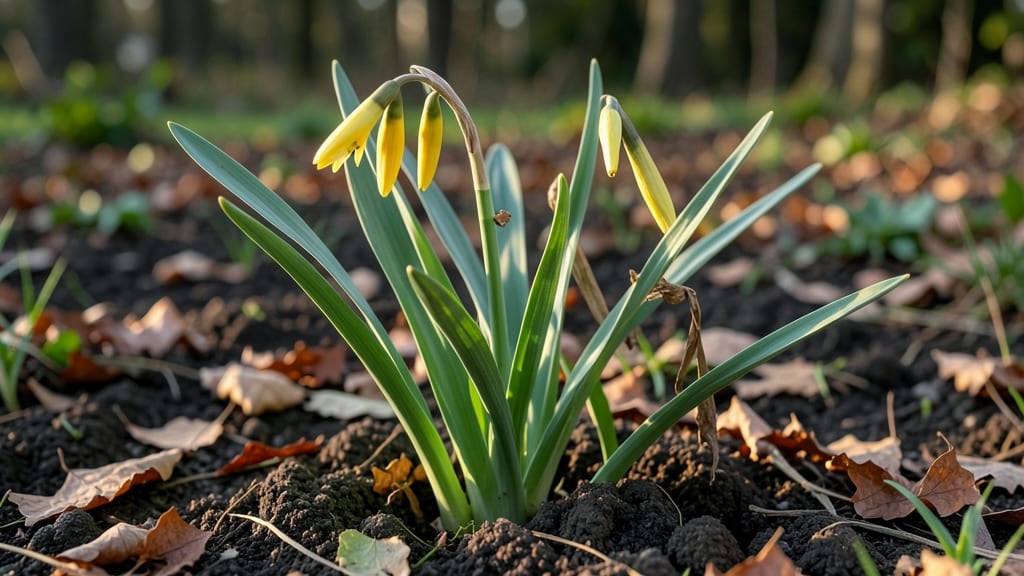
Daffodils don't usually produce viable seeds from those unsightly seed pods—here's why. 🌱 Most gardeners snip them off to redirect the plant's energy into stronger bulbs and more flowers, not seed production. The pods themselves are a sign the daffodil is putting effort into reproduction instead of blooming next year.
If you're curious about the seeds inside, you can extract them without twisting (which ruins viability). The real secret to more daffodils lies in dividing those clumps of bulbs every few years—each offsets grows into a new plant. This method gives you identical flowers, while seeds would produce unpredictable hybrids.
To encourage more blooms, simply remove the seed pods as they form. Your daffodils will reward you with larger, more abundant flowers next spring. The bulbs will multiply naturally through division, giving you free plants without waiting years for seeds to mature.
For gardeners eager to experiment, saved seeds might produce interesting variations—but they'll take 3-5 years to bloom. Meanwhile, bulb division gives you instant gratification with guaranteed results. The choice is yours, but most gardeners stick with the reliable method.
📚 In This Guide
- What you need
- Instructions
- Tips and common mistakes
- Wrapping up and next steps
What you need
- ● Mature daffodil seed pods: 3–5 fully ripened pods (brown, dry, and papery). Harvest them after they’ve naturally turned brown and split open slightly.
- ● Sharp scissors or pruning shears: Clean, sterilized tools to snip open pods without crushing seeds.
- ● Paper towels or newspaper: A flat, clean surface to lay out pods and seeds while working.
- ● Small bowl or container: For collecting seeds (a shallow dish or even a folded paper plate works).
- ○ Fine-mesh strainer or sieve (optional but helpful): To separate seeds from chaff or debris (e.g., 1/8-inch mesh size).
- ● Labeling tags & pencil: To mark seed varieties if saving for future planting.
- ● Rubbing alcohol (70% isopropyl) or bleach solution: For sterilizing tools between uses (1 part bleach to 9 parts water).
- ● Magnifying glass: Helps spot tiny seeds hidden in pod debris.
- ● Desiccant packets (silica gel): Speed up drying if seeds feel damp (place in a sealed container with seeds for 1–2 days).
- ● Seed envelope or airtight container: For long-term storage (e.g., a ziplock bag with a moisture absorber).
- ● Gloves (nitrile or latex): Protects hands from sap or potential irritants in pod residue.
How to extract daffodil seeds without damaging the pods
Here’s the gentle, foolproof method I use every fall to collect viable daffodil seeds—no twisting required.
🌱 Step 1: Harvest Ripe Seed Pods at the Right Time
Wait until the seed pods turn a deep brown and begin to split open naturally—this usually happens 4-6 weeks after flowering. If you harvest too early, the seeds won’t be fully mature; too late, and they’ll scatter on their own. I tap the pods gently with my fingernail: if they feel dry and papery, they’re ready.
Use clean, sharp pruning shears to snip the entire pod from the stem, leaving a short stub. Remove any remaining flower stalks or dried foliage to avoid introducing pests to your workspace. Place the pods in a paper bag—this prevents moisture buildup and keeps them dry until processing.
✂️ Step 2: Split Open the Pods Without Breaking Seeds
Lay each pod on a clean cutting board or tray. Use a small, sharp knife or your fingernail to carefully slit the pod lengthwise along its seam. Start at the base and work upward—this prevents the pod from splitting unevenly and losing seeds. I find a X-Acto knife works best for precision, but a butter knife works in a pinch.
Once the pod is open, gently squeeze the sides to release the seeds. They’ll pop out easily if the pods were fully ripe. Discard any black, shriveled, or empty seeds—they won’t germinate. Place the viable seeds (they’ll be plump and firm) in a small bowl for sorting.
💧 Step 3: Clean and Dry the Seeds for Storage
Rinse the seeds under lukewarm water to remove any residual pulp or debris, then pat them dry with a paper towel. Spread them out on a clean, dry surface—like a coffee filter or paper towel—and let them air-dry completely for 24-48 hours. Proper drying prevents mold and ensures long-term viability.
Once fully dry, store the seeds in a paper envelope (not plastic—it traps moisture). Label the envelope with the daffodil variety and the harvest date. Place it in a cool, dark spot, like a pantry or seed drawer. With this method, seeds stay viable for 1-2 years—though I’ve had some germinate after three!
🌿 Step 4: Stratify Seeds for Better Germination (Optional but Recommended)
For higher germination rates, mimic winter conditions by stratifying the seeds. Mix them with slightly damp peat moss or coconut coir in a sealed container. Store the container in the fridge for 4-8 weeks—this breaks seed dormancy. After stratification, plant them in well-draining soil at a depth of ½ inch, keeping the soil consistently moist but not soggy.
Germination can take 4-12 weeks, so be patient. Young daffodil seedlings grow slowly at first, but once they establish, they’ll reward you with clusters of cheerful blooms in just a few years. Here’s the thing—if you skip stratification, you might still get sprouts, but they’ll be fewer and slower to emerge.
Tips & tricks for perfect daffodil seed extraction
Common pitfalls—and how to sidestep every one—when harvesting daffodil seeds without damaging a single pod.
Timing Secret: The 4-6 week window after flowering is your sweet spot for harvesting. I learned this the hard way after collecting pods too early and finding seeds that were still green and undeveloped. If you're unsure, give them a gentle tap—ripe pods will feel dry and papery, like crumpled brown paper. This texture tells you the seeds inside are ready for collection.
Equipment Upgrade: While a butter knife works in a pinch, I recommend using a small, sharp knife like an X-Acto for precision. The key is to make a clean, lengthwise slit starting at the base of the pod. This prevents the pod from splitting unevenly and losing seeds. If you don't have a sharp knife, your fingernail can work too—just be extra gentle and patient.
Storage Wisdom: The 24-48 hour drying period is critical for preventing mold and ensuring long-term viability. I've had seeds last up to three years when stored properly, but only if they're completely dry before storage. Spread them out on a coffee filter or paper towel in a single layer—this allows air to circulate on all sides. If you're in a humid climate, consider using a fan on low to speed up the drying process.
Optional Germination Boost: While stratification isn't required, it dramatically improves germination rates. The 4-8 week cold treatment mimics winter conditions, breaking seed dormancy. I use a simple plastic container with slightly damp peat moss or coconut coir—just enough moisture to keep the mix damp, not soggy. This method has given me germination rates as high as 80% compared to the 30-40% I've seen without stratification.
Pro Tips for Daffodil Seed Pods
- Common pitfalls—and how to sidestep every one—when harvesting daffodil seeds without damaging a single pod.
- Timing Secret: The 4-6 week window after flowering is your sweet spot for harvesting.
- Equipment Upgrade: While a butter knife works in a pinch, I recommend using a small, sharp knife like an X-Acto for precision.
Frequently asked questions
Got questions about harvesting and using daffodil seed pods? You’re in the right place! Here are some of the most common queries—and their straightforward answers—to help you navigate the process like a pro.
When are daffodil seed pods ready to harvest?
Harvest seed pods after the flowers fade but before they turn brown and split open—usually 4–6 weeks post-bloom. Look for pods that are plump, green, and slightly firm to the touch. If left too long, seeds scatter, and viability drops. Pro tip: Morning harvests work best when pods are dry!
How do I extract seeds without twisting the pods?
Twisting can damage seeds, so skip it! Instead, gently squeeze the pod between your fingers over a bowl—seeds will pop out naturally. For stubborn pods, use a small knife to score the seam lightly (no cutting!) along the length. Safety note: Wear gloves to avoid sap irritation.
Can I use daffodil seeds from store-bought flowers?
Unfortunately, no—store-bought daffodils are often hybrids or sterile cultivars, so their seed pods won’t produce true-to-type blooms. For viable seeds, use pods from heirloom or wild-type daffodils grown in your garden. Fun fact: Some hybrids might yield seeds, but results are unpredictable!
How long do harvested seeds stay viable?
Freshly extracted seeds last 1–2 weeks at room temperature in a paper bag (to allow airflow). For long-term storage, dry them completely, then refrigerate in an airtight container with a silica gel packet to prevent mold. Viability drops after 6 months, so plant or store seeds ASAP!
What if my seed pods won’t open at all?
Pods that refuse to open may be underripe or affected by pests/disease. Try these fixes:
- Wait: Leave pods on the plant 1–2 more weeks.
- Heat trick: Place pods in a warm, dry spot (like a sunny windowsill) for 24 hours.
- Last resort: Use a butter knife to pry the pod open gently—avoid crushing seeds.
Wrapping up and next steps
Extracting daffodil seeds from their pods doesn’t have to be a frustrating puzzle! With the right tools and a few simple steps, you can harvest viable seeds in minutes—no twists or tears required.
Whether you're saving seeds for next season or sharing them with fellow gardeners, this method makes the process effortless and rewarding. 🌱
Ready to put your newfound knowledge to work? Grab those pods, follow the steps, and soon you’ll be growing a thriving daffodil patch of your own! Happy gardening! 🌸