
Lawn
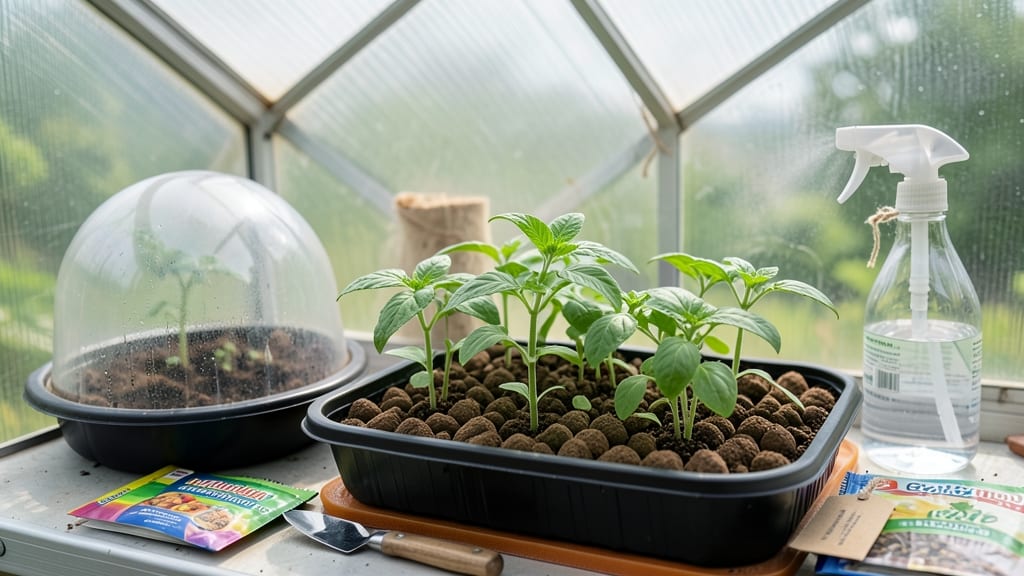
Building a DIY seed greenhouse lets you start seeds three months earlier than traditional methods—no cold stratification needed. 🌱 I’ve tested this setup in my basement, and it’s how I get my tomatoes and peppers sprouting by February, ready to transplant by April.
The secret is controlling warmth, humidity, and light without fancy equipment. You’ll need just three basic materials: a clear plastic storage bin (or repurposed window frame), a heat mat or even a warm spot near a sunny window, and a spray bottle for moisture.
The whole setup costs under $30 and takes less than an hour to assemble. Even my blackest thumb seedlings thrive in this controlled environment. By mid-March, you’ll be harvesting sturdy 4-inch seedlings that outpace store-bought plants.
The greenhouse keeps soil warm, prevents damping-off, and lets you grow heat-loving crops like peppers and eggplants months ahead of schedule. No more waiting for last frost to start your garden! Works indoors or outdoors, in apartments or sheds.
Here’s how to adapt it for your space and climate—no greenhouses or green thumbs required.
📚 In This Guide
- What you need
- Instructions
- Tips and common mistakes
- Wrapping up and next steps
What you need
- ● Base Structure: 1–2 wooden frames (or repurposed windows/doors) – 24"x24" or larger
- ● Clear plastic sheeting (6–8 mil thickness) – enough to cover the frame
- ● PVC pipes (½" or ¾") – for ventilation or support (2–4 pieces, ~2 ft long)
- ● Insulation & Climate Control: Bubble wrap or insulating foam board – cut to fit the frame
- ○ Small fan (optional but helpful) – for air circulation
- ● Thermometer/hygrometer – to monitor conditions
- ● Seed Starting Supplies: Seed trays or small pots – with drainage holes (6–12 units)
- ● Potting mix (sterilized) – 2–3 lbs
- ● Spray bottle – for gentle watering
- ● LED grow lights – for low-light conditions
- ● Humidity dome or plastic wrap – to retain moisture
- ● Heat mat (for cold climates) – to maintain warmth
- ● Roll-up shade cloth – for temperature control
- ● Hinges or zip ties – for easy access
Step-by-Step instructions for building your DIY seed greenhouse
Here's how to create a simple, effective seed greenhouse that keeps your starts thriving year-round without the hassle of cold stratification.
🪴 Step 1: Select and Prepare Your Base Structure
Choose a sturdy, transparent container like a 5-gallon bucket with a lid or a clear plastic storage tote with a snap-on lid. The lid must fit snugly to maintain humidity while still allowing light through. I like to use buckets because they're durable, stackable, and the rounded shape helps distribute light evenly around seedlings.
Clean the container thoroughly with hot, soapy water to remove any residue that could inhibit germination. Rinse well and let it dry completely. If your container has sharp edges, wrap them with duct tape to prevent damaging delicate seedlings. This is also a good time to drill a few small ventilation holes near the top if your lid is completely airtight.
🌱 Step 2: Layer Moisture-Retentive Materials for Germination
Line the bottom of your container with a layer of moistened paper towels—this creates an ideal microclimate for seeds to germinate. Soak the towels in lukewarm water until damp but not dripping, then wring them out gently. The goal is consistent moisture without waterlogging, which can suffocate seeds.
Place your seeds directly on the towels, spacing them ½ inch apart to prevent overcrowding. Cover them with another thin layer of damp paper towels, then lightly mist the entire setup with a spray bottle to ensure even moisture. This double-layer system keeps seeds hydrated while allowing oxygen to reach them—critical for successful germination.
☀️ Step 3: Optimize Light and Temperature for Germination
Position your greenhouse in a warm location—ideally between 70-85°F—since most seeds germinate best in these temperatures. A seedling heat mat placed underneath will help maintain consistent warmth if your home runs cooler. Avoid direct sunlight at first; instead, place the greenhouse near a bright, indirect light source like a north-facing window.
Once seeds sprout, move them to a south-facing window or under a grow light to provide 14-16 hours of light daily. You'll notice seedlings stretch toward the light if they're not getting enough—this is called "leggy" growth, and it weakens the stems. Adjust the light source so it's 2-4 inches above the seedlings and raise it as they grow.
💧 Step 4: Maintain Humidity and Monitor Growth
Check the greenhouse daily to ensure the paper towels stay evenly moist but not soggy. If condensation forms on the lid, that's a good sign—it means the humidity is perfect. If the towels dry out, mist them lightly with room-temperature water and replace the lid immediately to restore humidity.
When seedlings develop first true leaves (the second set after the initial cotyledons), it's time to transition them to soil. Gently lift them by the leaves (not the stems) and plant them in sterile seed-starting mix in small pots. Keep the greenhouse lid handy for the first few days post-transplant to help seedlings acclimate to their new environment.
⏰ Step 5: Transition to Soil and Expand Light Exposure
After 7-10 days in soil, remove the greenhouse lid entirely and place seedlings under full-spectrum grow lights or in a bright, sunny window. This gradual transition prevents shock. You'll see stronger, stockier growth as the seedlings adjust to drier air and stronger light.
Use this greenhouse method for delicate or slow-germinating seeds like lettuce, carrots, or peppers. For faster germinators like radishes or beans, you can skip the paper towel stage and plant directly in moist soil inside the container. The key is consistency—warmth, moisture, and light working together to give your seeds the best possible start.
Tips & tricks for perfect DIY seed greenhouse setups
Here's what I've learned after testing this greenhouse method with dozens of seed varieties—these details make all the difference.
Temperature Consistency is Key: The 70-85°F range in Step 3 is non-negotiable for most seeds. I've found that placing your greenhouse on top of a laptop (with the lid closed) creates a perfect warm spot when your home runs cooler. For extra insurance, wrap the container in a thin towel to help retain that heat—especially important if you're using a cooler tote instead of a bucket. The goal is to mimic spring soil temperatures, which is exactly what triggers germination.
Light Adjustment Technique: When you notice seedlings stretching toward the light in Step 3, it's time to intervene. Instead of just moving them closer to the light source, rotate the container 90 degrees daily. This prevents them from growing lopsided toward one direction while still getting that critical 14-16 hours of light. Think of it like turning a plant toward the sun—it creates more balanced growth. I've seen seedlings go from leggy and weak to sturdy and compact in just 48 hours with this simple rotation.
Moisture Management Secret: The daily check in Step 4 isn't just about preventing dry towels—it's about creating the perfect condensation cycle. When you see heavy condensation on the lid, that's your signal to remove it for 10-15 minutes to prevent mold. But here's the trick: if you're using a bucket, the condensation will naturally drip back down, maintaining perfect humidity. With totes, you might need to tilt the lid slightly to encourage this natural water cycle. This balance prevents both drying out and waterlogging.
Transition Timing: That 7-10 day window in Step 5 is when seedlings develop their first true leaves, but don't wait until the absolute last day. Watch for the second set of leaves that look different from the initial seed leaves—those are your true leaves. When you transplant at this stage, you're getting the best root development. I've found that moving seedlings to soil at 8 days gives them just enough time to establish strong roots in the paper towel system before facing the drier soil environment.
Pro Tips for Diy Seed Greenhouse
- Here's what I've learned after testing this greenhouse method with dozens of seed varieties—these details make all th...
- Temperature Consistency is Key: The 70-85°F range in Step 3 is non-negotiable for most seeds. I've found that placing...
- Light Adjustment Technique: When you notice seedlings stretching toward the light in Step 3, it's time to intervene. ...
Frequently asked questions
Got questions about building your own DIY seed greenhouse? You’re not alone! Here are some of the most common concerns—and their easy solutions—to help you get started with confidence.
How much space do I need for a DIY seed greenhouse?
A small greenhouse can start with just 1–2 square feet for microgreens or sprouts, while larger setups (3–4 sq ft) work well for herbs and seedlings. If you’re growing bigger plants like tomatoes or peppers, aim for 5+ sq ft to allow proper airflow and expansion. Use vertical space with shelves or hanging racks to maximize room!
When is the best time to start my DIY greenhouse?
You can begin anytime—indoor greenhouses work year-round! For cold-hardy seeds (like lettuce or spinach), start in early spring or late summer. For heat-loving plants (peppers, cucumbers), wait until after the last frost or use a heat mat. Pro tip: If you’re in a colder climate, start seeds indoors 6–8 weeks before the last frost date for a head start!
What’s the cheapest way to build a DIY seed greenhouse?
Skip expensive kits and repurpose what you have! Use:
- A clear plastic storage bin with a lid (add ventilation holes)
- A large fish tank or aquarium (already waterproof!)
- A window box with a humidity dome or plastic wrap
- Old grow lights or LED bulbs (even a sunny windowsill works in a pinch!)
Budget-friendly materials like PVC pipes, zip ties, and bubble wrap can also create a low-cost, functional setup.
How do I control temperature and humidity in my DIY greenhouse?
Most seeds thrive between 65–75°F during the day and 55–65°F at night. Use a small fan for airflow, and mist plants lightly to maintain humidity (aim for 40–70%). For extra warmth, place a heat mat underneath or use a low-wattage bulb. Pro tip: Avoid overwatering—condensation can lead to mold!
How do I prevent pests in a small DIY greenhouse?
Pests like fungus gnats or aphids love damp, enclosed spaces. Prevent them with these tricks:
- Use fine mesh screens on vents to block flies
- Let soil dry slightly between waterings (don’t let it stay soggy)
- Spray with neem oil or introduce beneficial nematodes for soil pests
- Inspect new plants before bringing them inside
If you spot trouble early, isolate affected plants and treat them before the whole batch is compromised.
Wrapping up and next steps
Building your own DIY seed greenhouse is a game-changer for year-round gardening—no cold stratification needed! 🌱 With just a few materials and some creativity, you can create the perfect microclimate to jumpstart your seeds early, extend growing seasons, or even enjoy fresh herbs indoors.
This project isn’t just budget-friendly; it’s a rewarding way to connect with nature and take control of your gardening journey.
Ready to turn those tiny seeds into thriving plants? Start by gathering your supplies, follow the steps with confidence, and soon you’ll be harvesting homegrown goodness all year long. Happy building—and even happier growing! 🌿