
Lawn
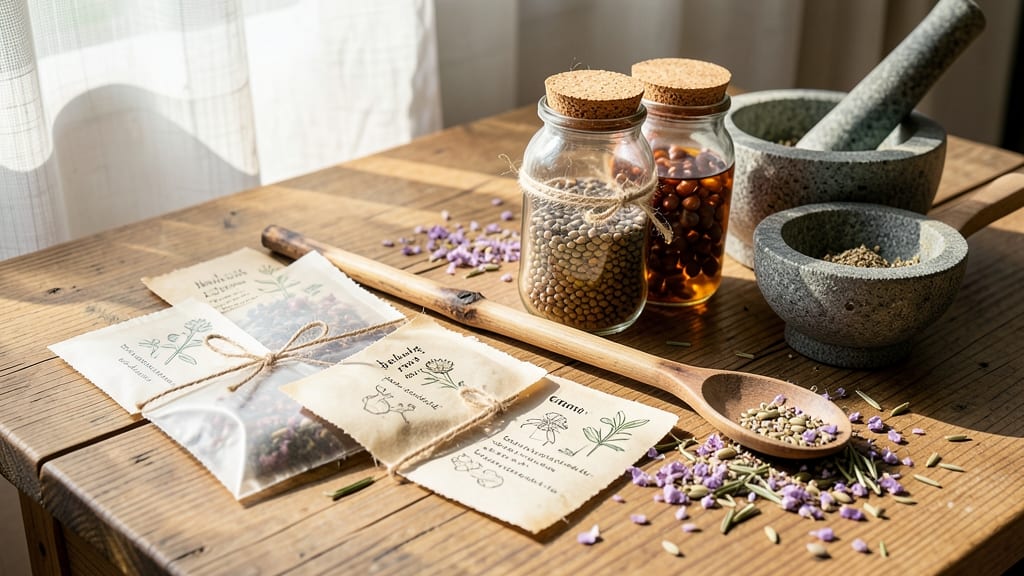
Saving seeds from your best plants means never paying for blooms again. 🌸 DIY seed packets turn your garden's leftovers into next year's star performers—no store-bought tags needed. The process is simpler than you'd think: collect seeds, dry them properly, and package them with care for perfect germination.
You'll need just a few supplies: plain paper envelopes, a pencil, and a dry spot to store them. I label mine with the plant name, year, and planting date—this way, I never forget what I'm growing. The best part? You'll cut garden costs by 90% while reducing waste.
By spring, you'll be planting seeds that thrive exactly where they belong in your garden. The blooms will be even more vibrant than last year's, and you'll have the satisfaction of knowing every petal came from your own soil. This method works for annuals, perennials, and even some veggies.
Here's how to get started without a single store-bought packet in sight!
📚 In This Guide
- What you need
- Instructions
- Tips and common mistakes
- Wrapping up and next steps
What you need
- ● Seed pods or dried seed heads: Harvest mature, dry seeds from flowers, veggies, or herbs (e.g., tomatoes, marigolds, or basil). Aim for at least 1–2 teaspoons per packet.
- ● Seed packet papers: Option 1: Recycled paper (e.g., old book pages, junk mail, or seed packet remnants). Use 3x5-inch sheets (standard index card size).
- ● Option 2: Brown paper bags (e.g., from flour, coffee, or tea). Cut into 3x4-inch squares.
- ● Adhesive: Starch glue (flour + water paste) for eco-friendly sealing.
- ● Mod Podge or craft glue (if you prefer a stronger bond).
- ● Writing tools: Pencil, fine-tip marker, or waterproof ink pen (to prevent smudging).
- ● Scissors or a craft knife (for cutting paper/bags).
- ● Ruler (to measure and create neat folds).
- ○ Hole punch (optional, for adding twine or ribbon).
- ○ Twine, ribbon, or washi tape (optional, for decorative closures).
- ● Drying rack or paper towels (to air-dry seeds before packaging).
- ○ Label templates (optional): Print free templates online or sketch your own with: Seed name
- ● Year harvested
- ● Germination tips (e.g., "plant in spring")
- ● Dry seeds: Seeds must be completely dry (no moisture = no mold!). Spread them on paper towels for 2–3 days if needed.
- ● Clean workspace: A flat surface (table or tray) to fold and assemble packets.
- ● Patience: Let glue dry fully (5–10 minutes) before handling.
Step-by-step instructions for creating DIY seed packets
Here’s how to preserve your garden’s best seeds in stylish, reusable packets that’ll have you ready for next spring!
🌱 Step 1: Harvest and Dry Your Seeds Properly
Wait until seed pods mature fully on the plant—usually when they turn brown or papery and open naturally. For example, tomato seeds ripen when the fruit is fully colored, while pea pods should be dry and rattly. Snip the pods off with clean scissors and lay them on a paper towel in a single layer. Place them in a warm, dry spot (around 70°F) for 1-2 weeks until completely dry.
I tap the pods gently to release seeds, then spread them on the towel to avoid clumping. If you’re working with large seeds like beans or peas, you can skip the drying step—they’ll dry fast enough in the packet. The goal is to remove all moisture so seeds stay viable for years. If you see mold or musty smells, start over with fresh seeds.
📋 Step 2: Label and Organize Your Seed Collection
Grab a permanent marker and write the seed name, variety, and harvest year directly on a small scrap of paper or a seed-saving envelope. I like to add a quick note like “heirloom” or “disease-resistant” if relevant. For example, “Sunnyland Tomato – Heirloom – 2024” keeps track of everything. Place these labels inside your DIY packets so they stay with the seeds.
If you’re using kraft paper or envelopes, fold them in half and write the details on the outside too. This double-labeling prevents mix-ups when you’re ready to plant. Store seeds in a cool, dark place (like a glass jar in the pantry) until you’re ready to package them—this preserves freshness.
✂️ Step 3: Choose and Prepare Your DIY Packet Materials
Pick your packet style: kraft paper envelopes, small muslin bags, or even repurposed tea bags work beautifully. For envelopes, fold them into 3-inch squares and seal with a dab of flour paste (mix 1 part flour with 2 parts water) or a tiny bit of glue. If using muslin, tie a knot at the top and leave a small opening to add seeds later.
I love using 100% cotton or unbleached paper because it’s breathable and compostable. Avoid plastic—it traps moisture and can degrade seeds over time. For extra flair, add a pressed flower or a tiny sketch of the plant on the packet. This makes your seed collection feel like a garden heirloom!
🌿 Step 4: Fill and Seal Your Packets
Use a funnel or a rolled-up paper cone to pour seeds into your packets—this keeps them from spilling everywhere. For small seeds like lettuce or basil, I like to add a tiny piece of silica gel (the kind that comes in shoe boxes) to absorb any lingering moisture. Seal the packets tightly with a second dab of flour paste or a stitch of thread if using fabric.
Write the planting date on the outside of the packet too—this is a game-changer for next year! For example, “Plant after last frost” or “Direct sow in spring.” Store your finished packets in a cool, dry place (like a seed catalog box or a labeled jar). Avoid the fridge unless you’re storing for 5+ years—temperature fluctuations can damage seeds.
⏰ Step 5: Test and Store for Long-Term Viability
After 3-6 months, test a few seeds to check viability. Plant them in a small pot with moist soil and cover lightly. If they sprout within 1-2 weeks, your seeds are still good! If not, store the remaining seeds in an airtight container with a desiccant packet (like those in vitamin bottles) to keep moisture out.
I label my storage containers with the year and variety, then place them in a dark, cool pantry (around 50-60°F). Most seeds stay viable for 1-5 years, depending on the type. For example, tomato seeds last 4-6 years, while onion seeds may only keep for 1 year. This method keeps your garden sustainable and waste-free for seasons to come!
Tips & tricks for perfect DIY seed packets
These little tricks will transform your seed-saving into a sustainable, organized system that keeps your garden thriving year after year.
Drying Secrets: The 1-2 weeks of drying at 70°F is non-negotiable for most seeds, but here's my pro move: place a small fan nearby to create gentle airflow. This speeds up drying without risking seed damage. For large seeds like beans, I actually speed up the process by spreading them on a wire rack in a warm spot—no drying towel needed.
Labeling Hack: Instead of just writing on paper, I use tiny envelopes or even seed-saving cards that have pre-printed sections for variety, year, and planting instructions. This keeps your labels uniform and prevents smudging over time. Store these labels inside your packets so they stay with the seeds forever.
Material Matters: For extra protection, I line my kraft paper envelopes with wax paper before adding seeds. This creates a moisture barrier while keeping everything breathable. If using muslin bags, I double them up for added durability—especially for delicate seeds like lettuce or basil.
Long-Term Storage: The 50-60°F pantry storage is ideal, but here's what I do differently: I add a tiny silica gel packet to each storage container (not just the packets). This keeps the entire collection dry and prevents any potential moisture issues from spreading between seed types.
Pro Tips for Diy Seed Packets
- These little tricks will transform your seed-saving into a sustainable, organized system that keeps your garden thriv...
- Drying Secrets: The 1-2 weeks of drying at 70°F is non-negotiable for most seeds, but here's my pro move: place a sma...
- Labeling Hack: Instead of just writing on paper, I use tiny envelopes or even seed-saving cards that have pre-printed...
Frequently asked questions
Got questions about saving your own seed packets?
You’re not alone! Here are answers to the most common queries—so you can garden smarter, waste less, and prep for next season with confidence.
How do I know which seeds are worth saving?
Not all seeds are created equal! Save seeds from open-pollinated or heirloom varieties (avoid hybrids like F1 plants—they won’t grow true). Focus on large, healthy seeds from strong plants, like tomatoes, beans, or peppers. Skip saving from store-bought veggies (they’re often hybridized).
When is the best time to harvest seeds?
Timing matters! Harvest seeds when the plant’s pods or flowers dry naturally but before they shatter or attract pests. For example:
- Tomatoes: Let them fully ripen, then scoop seeds from the gel.
- Peppers: Wait until they’re crispy-dry and brown.
- Beans: Dry pods until they rattle with seeds inside.
Store them in a cool, dark place for 1–2 weeks to finish drying.
Can I reuse old seed packets for DIY ones?
Clean and sanitize empty packets (wipe with rubbing alcohol) to reuse them. Label them clearly with the seed type, harvest year, and germination tips. For extra flair, add a handwritten tag with care instructions—like “Direct sow after last frost” or “Needs 6+ hours of sun.”
What if my saved seeds don’t grow?
Don’t panic! Low germination could mean:
- Seeds weren’t fully dry before storage.
- They’ve exceeded their shelf life (most last 1–5 years).
- Moisture or pests damaged them.
Test a few seeds in damp paper towels—if they sprout in 7–14 days, the rest are viable. If not, try a fresh batch or swap in store-bought seeds for that variety.
Are DIY seed packets truly zero-waste?
Almost! While the process cuts packaging waste, seeds themselves are biodegradable. For a fully circular approach, compost leftover seeds or use them as microgreens. Pair your DIY packets with reusable grow bags or cloth seed envelopes to minimize even further.
Wrapping up and next steps
Creating your own DIY seed packets is a rewarding way to reduce waste, save money, and ensure your garden thrives next season! With just a few simple materials and a little creativity, you’ve got the perfect zero-waste solution for preserving your favorite seeds.
Whether you’re a seasoned gardener or just starting out, this eco-friendly habit is easy to adopt—and it’s a gift that keeps on giving for years to come.
Ready to take the next step? Grab your saved seeds, gather your supplies, and start crafting today! Your future garden (and the planet) will thank you! 🌱✨