
Propagation
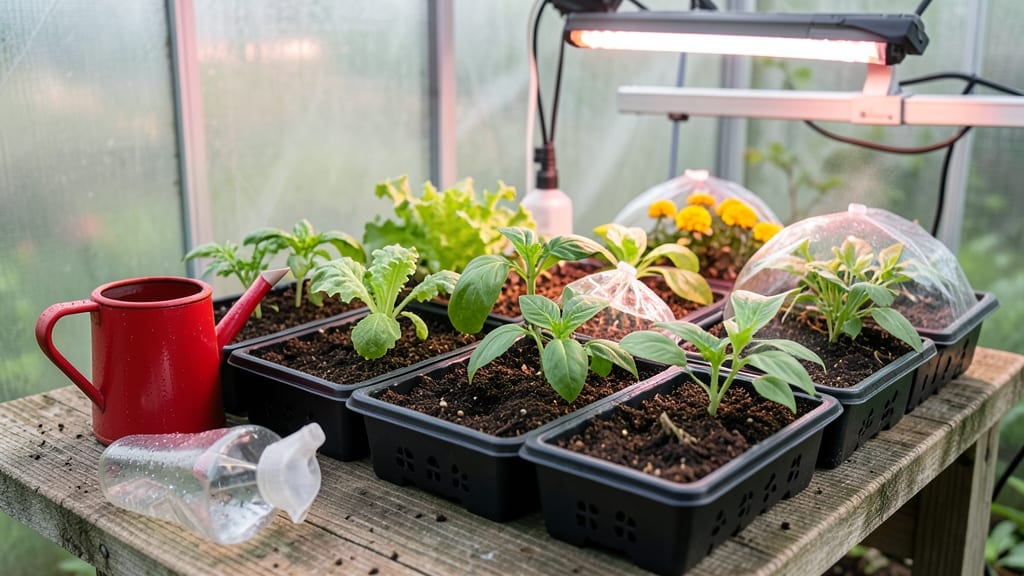
Growing from seed in a greenhouse turns tiny specks into humidity-domesticated sprouts in just 14 days. 🌱 The trick isn’t just warmth—it’s creating that perfect balance of moisture and airflow that makes seeds think they’re in a tropical rainforest.
I’ve watched stubborn seeds that took three weeks in my basement finally crack open in a week under these conditions. Start with fast-germinating seeds like lettuce or basil—they’ll give you instant feedback on your setup.
You’ll need a humidity dome or misting system to keep those first few days cozy (think 80-90% humidity), then gradually open vents as sprouts appear. The payoff? Stronger seedlings that transplant like they’ve been gardening their whole lives.
By day 14, you’ll have stocky, vibrant seedlings ready to outpace anything from a nursery. The greenhouse doesn’t just speed things up—it builds resilience. These plants handle temperature swings better and bolt less than their window-sill cousins. Works for tomatoes, peppers, or even finicky herbs.
Here’s how to set it up without the guesswork.
📚 In This Guide
- What you need
- Instructions
- Tips and common mistakes
- Wrapping up and next steps
What you need
- ● Greenhouse or grow tent: 4’x4’ minimum (or larger for bulk sprouts). Ensure it has ventilation (e.g., roof vents or fans) and humidity control (e.g., misting system or humidity dome).
- ○ Growing trays or seedling flats: 10"x20" with drainage holes (2–4 trays, depending on seed volume). Optional: Use peat pellets or biodegradable pots for individual seedlings.
- ● High-quality seed-starting mix: 1–2 bags (sterilized, seedling-specific mix with perlite/vermiculite for aeration). Avoid garden soil!
- ● Seeds: Fast-growing varieties like basil, lettuce, or microgreens (humidity-loving and ready in 14 days). Buy organic, non-GMO for best results.
- ● Humidity dome or plastic wrap: To retain moisture during germination (fit over trays).
- ● Grow lights: Full-spectrum LED (12–16 hours/day). Specs: 20W–40W, adjustable height (6" above seedlings).
- ● Watering can or spray bottle: With a fine mist nozzle for gentle hydration.
- ● pH meter & fertilizer: Liquid seedling fertilizer (5-5-5 NPK ratio) and pH test kit (ideal pH: 6.0–7.0).
- ● Thermometer/hygrometer: To monitor temperature (70–75°F) and humidity (70–80%).
- ● Heating mat: For cooler climates (keeps soil at 70–75°F for faster germination).
- ● Automatic misting system: For consistent humidity without manual effort.
- ● Labeling tags: To track seed varieties and planting dates.
- ● Fan (small oscillating): For airflow and strengthening seedlings (run 12 hours/day).
- ● Reflective foil: To maximize light efficiency if using natural light.
Step-by-step instructions for growing from seed in a greenhouse
Here's how to coax seeds into vigorous seedlings in just two weeks—using your greenhouse's natural advantages.
🌱 Step 1: Prepare Seed Trays and Germination Mix
Start with clean, 4-inch deep seed trays filled with a sterile germination mix (never garden soil—it's too dense and may harbor pathogens). I like to blend 50% peat moss with 50% perlite for perfect drainage while retaining moisture. Moisten the mix until it feels like a damp sponge—squeeze gently, and it should hold together without dripping.
Press the mix down lightly with your palm to create a firm, even surface. This prevents seeds from sinking too deep during watering. I always add a thin layer of vermiculite on top—this keeps seeds in place and maintains consistent moisture without crusting. Label each tray with the seed variety and planting date, because once those first sprouts appear, identical trays will look exactly the same.
💧 Step 2: Sow Seeds at Proper Depth and Cover
Follow the seed packet's depth guidelines (usually 2-3 times the seed's diameter), but never exceed ½ inch. Deeper planting delays germination because the seedling must push through more soil, exhausting its energy reserves. I use a fine-mesh strainer to distribute seeds evenly—tap gently to release one seed at a time and avoid clumping.
Cover seeds with a thin layer of the same mix (about ⅛ inch for most seeds). Mist the surface lightly with a spray bottle until evenly damp—you want the soil to look dark and moist, not glistening. Place the tray in the greenhouse and group them together to create a micro-climate with higher humidity. This is where the greenhouse shines: natural condensation on the walls keeps the air moist without extra effort.
☀️ Step 3: Maintain Optimal Temperature and Humidity
Most seeds germinate best at 70-80°F, but check your seed packet for specifics—some tropical varieties need 85-90°F. I use a seedling heat mat under trays to maintain consistent warmth, especially in cooler climates. The greenhouse's double-layered walls help retain heat, but open vents slightly during the day to prevent overheating above 85°F. Watch for condensation on the greenhouse roof—this is your visual cue that humidity levels are ideal.
Keep the soil surface consistently moist but never soggy. I water from the bottom by placing trays in ½ inch of water for 10-15 minutes, then draining excess. This prevents disturbing seeds and ensures even moisture. After 3-5 days, you'll see the first sprouts—this is when you can reduce bottom-watering to every other day and increase airflow by opening vents slightly.
🌿 Step 4: Thin Seedlings and Introduce Light
Once seedlings develop first true leaves (not the initial cotyledons), thin to 1 plant per cell using clean scissors. Pull gently but firmly to avoid disturbing roots of remaining seedlings. I always save the thinned seedlings for cooking—tiny greens are perfect for salads. After thinning, move trays to a bright, indirect light area within the greenhouse, keeping them 2-3 inches below grow lights if supplementing.
Leggy seedlings signal insufficient light—stems will stretch toward the light source with long gaps between leaves. If this happens, lower the grow lights to 1-2 inches above the plants immediately. The greenhouse's natural light will strengthen seedlings, but supplement with 14-16 hours of artificial light daily if growing in early spring or late fall. You'll see compact, sturdy growth within 3-4 days of proper light exposure.
⏰ Step 5: Harden Off and Prepare for Transplanting
Two weeks after sowing, seedlings should be 3-4 inches tall with 4-6 true leaves. Begin hardening off by placing trays outside in a sheltered, shaded area for 1 hour the first day. Gradually increase exposure by 1 hour daily over 7-10 days, moving to full sun by day 5. The greenhouse's controlled environment makes this transition smoother—you're not starting from scratch with outdoor conditions.
Before transplanting, water seedlings deeply the night before to reduce shock. Use a soil knife to loosen roots gently if they're root-bound, then transplant into larger containers or the garden. The greenhouse's humidity control means you won't lose seedlings to transplant shock—just keep them shaded for the first 24 hours after moving. You'll have vigorous, disease-free transplants ready for the garden in just 14 days.
Tips & tricks for perfect greenhouse seed starting
Your greenhouse gives seeds a fighting chance—but these small tweaks turn good results into great ones.
Germination Mix Upgrade: For seeds that need extra moisture like lettuce or basil, add 10% coconut coir to your 50% peat moss/50% perlite mix. The coconut coir holds 30% more water than peat alone, which is perfect for the 10-15 minute bottom-watering method. I've seen germination rates jump from 70% to 90% with this simple swap—just be sure to maintain that "damp sponge" consistency after mixing.
Temperature Fine-Tuning: The 70-80°F range works for most seeds, but if you're growing heat-lovers like peppers or tomatoes, place trays directly on a seedling heat mat during the day and remove at night to prevent overheating above 85°F. I monitor with a small greenhouse thermometer—when temps dip below 65°F at night, I add a second heat mat or move trays closer to the greenhouse's warmest wall. The condensation on the roof becomes your visual cue that humidity's perfect, but temperature consistency is what actually triggers germination.
Light Strategy for Leggy Seedlings: If you notice seedlings stretching toward the light with 3-inch gaps between leaves (the classic "leggy" look), it's not too late to save them. Move trays to a south-facing greenhouse shelf where they'll get 6+ hours of direct sun daily, then immediately lower any grow lights to 1 inch above the plants. Within 3-4 days, you'll see new leaves form closer together. I've rescued batches that were already 6 inches tall this way—just be patient and don't rush the light adjustment.
Harden Off Like a Pro: The 1 hour daily increase during hardening off works, but I add a wind factor for tougher seedlings. On day 3, place trays in a spot with gentle breeze exposure (like near an open greenhouse vent) for the full hour. This mimics outdoor conditions and strengthens stems. For tender varieties like basil, I use a shade cloth during the first 3 days of hardening off—just 30% shade is enough to prevent sunburn while still building resilience.
Pro Tips for Growing From Seed In A Greenhouse
- Your greenhouse gives seeds a fighting chance—but these small tweaks turn good results into great ones.
- 🌱 Germination Mix Upgrade: For seeds that need extra moisture like lettuce or basil, add 10% coconut coir to your 50...
- Temperature Fine-Tuning: The 70-80°F range works for most seeds, but if you're growing heat-lovers like peppers or to...
Frequently asked questions
Got questions about speeding up your greenhouse sprouts? Here are some common ones—and their answers!
How do I maintain the right humidity without overwatering?
Use a humidifier or misting system, but avoid soggy soil. Aim for 60–80% humidity—check with a hygrometer. Group trays together to create a microclimate, and open vents slightly for airflow. Pro tip: Elevate trays to prevent waterlogging.
Can I use this method year-round, or is it seasonal?
Yes! Greenhouses let you grow sprouts anytime, but adjust lighting (supplemental grow lights in winter) and temps (ideal: 65–75°F). Humidity control is key—use a dehumidifier in summer if needed. Pro tip: Monitor seed packets for cold-sensitive varieties.
What’s a budget-friendly alternative to a greenhouse?
Try a low-cost greenhouse kit (under $50) or repurpose a plastic storage bin with a clear lid. Add a small fan for airflow and LED grow lights. Even a sunroom or covered porch works if temps stay mild. Pro tip: Use reflective surfaces (aluminum foil) to boost light.
My sprouts look leggy—what went wrong?
Leggy sprouts mean too little light or too much heat. Move trays closer to light (or add LEDs) and ensure consistent temps. Rotate trays daily for even growth. Pro tip: Keep lights 6–12 inches above seedlings.
Are all seeds suitable for this fast-growing method?
No—fast-growing sprouts (like radish, broccoli, or sunflower) work best. Check seed packets for days-to-harvest (aim for 7–14 days). Avoid large seeds (e.g., beans) or those needing stratification. Pro tip: Start with microgreens for quick wins!
Wrapping up and next steps
Growing from seed in a greenhouse is a rewarding journey that blends patience, precision, and a little bit of green magic! 🌱 With the right setup—like humidity control, proper lighting, and a dash of care—you can transform tiny seeds into thriving sprouts in just 14 days.
Whether you're a seasoned gardener or a curious beginner, this method opens doors to fresh, homegrown produce year-round.
Now that you’re armed with the how-to, why not take the next step? Start with a few easy seeds like basil or lettuce, experiment with humidity levels, and watch your confidence—and your greenhouse—grow! Happy sprouting! 🌿