
Size
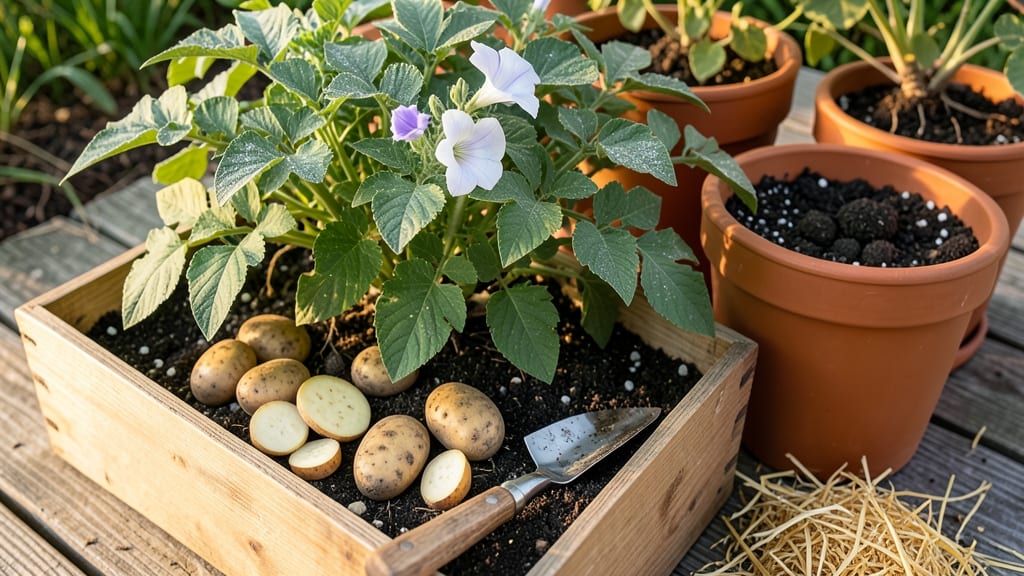
Growing seed potatoes in pots turns a small balcony into a harvest of crisp, homegrown spuds. 🌱 I’ve turned my patio into a potato patch using nothing but 5-gallon buckets and a sunny corner—no dirt, no fuss.
The secret is in the layers: chitting, the right soil mix, and keeping the pots snug for sturdy growth. By mid-summer, you’ll pull up a bucketful of potatoes instead of just one or two from a garden bed.
You only need three things: seed potatoes (certified disease-free), a 5-gallon container per plant, and a spot that gets 6+ hours of sun daily. No fancy soil—just a mix of potting soil and compost, topped with a 2-inch layer of straw to keep moisture steady.
The key? Planting them 4 inches deep, then adding more soil as the stems grow—this prevents rot while encouraging bigger tubers. Water when the top inch feels dry, and watch those vines climb like a jungle.
By week 10, you’ll see the foliage yellow and die back—that’s when the real magic happens. Gently empty the pot and sift through the soil for 5-10 potatoes per plant, ranging from tiny new potatoes to full-sized keepers.
The best part? No digging, no weeds, and no wasted space. Even if you’ve killed plants before, potatoes in pots are impossible to mess up—just follow the layers and the watering.
For urban gardeners or small spaces, this method is a game-changer. Double up pots for more harvest, or try growing two varieties in one container for a mix of flavors.
And if your greens flop? Just add more soil—potatoes are forgiving. Ready to turn your patio into a potato powerhouse? Let’s get planting!
📚 In This Guide
- What you need
- Instructions
- Tips and common mistakes
- Wrapping up and next steps
What you need
- ● Seed potatoes: 2–4 certified disease-free seed potatoes (like Yukon Gold, Red Pontiac, or Fingerlings) per pot. Choose small to medium-sized tubers with visible "eyes" (sprouts).
- ● Containers: 1–2 large pots (10–12 inches deep, 12+ inches wide) per seed potato. Use fabric grow bags, plastic pots, or wooden barrels with drainage holes.
- ● Potting mix: 2–3 bags of lightweight, well-draining soil mix (avoid garden soil—it compacts!). Look for a blend labeled for vegetables or potatoes.
- ● Drainage: Small rocks, gravel, or broken pottery pieces (1–2 inches deep) to prevent root rot.
- ● Watering can or hose: With a gentle spray nozzle for even moisture.
- ○ Fertilizer (optional but helpful): A balanced 10-10-10 or 5-10-10 granular fertilizer (follow package instructions for dosage).
- ● Gloves: To protect your hands from soil and sharp edges.
- ● Pruners or scissors: For cutting seed potatoes (if pre-sprouting).
- ● Twine or stakes: If your potato variety needs support (e.g., for tall stems).
- ● Mulch (straw or grass clippings): To retain moisture and regulate soil temperature.
- ○ pH tester (optional): To check soil acidity (ideal range: 5.0–6.5).
Step-by-Step instructions for growing seed potatoes in pots
Here's how to turn small seed potatoes into a bountiful harvest using just containers and a sunny spot.
🌱 Step 1: Chit Your Seed Potatoes Before Planting
Place your seed potatoes in a bright, cool spot—like a sunny windowsill—for 4-6 weeks before planting. You'll see sprouts (chits) emerge from the top. These little shoots are your early warning system for healthy growth. I always rotate the potatoes weekly so they sprout evenly.
Don't plant until you see at least 1-inch sprouts. If you plant too early, the potatoes may rot before sprouting. Keep them in a well-ventilated area—condensation can cause mold. A mesh bag with holes works perfectly.
🪴 Step 2: Choose and Prepare Your Containers
Use 5-gallon pots or containers at least 12 inches deep—one potato per container is best for even growth. Drainage holes are a must; no holes mean soggy roots and failed harvests. I like fabric grow bags because they let excess water escape while keeping roots aerated.
Fill the bottom 2 inches with gravel or broken pottery for drainage. Then add 4-6 inches of light, well-draining potting mix. Avoid garden soil—it compacts and suffocates roots. Mix in a handful of compost for nutrients, but don’t overdo it—too much can cause rot.
☀️ Step 3: Plant and Position for Maximum Sun
Place your chitted potato 2-3 inches deep, with the sprouts facing up. Cover lightly with soil—just enough to hold it in place. Water gently until the soil feels moist but not soggy. Too much water now will drown the sprouts before they take root.
Set your pots in a spot with full sun (6+ hours daily). A south-facing window or balcony works, but if you're using grow lights, keep them 4-6 inches above the plants and on for 12-14 hours daily. Leggy, pale stems mean your light isn’t strong enough—adjust immediately.
💧 Step 4: Feed and Maintain Through Growth
When the first green leaves appear (about 3-4 weeks), add 2 more inches of soil around the base, burying the stems up to the leaves. Repeat this every 2 weeks until the pot is full. This encourages more tuber formation underground. I use a balanced 10-10-10 fertilizer every 4 weeks to keep growth strong.
Water deeply when the top 2 inches of soil feel dry—never let the soil stay soggy. Overwatering is the #1 killer of container potatoes. A moisture meter helps, but your finger works too. Mulch the surface with straw or grass clippings to retain moisture and keep soil cool.
⏰ Step 5: Harvest When Foliage Yellows
Your potatoes are ready when the leaves turn yellow and die back (about 12 weeks). Gently dig around the edges of the pot with your hands or a small trowel. Avoid a fork—it pierces the tubers. Brush away excess soil to reveal your harvest.
Let the potatoes cure in a dark, dry place for 1-2 weeks before storing. This toughens their skins and prevents bruising. If you see any soft or moldy potatoes, use them first—they won’t keep long. Store the rest in a cool, dark spot (40-50°F) for up to 3 months.
Tips & tricks for growing seed potatoes in pots
A few simple tricks will help you avoid common pitfalls and maximize your container-grown potato harvest.
Chitting Check: In Step 1, when you're waiting for those 1-inch sprouts, place your potatoes on a mesh bag or paper towel to improve airflow. This prevents mold from forming on the sprouts and speeds up the chitting process. I’ve seen sprouts emerge in just 3 weeks when using this method instead of the full 4-6 weeks.
Container Depth Matters: For Step 2, if you’re using a container deeper than 12 inches, you can plant two potatoes—just space them at least 6 inches apart. The extra depth gives roots room to grow downward, which can actually increase your yield. Just be sure to monitor watering more carefully with two plants in one container.
Sunlight Strategy: When positioning your pots in Step 3, rotate them every few days to ensure even sunlight exposure. Plants will naturally lean toward the light, creating uneven growth. A simple turn every 2-3 days keeps your potato plants balanced and encourages uniform tuber development.
Harvesting Hack: In Step 5, when digging for your potatoes, gently shake the container first to loosen the soil. This makes it easier to brush away dirt and reduces the risk of damaging those tender tubers. I’ve found this method saves time and prevents bruising, especially with larger potatoes.
Pro Tips for Grow Seed Potatoes In Pots
- A few simple tricks will help you avoid common pitfalls and maximize your container-grown potato harvest.
- Chitting Check: In Step 1, when you're waiting for those 1-inch sprouts, place your potatoes on a mesh bag or paper t...
- Container Depth Matters: For Step 2, if you’re using a container deeper than 12 inches, you can plant two potatoes—ju...
Frequently asked questions
Got questions about growing seed potatoes in pots? You’re not alone! Here are some of the most common concerns—and their easy solutions—to help you grow like a pro.
Can I use any type of pot for seed potatoes?
Not all pots work equally well. Opt for containers at least 12 inches deep with drainage holes to prevent root rot. Fabric grow bags or plastic buckets with handles are great choices, but avoid shallow planters—they’ll restrict tuber growth. Pro tip: If your pot lacks drainage, add a layer of gravel or broken pottery at the bottom!
How long does it take to harvest potatoes from pots?
With seed potatoes, you can expect a harvest in 10–12 weeks for new potatoes (small, tender tubers) or 14–16 weeks for full-sized potatoes. Check for readiness by gently brushing soil away from the pot—if you see potatoes forming, it’s time to dig! Pro tip: For faster results, choose early-maturing varieties like ‘Yukon Gold’ or ‘Red Pontiac.’
What if my seed potatoes sprout but don’t produce tubers?
No tubers? Don’t panic! This usually happens due to lack of sunlight, poor soil, or overcrowding. Ensure your pot gets 6+ hours of sunlight daily, use a high-quality potting mix (no garden soil), and thin seedlings to 1–2 per pot. If stems grow tall but no potatoes form, try earthing up—pile soil around the stems to encourage tuber development.
Can I reuse last year’s potting soil for seed potatoes?
Reusing soil isn’t ideal because it can harbor diseases like blight or pests that target potatoes. Refresh your mix with 50% new potting soil and add compost for nutrients. If you’re short on soil, sterilize used soil by baking it at 200°F (93°C) for 30 minutes to kill pathogens. Pro tip: Rotate crops—don’t plant potatoes in the same pot two years in a row!
Are homegrown potatoes from seed potatoes safe to eat?
Seed potatoes are certified disease-free and safe for consumption. Just avoid using store-bought potatoes (like those from the grocery bag)—they’re treated to prevent sprouting and may carry diseases. Always wash harvested potatoes thoroughly before eating. Bonus: Homegrown potatoes are more flavorful and nutrient-dense than store-bought!
What’s the best way to store harvested potatoes?
Store potatoes in a cool (40–50°F), dark, and humid place (like a cardboard box with shredded newspaper) to prevent sprouting. Avoid refrigeration—it turns starches to sugar, making them taste sweet! For long-term storage, cure potatoes at 50–60°F for 1–2 weeks before storing to thicken their skins and improve flavor.
Wrapping up and next steps
Growing seed potatoes in pots is a rewarding way to enjoy fresh, homegrown spuds—even with limited space! With the right containers, chitting, and care, you’ll harvest delicious potatoes in just 12 weeks.
Start small, experiment with varieties, and don’t forget to harvest early for the tastiest results.
Ready to dig in? Plant your seed potatoes today and watch your container garden flourish! Once you’ve mastered this method, try growing other space-saving crops like radishes or green onions next.