
Lawn
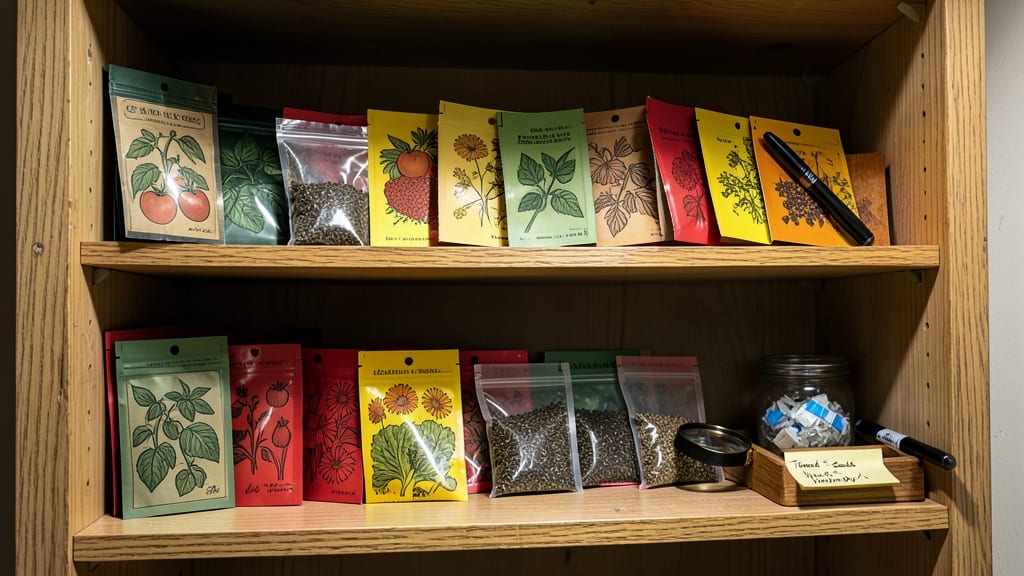
Proper seed packet storage means the difference between a 5-year seed and a dead one. ✨ I’ve thrown out more expired seeds than I’d like to admit—until I learned the simple tricks that keep them viable for years.
The key? Cool, dry conditions and the right packaging to block moisture and light.
You’ll need airtight containers (mason jars or vacuum-sealed bags work best), silica gel packets for extra moisture control, and a dark, cool spot like a basement or pantry.
Labeling with the variety and date is non-negotiable—trust me, you’ll forget in two years. Even a small leak or humidity spike can ruin a packet in weeks.
By following these steps, your seeds stay fresh for 5-10 years or longer, ready to grow into the same vibrant plants you bought them for. No more guessing if they’ll sprout or wasting money on new packets.
The best part? It takes less than 10 minutes to organize your entire collection properly.
This method works for heirlooms, vegetables, flowers, or herbs—just adjust the storage conditions slightly for tropical seeds. Let’s keep those seeds alive for planting seasons to come!
📚 In This Guide
- What you need
- Instructions
- Tips and common mistakes
- Wrapping up and next steps
What you need
- ● Air-tight containers: 3–5 (e.g., Mylar bags with zip locks, glass jars with rubber seals, or vacuum-sealed bags). Choose sizes to fit your seed packet quantities.
- ● Desiccant packs: 2–4 (silica gel or uncooked rice in breathable pouches to absorb moisture).
- ● Permanent markers or labels: 1–2 (for marking seed types, varieties, and storage dates).
- ○ Small plastic bags (optional): 5–10 (quart-sized, for grouping similar seeds before sealing).
- ● Cool, dark space: Ideal temp: 32–41°F (0–5°C) (e.g., fridge, basement, or root cellar). Avoid freezer temps!
- ● Humidity control: Aim for 30–50% humidity (desiccants help!).
- ● Stable conditions: No fluctuations in temp or moisture—consistency is key!
- ● Seed catalog or spreadsheet: Track varieties, purchase dates, and germination rates.
- ● Aluminum foil or mylar tape: For extra air-tight seals on containers.
- ● Humidity indicator cards: Monitor moisture levels in storage.
- ● Soft cloth or tissue paper: Wrap delicate seeds (like flowers) to prevent damage.
Step-by-Step guide to storing seed packets for maximum longevity
Here’s the foolproof method I use to keep seeds viable for years—no fancy equipment needed.
🪴 Step 1: Remove Seeds from Packets and Dry Thoroughly
Empty seeds into a clean, dry container and spread them in a single layer on a paper towel. Let them air-dry for 24-48 hours in a cool, dark place—a pantry or basement works well. You’re aiming for seeds that feel completely dry to the touch, with no moisture left on the surface.
I know it seems counterintuitive to open packets, but this prevents condensation buildup inside sealed bags, which can rot seeds over time. If your seeds feel even slightly damp after drying, repeat the process until they’re bone-dry.
☀️ Step 2: Choose the Right Storage Container
Use airtight, moisture-proof containers like glass jars with rubber seals, vacuum-sealed bags, or even repurposed spice jars. Label each container with the seed variety, purchase date, and germination rate—this saves headaches later. I like to add a small packet of silica gel (the kind that comes with electronics) to absorb any lingering moisture.
Never use plastic bags without sealing—they let moisture in over time. If you’re storing large quantities, divide seeds into smaller containers. This ensures even temperature distribution and prevents clumping.
💧 Step 3: Store in a Cool, Dark, Stable Environment
Keep seeds in a consistently cool spot—32-41°F is ideal, like a refrigerator’s crisper drawer or a basement. Avoid the main fridge body, as temperature fluctuations there can damage viability. If your space runs warmer, aim for the coolest possible spot—even 50-60°F works if it’s dry.
Darkness is critical—light accelerates seed degradation. If your storage space has windows, wrap containers in black paper or aluminum foil to block even indirect light. Check containers once a year to ensure no moisture has formed inside.
⏰ Step 4: Test Germination Periodically
Every 2-3 years, test a few seeds to check viability. Place 10 seeds on a damp paper towel in a sealed bag, then store them in a warm (70°F) spot for 7-14 days. Count how many sprout—if fewer than 80% germinate, it’s time to refresh your supply.
I mark germination rates on my labels so I can track decline over time. For example, if a packet says “90% germination (2022),” I’ll test again in 2025. This prevents wasted money on seeds that may not perform well.
🌱 Step 5: Handle Special Cases (Vegetables, Flowers, Heirlooms)
Some seeds need extra care. Vegetable seeds (like tomatoes or peppers) lose viability faster—store them in the coolest spot and test every 1-2 years. Heirloom or rare seeds benefit from freezer storage if you have long-term plans, but most home gardeners don’t need this.
For flower seeds, group them by family—many have similar storage needs. If you’re unsure, err on the side of cooler temps. I’ve kept marigold and zinnia seeds viable for 5+ years using this method, but lettuce and spinach seeds often last only 1-2 years even with perfect storage.
Tips & tricks for perfect seed packet storage
These little-known tricks will help you extend seed viability beyond what you'd expect.
Drying is Non-Negotiable: The 24-48 hour drying time in Step 1 is where most people fail. I've seen seeds mold after just 12 hours when left in humid conditions. Place your paper towel with seeds on a wire rack over a baking sheet to allow airflow underneath—this speeds drying without adding heat. If your kitchen is humid, consider using a small fan on low to circulate air. Remember, any moisture left will create the perfect environment for mold growth, especially in sealed containers.
Container Selection Matters More Than You Think: While glass jars are ideal, I've had great success with heavy-duty zip-top freezer bags for short-term storage (up to 2 years). The key is removing as much air as possible before sealing. For long-term storage, glass is better because plastic can degrade over time and let moisture through. If using jars, leave about 1/4 inch headspace—seeds expand slightly over time.
Temperature Stability is Everything: The 32-41°F range is critical, but what matters more is consistency. I've seen seeds stored at 50°F last perfectly fine when humidity was controlled, while seeds at 35°F with moisture issues failed. Use a small thermometer in your storage area to monitor temperature fluctuations. If your basement gets damp in summer, move seeds to the fridge's crisper drawer—it's more stable than most basements.
Labeling System That Actually Works: Don't just write the seed type—include the purchase date and your initial germination test results. I use colored dots on my labels: green for 90%+ germination, yellow for 70-89%, and red for below 70%. This visual system lets me spot potential problems at a glance. For rare seeds, add a second label with the variety's specific storage requirements—some tropical seeds need warmer storage than the standard cool, dark method.
Pro Tips for Seed Packet Storage
- These little-known tricks will help you extend seed viability beyond what you'd expect.
- Drying is Non-Negotiable: The 24-48 hour drying time in Step 1 is where most people fail. I've seen seeds mold after ...
- Container Selection Matters More Than You Think: While glass jars are ideal, I've had great success with heavy-duty z...
Frequently asked questions
about seed packet storage—because even the best-laid plans need a little troubleshooting! Here’s what you’ve been wondering:How long can seeds stay viable in a seed packet if stored properly?
Most seeds last 1–5 years in their original packets if kept cool (32–41°F) and dry. However, heirloom or rare seeds (like tomatoes or peppers) may stay viable for 5–10+ years with ideal storage. Always check the packet’s “best by” date—it’s a guideline, not a hard limit!
Can I store seed packets in the fridge or freezer instead of a seed vault?
A fridge (35–40°F) or freezer (0°F) works great for short-term storage (up to 2 years). For long-term (5+ years), use a cool, dark pantry (50–70°F) with a dehumidifier—just avoid moisture-prone spots like basements. Pro tip: Use airtight containers with silica gel packets to lock in freshness!
What do I do if my seed packet feels damp or moldy?
Damp seeds = viability loss. If you spot mold or condensation:
- Dry them fast: Spread seeds on a paper towel in a cool, dry spot (no heat!) for 1–3 days.
- Test viability: Plant a few—if <70% germinate, store the rest in the freezer for backup.
- Avoid: Microwaves or ovens (they kill seeds).
Prevent future issues by repackaging seeds in Mylar bags with oxygen absorbers!
Are there better alternatives to storing seeds in their original packets?
Original packets are fine for short-term use, but for long-term storage (3+ years), upgrade to:
- Mylar bags + oxygen absorbers (gold standard for 10–20+ years of viability).
- Glass jars with tight lids (add silica gel to absorb moisture).
- Vacuum-sealed bags (great for bulk seeds, but check for air leaks).
Label everything! Use a permanent marker on containers—seeds lose potency over time, and you’ll forget what’s what!
How do I know if old seeds are still good to plant?
Perform a “germination test”:
- Moisten a paper towel, place 10 seeds in a plastic bag, and seal.
- Keep in a warm (70°F) spot for 5–7 days.
- If 50%+ sprout, plant the rest! Below 50%? Try freezing them for a “reset” or save for microgreens.
Note: Some seeds (like onions) age better over time—don’t toss them just because they’re “old”!
Wrapping up and next steps
Storing your seed packets the right way isn’t just about keeping them safe—it’s about unlocking the full potential of your future gardens! 🌱 By prioritizing cool, dry conditions and airtight containers, you can preserve viability for years, ensuring your hard work pays off season after season.
Whether you’re a seasoned gardener or just starting, these simple steps will give you peace of mind and a head start on your next planting adventure.
Now that you’re armed with the cool, dry secrets, take the next step: audit your seed stash! Check expiration dates, organize packets by planting season, and label everything clearly. Happy growing—and may your seeds always sprout with vigor! 🌿