
Lawn
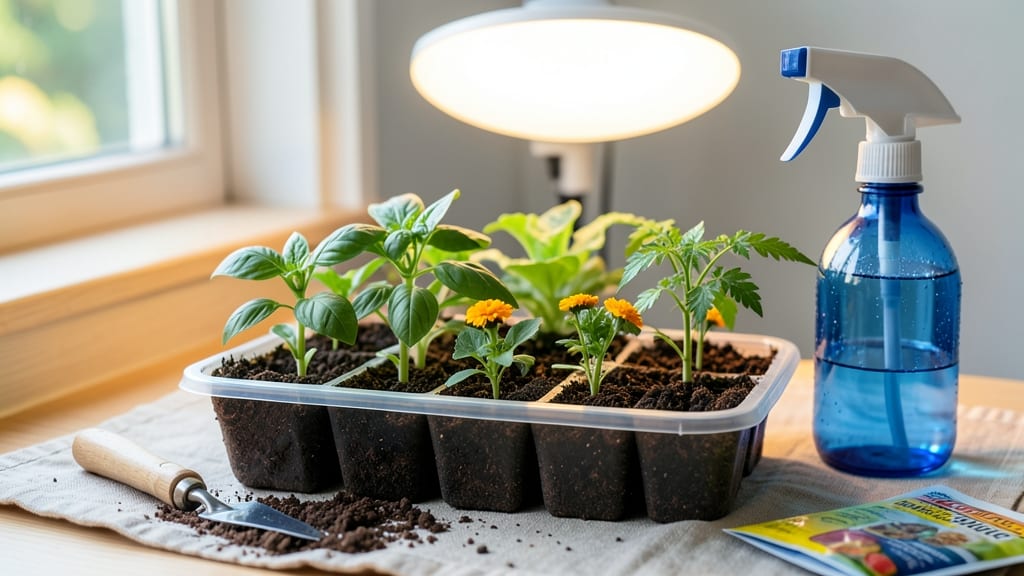
Seed starter kits cut germination time in half while keeping your space tidy. 🌱 I’ve tested dozens, and the right one turns a windowsill into a nursery—no greenhouse needed. The best kits create the perfect humidity and warmth, so seeds sprout faster and stronger than in open soil.
You’ll need just three things: the kit itself, seed-starting mix, and a sunny spot (or grow light). Most kits include domed lids to trap moisture, and they’re designed to fit under fluorescent bulbs if natural light is weak. Transplanting is easy too—just pop the whole block into the garden.
The payoff? Healthy seedlings in 7-10 days instead of weeks, with fewer leggy or weak plants. You’ll avoid the heartbreak of damping-off (that fuzzy mold that kills seedlings) and save money by growing from seed instead of buying transplants.
Whether you’re growing tomatoes, herbs, or flowers, starter kits work for almost any seed. For beginners, look for kits with clear instructions and built-in drainage—those are the game-changers.
📚 In This Guide
- What you need
- Instructions
- Tips and common mistakes
- Wrapping up and next steps
What you need
- ● Seed starter trays or pots: 1-2 trays (biodegradable or reusable) with individual cells (2-4" deep) or small pots (2-3" diameter). Pro tip: 💡 Opt for peat-free or compostable options for eco-friendliness!
- ● Seed starting mix: 1 bag (1-2 cubic feet) of lightweight, sterile potting soil (avoid garden soil—it’s too dense!). Look for labels like "seed starter" or "organic."
- ● Seeds: Your chosen variety (check seed packets for spacing requirements). Example: 50-100 seeds for a small tray.
- ● Watering can or spray bottle: With a fine mist nozzle to avoid disturbing seeds.
- ● Clear plastic dome or plastic wrap: 1 sheet (for humidity) or a dome lid (if using a starter tray).
- ● Grow lights or sunny windowsill: A full-spectrum LED grow light (12-16 hours/day) or a south-facing window (6+ hours of sunlight).
- ● Plant labels: Small sticks or biodegradable tags + a marker to track seed varieties.
- ○ Heating mat: 1 mat (optional but speeds up germination for cool-season crops like lettuce or peppers).
- ● Fertilizer: A balanced, water-soluble fertilizer (5-10-5 ratio) or organic options like fish emulsion (dilute to half-strength).
- ● Tweezers or small spoon: For gently placing tiny seeds (e.g., carrots or basil).
- ○ Fan: A small clip-on fan (optional) for airflow to prevent damping-off disease.
- ● Compost bin or reusable containers: For repurposing trays/pots after transplanting (zero-waste win!).
- ● Know your last frost date (check local gardening resources) to time seed starting correctly.
- ● Read seed packets for specific depth and spacing—some seeds need light to germinate (e.g., petunias)!
- ● Sanitize tools and trays with a 10% bleach solution (1 part bleach to 9 parts water) to prevent mold.
How to use seed starter kits for reliable germination
Skip the guesswork—these kits make starting seeds foolproof and eco-friendly.
🌱 Step 1: Assemble the Kit Components
Unpack your kit and lay out all parts: the biodegradable seed pods, moisture tray, and clear lid. These pods are pre-filled with sterile growing medium—no need to mix soil yourself. I always check the pods first for any cracks or tears, since damaged ones can dry out too fast or trap excess moisture.
Place the pods into the moisture tray, spacing them evenly. The tray’s built-in water reservoir will handle irrigation, so you won’t need to water from above. This is where it gets smart: the pods’ unique shape lets roots grow freely while keeping the medium evenly moist without drowning seedlings.
💧 Step 2: Add Seeds and Water
Follow the kit’s planting guide to place 1-2 seeds per pod at the recommended depth (usually ¼ inch for small seeds, ½ inch for larger ones). I tap the seed packet gently to release one seed at a time—planting too many in one pod leads to weak, crowded seedlings. If your kit includes a seedling marker, label each pod now.
Fill the moisture tray’s reservoir with room-temperature water until the water level reaches just below the pods. The tray’s wicking action will gradually hydrate the growing medium. Don’t overfill—water should never touch the pods directly. Within 30 minutes, the medium will look uniformly damp but not soggy.
☀️ Step 3: Cover and Position for Germination
Secure the clear lid over the tray to create a humidity dome. This traps warmth and moisture, which speeds up germination—often in just 5-7 days for fast growers like lettuce or basil. Place the tray in a warm spot (70-75°F) like on top of your fridge or near a sunny window.
Check daily for condensation on the lid. If it’s foggy, your humidity is perfect. If it’s dry, add a splash of water to the reservoir. Avoid lifting the lid too often—each time you do, you risk drying out the seeds. You’ll know germination is working when you see tiny green shoots breaking through the pod surface.
🌿 Step 4: Transition to Light and Air
Once 50% of seeds have sprouted, remove the lid permanently. This prevents damping-off disease, which thrives in damp, enclosed spaces. Move the tray to a bright location with 12-14 hours of light daily—a south-facing window or under a grow light works best.
Seedlings will need strong, direct light to prevent leggy growth. If they stretch toward the light with pale stems, your setup isn’t bright enough. I raise the grow light 2-3 inches higher as they grow to maintain the right distance. Water only when the top of the medium feels dry to the touch, usually every 2-3 days.
⏰ Step 5: Transplant Directly Into Soil
When seedlings have 2-3 true leaves (not just the initial seed leaves), they’re ready for the garden. The pods’ biodegradable material breaks down in soil, so you can plant them whole—no root disturbance. Dig holes slightly larger than the pods and press soil around them gently to secure.
Water deeply after transplanting to help the roots establish. The pods will dissolve over time, leaving your plants with no transplant shock. I always plant on a cloudy day to reduce stress on the seedlings. Within 7-10 days, you’ll see new growth as they adjust to their permanent home.
Tips & tricks for perfect seed starter kits
Real talk: These kits make seed starting foolproof, but a few small details can make all the difference between fast, healthy sprouts and frustrating delays.
Pod Inspection: Before planting, give your biodegradable seed pods a quick visual check for any tears or cracks. Damaged pods can dry out too fast or trap excess moisture—both kill seeds. If you find a compromised pod, simply replace it with a fresh one from your kit. This step saves you from wondering why some seeds aren't sprouting while others thrive.
Water Temperature Matters: Always use room-temperature water (around 70°F) when filling the moisture tray. Cold water can shock the seeds and slow germination, while warm water might encourage mold growth. I keep a pitcher of water at room temp ready before I start—it makes the whole process smoother. The 30-minute wait after watering ensures the medium is perfectly damp but not soggy, which is key for those first critical days.
Light Transition Strategy: When you remove the lid after 50% germination (Step 4), gradually introduce your seedlings to stronger light over 2-3 days. Start by propping the lid open slightly with a small stick or book. This slow transition prevents shock from sudden light exposure, which can cause seedlings to stretch or bleach out. I've seen seedlings go from healthy to leggy in hours when moved too quickly!
Pro Tips for Seed Starter Kits
- Real talk: These kits make seed starting foolproof, but a few small details can make all the difference between fast,...
- Pod Inspection: Before planting, give your biodegradable seed pods a quick visual check for any tears or cracks. Dama...
- Water Temperature Matters: Always use room-temperature water (around 70°F) when filling the moisture tray. Cold water...
Frequently asked questions
Got questions about seed starter kits?
You’re not alone! Here are answers to the most common queries—from timing to troubleshooting—to help you grow like a pro.
What’s the best time to start seeds with a kit?
Timing depends on your climate and seed type! For most veggies, start indoors 6–8 weeks before the last frost (check your USDA zone). Leafy greens and herbs germinate faster (try 3–4 weeks early), while root crops like carrots need 4–6 weeks. Kits often include germination timelines—follow those for foolproof results!
How long does it take for seeds to sprout in a starter kit?
Germination time varies by seed: fast growers (radishes, lettuce) sprout in 3–7 days, while slower ones (tomatoes, peppers) take 7–21 days. Keep soil moist (not soggy!) and warm (70–85°F). Most kits include a humidity dome—remove it once sprouts appear to prevent mold. Patience pays off!
Are seed starter kits worth it for beginners?
Kits eliminate guesswork with pre-measured soil, trays, and step-by-step guides. They’re perfect for beginners who want zero-waste, high-success rates without overcomplicating things. Plus, they’re reusable—just sanitize and refill. DIYers can save money by repurposing containers (egg cartons, toilet paper rolls), but kits save time and stress.
What if my seeds aren’t germinating? Troubleshooting tips!
Don’t panic—try these fixes:
- Check moisture: Soil should feel like a damp sponge. Use a spray bottle for gentle watering.
- Test temperature: Seeds need warmth (a heating mat helps). Avoid cold drafts.
- Verify depth: Tiny seeds (like basil) need just ¼-inch coverage; larger ones (beans) can go deeper.
- Freshness matters: Old seeds (over 1 year) may fail. Swap them out!
- Light exposure: Some seeds (like tomatoes) need light after sprouting.
Can I use seed starter kits for herbs or flowers too?
Yes! While kits are designed for veggies, they work great for herbs (basil, cilantro) and flowers (marigolds, sunflowers). Just adjust spacing—herbs need 2–3 inches apart, while flowers may require larger pots. Avoid kits labeled “veggie-only” for delicate plants like orchids, but for most annuals, they’re a game-changer!
Wrapping up and next steps
Seed starter kits are your gateway to a thriving, eco-friendly garden—no experience required! 🌱 Whether you're a green thumb or a curious beginner, these kits make growing easy, sustainable, and rewarding. With fast germination and zero-waste harvesting, you’re not just planting seeds; you’re cultivating a greener future.
Ready to take the next step? Start small—pick a kit that excites you, follow the simple steps, and watch your garden grow! Happy planting! 🌿